In Monster Hunter Wilds, there’s an incredible amount of versatility in character building, which significantly contributes to the game’s widespread popularity. With numerous unique playstyles for each weapon, coupled with a multitude of skill and armor effects, it’s almost impossible for players to experiment with every potential build combination.
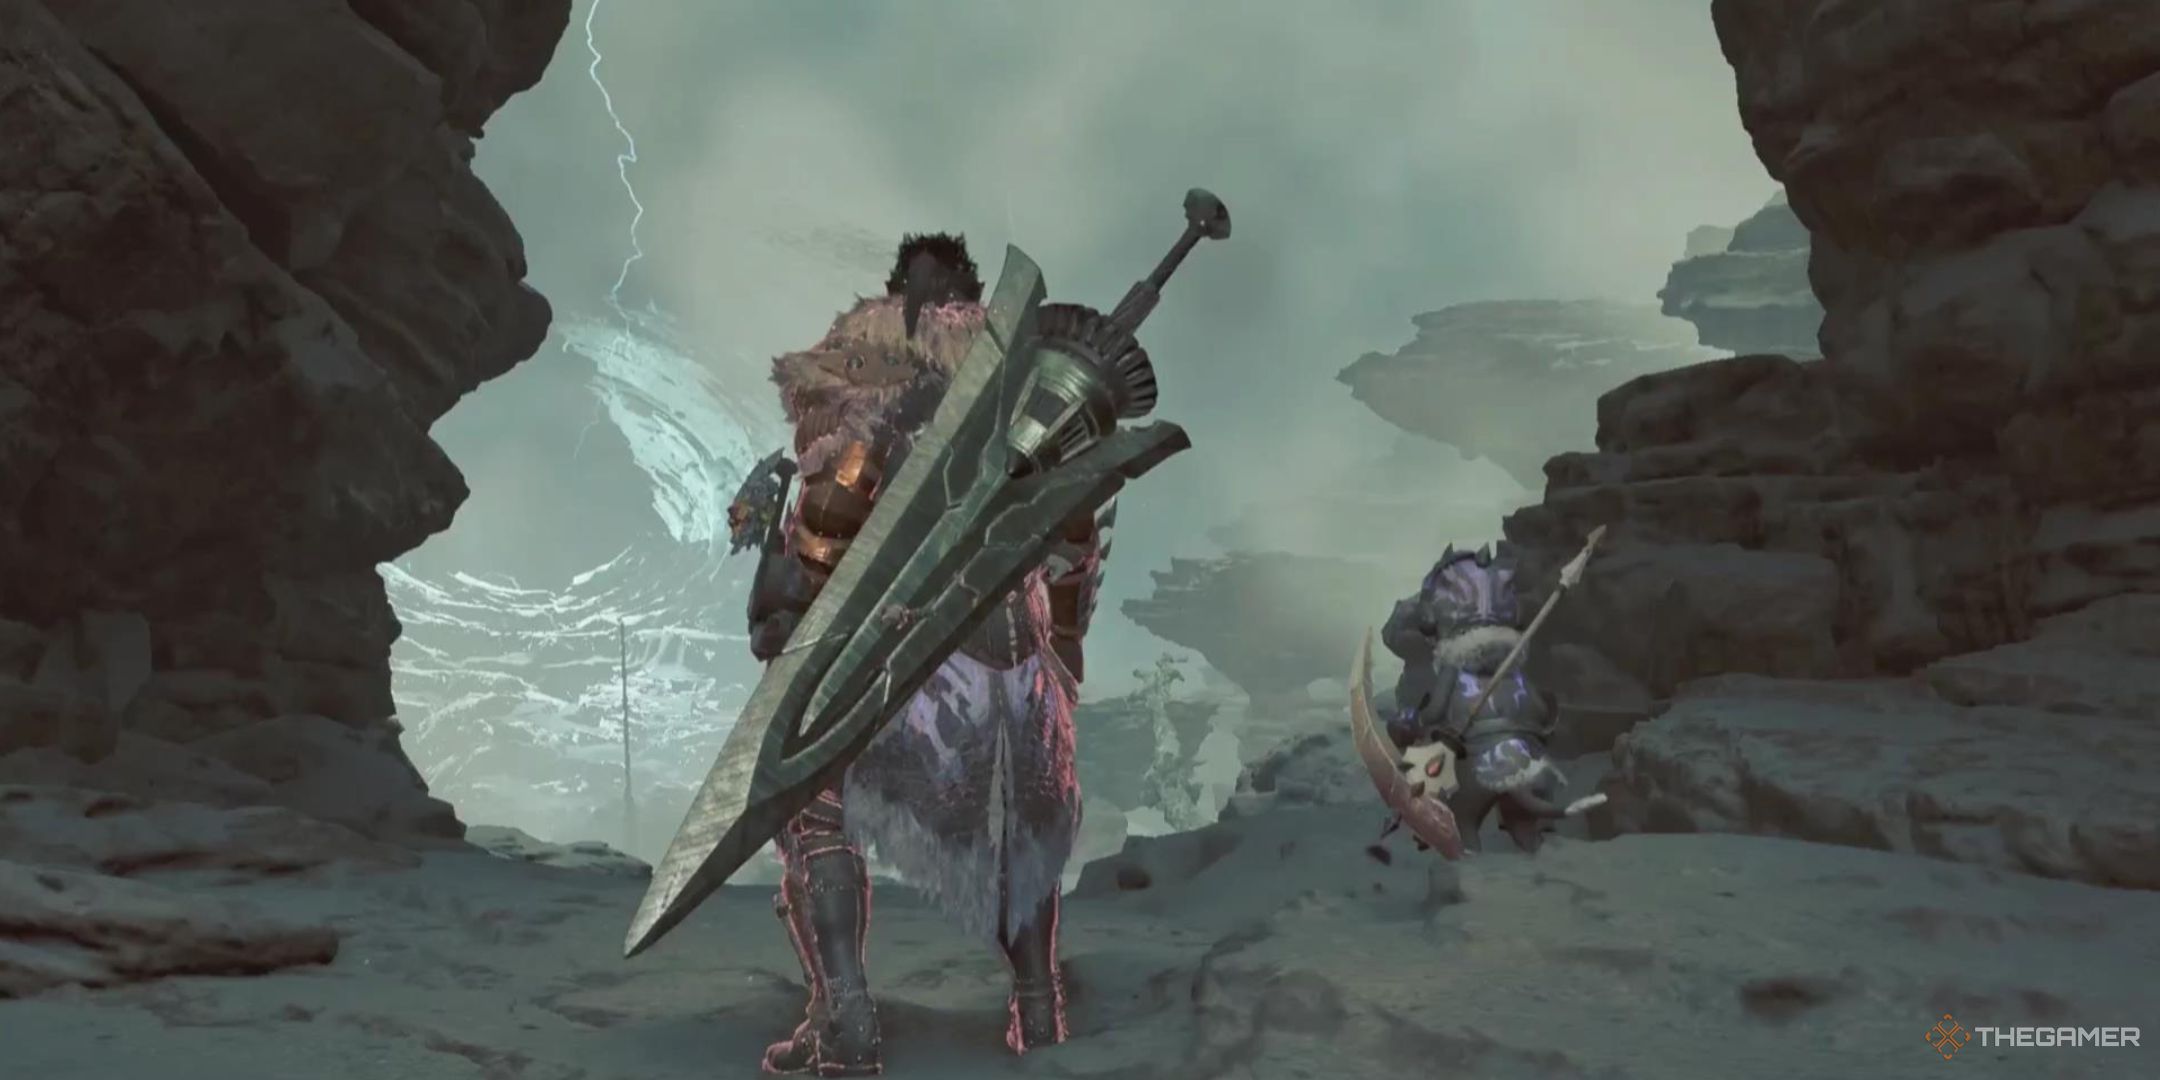
The Great Sword’s effectiveness largely depends on maximizing its damage per strike, given that it’s among the least frequent yet most powerful weapon strikes. This strategy is logical since you won’t be consistently landing blows as you would with Dual Blades.
In Monster Hunter World, the Great Sword build continues to evolve and improve, so it can’t be labeled as the ultimate build for all situations. However, it serves as an excellent base for further experimentation and development of different Great Sword builds.
Great Sword Build Overview
For this construction project, we’ll be venturing into high-risk, high-reward territory. This build will likely be one of the toughest playstyles, not just for the enemies you encounter, but for you as well. You’ll find yourself in precarious situations, but when you succeed, it’s going to be met with resounding cheers.
As a gamer, let me warn you upfront: This isn’t a build for beginners or those who haven’t fully grasped the game mechanics yet. A single misstep with this build could lead to defeat in a hunt, and you can only take so many defeats before you have to call it quits.
With a skilled hunter wielding it, this setup will likely become one of the most powerful per-strike damage builds in the game, guaranteeing that whatever creature you strike, it will undoubtedly notice the impact.
Great Sword Build Guide
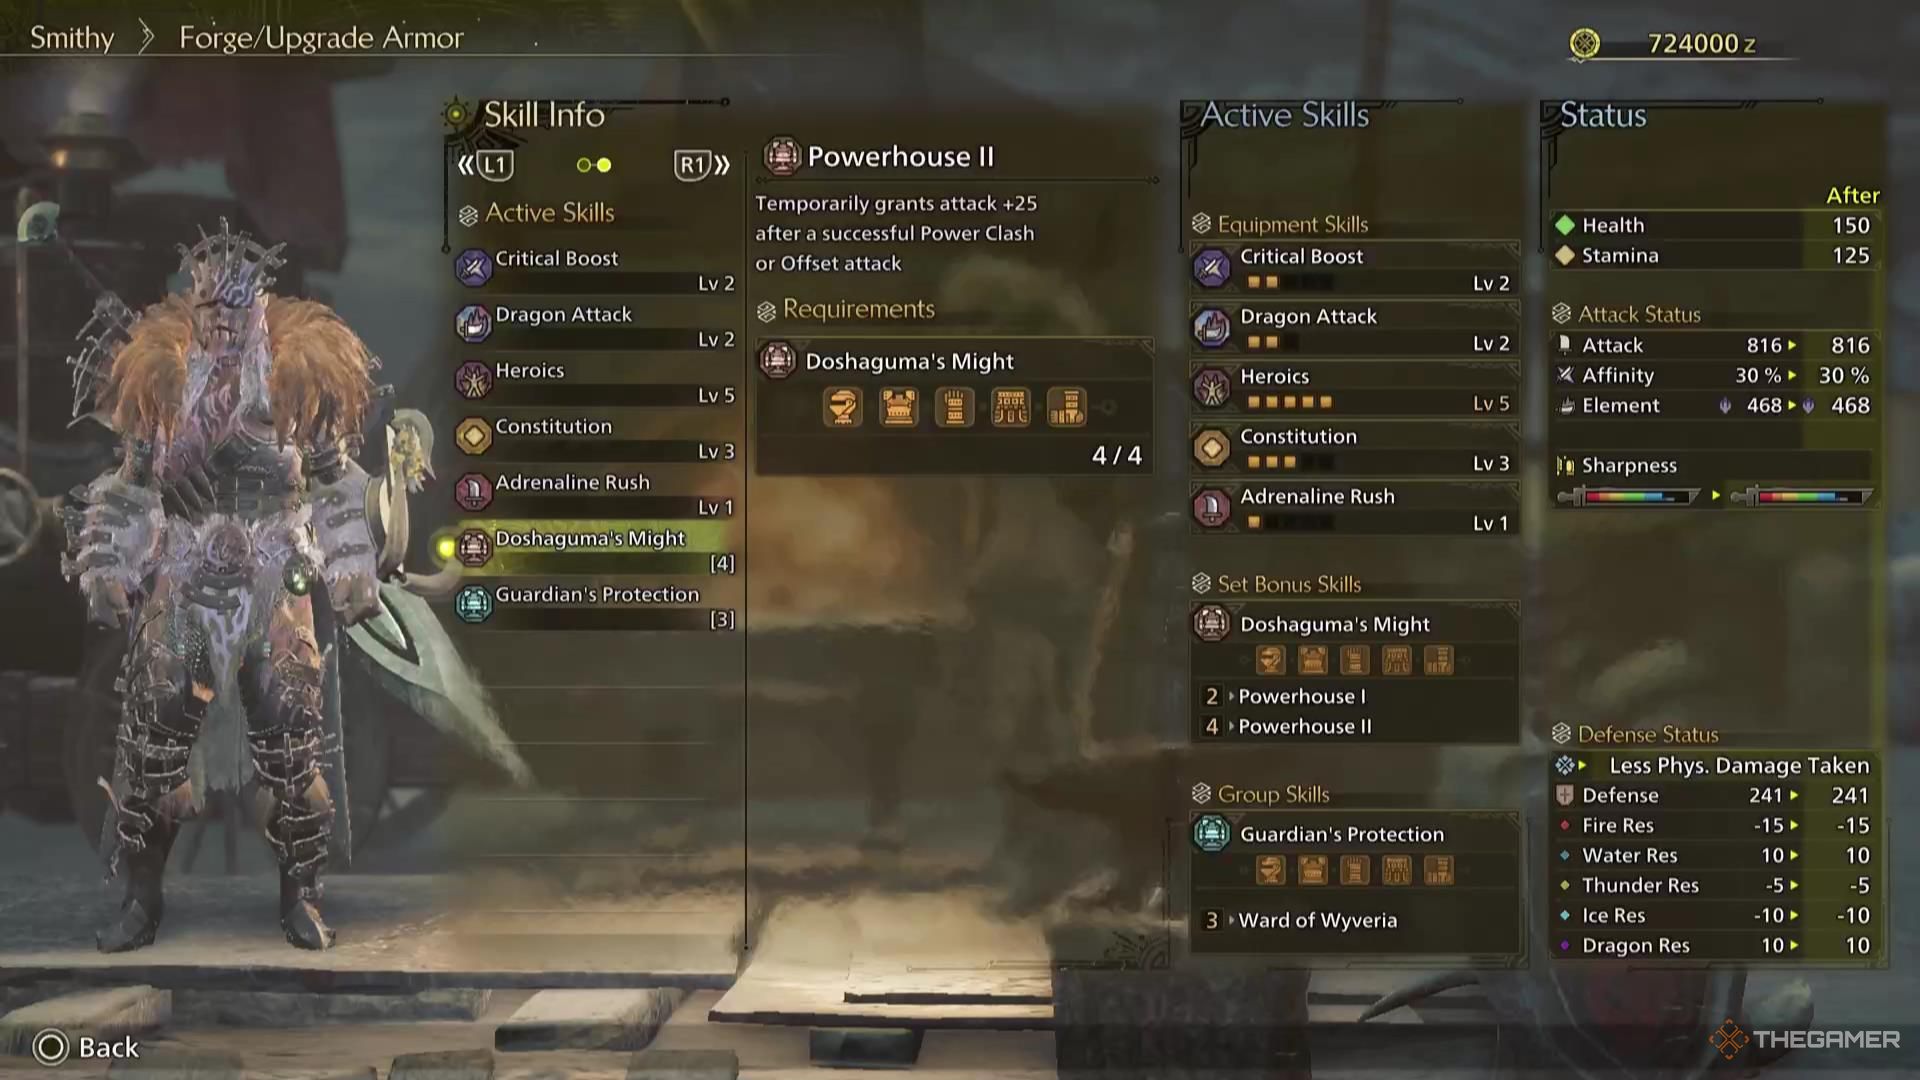
This strategy primarily focuses on maximizing the damage from your critical strikes and boosting your damage output in challenging situations where risk is high. The armor set we’ll be utilizing for this purpose is the ‘Guardian Doshaguma Set b’. To gain the optimum Bonus Skill, you’ll require four of these pieces, but it’s equally crucial to take advantage of the Heroic skill benefits they provide.
| Slot | Item | Effect | Decoration |
|---|---|---|---|
| Weapon | Artian Great Sword | Affinity Focus | Damaging Elemental Effect | Critical Jewel | Critical Jewel | Ironwall Jewel |
| Head | Guardian Doshaguma Helm b | Heroics I | Doshaguma’s Might I | Mighty Jewel | Refresh Jewel | Physique Jewel |
| Chest | Rey Sandmail a | Maximum Might II | Stamina Surge I | Physique Jewel | Physique Jewel |
| Hand | Guardian Doshaguma Braces b | Heroics I | Doshaguma’s Might I | Refresh Jewel | Destroyer Jewel | Physique Jewel |
| Waist | Guardian Doshaguma Coil b | Heroics II | Doshaguma’s Might I | Partbreaker | Defense Jewel |
| Legs | Guardian Doshaguma Greaves b | Constitution I | Heroics I | Doshaguma’s Might I | Partbreaker | Defense Jewel |
| Talisman | Defense Charm I | Defense Boost I |
As a gamer, I prefer the ‘b’ version of this setup because it offers additional customization options through its enhanced decoration slots. On the other hand, the ‘a’ version doesn’t seem to provide any beneficial skill effects for my specific build.
Skill Effects
This combination of gear and decorations is going to provide us with the following skill effects:
| Maximum Might III | This is going to increase our affinity by 30 percent when we’ve had a full stamina gauge for a short amount of time. This is going to be made easier by some of our decoration slots down below. |
|---|---|
| Powerhouse II | This is going to gain us a considerable attack boost after a successful power clash or landing an offset attack. The Great Sword is capable of both of these; while it might not come into effect often, the extra damage will be a nice bonus when it does. |
| Stamina Surge II | This is going to increase our stamina recovery speed by 30 percent, helping keep our stamina gauge full more often, and helping Maximum Might come into effect quicker. |
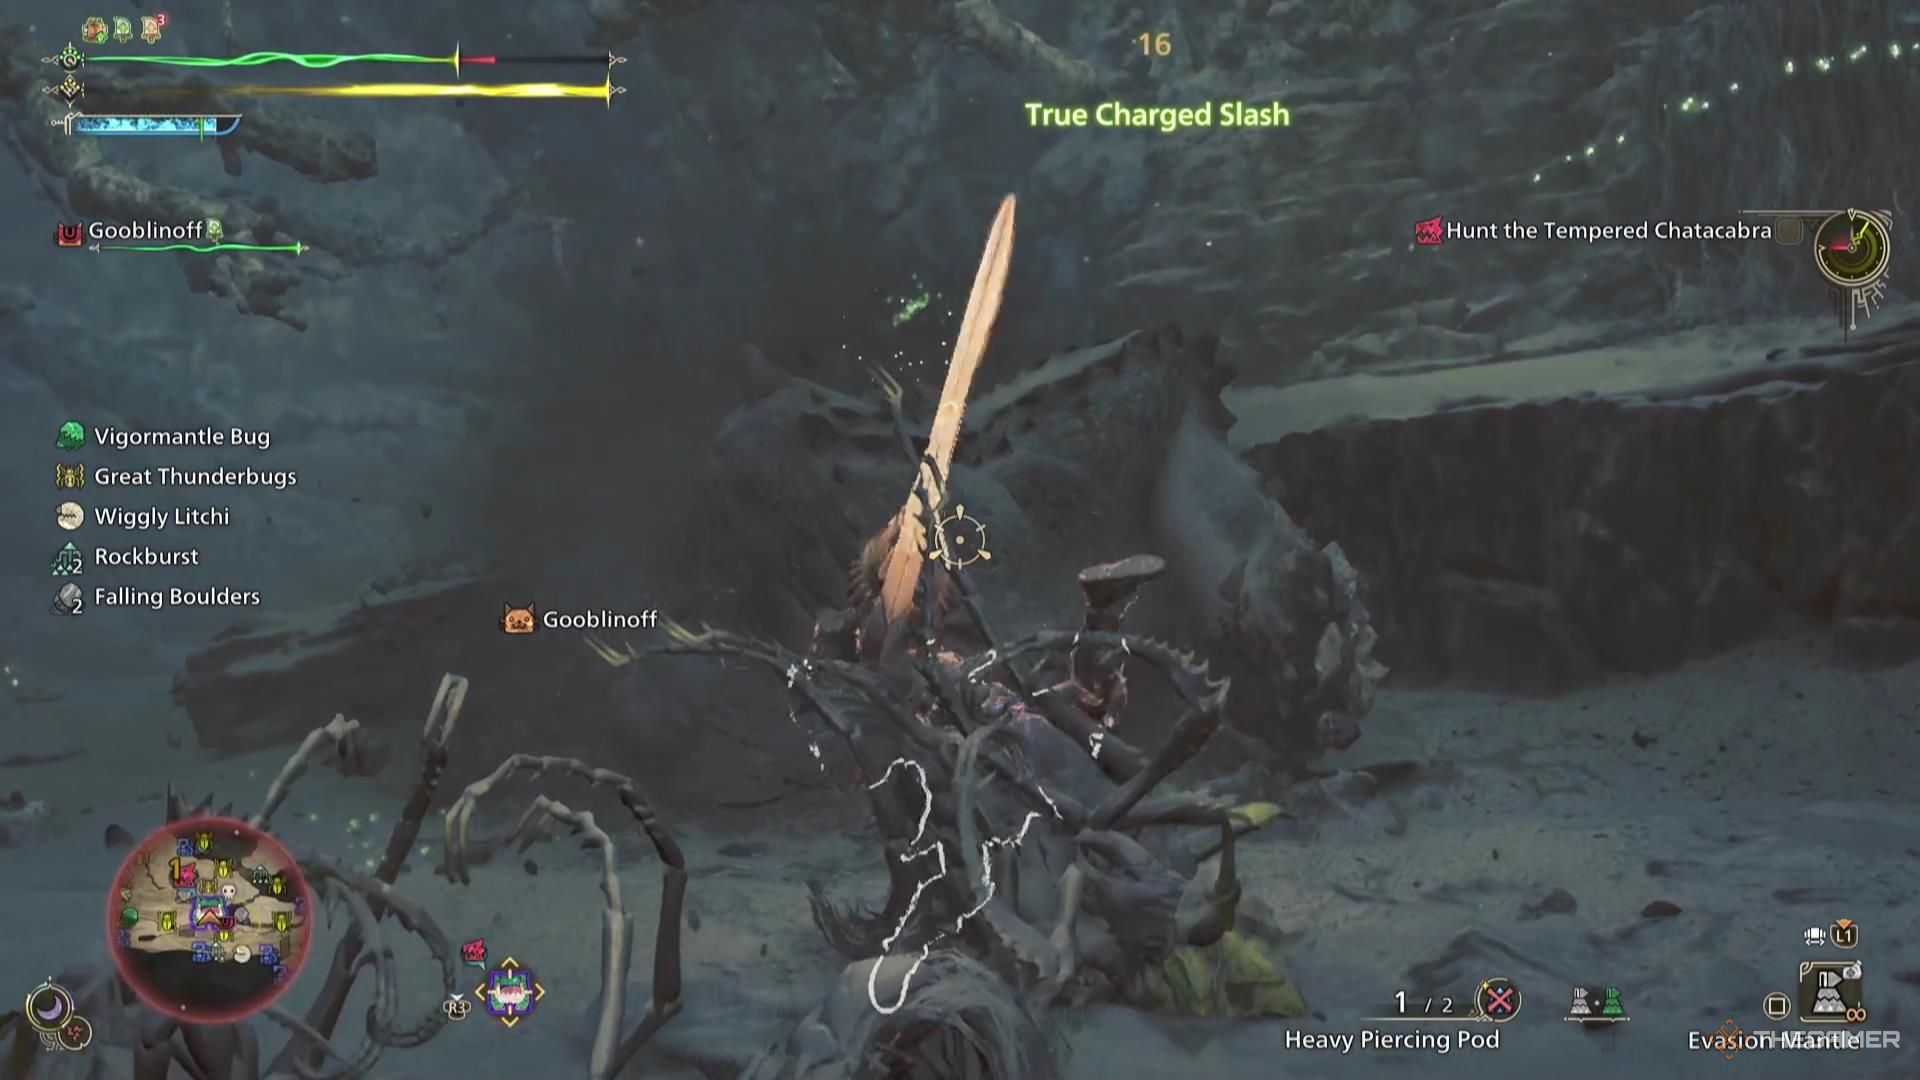
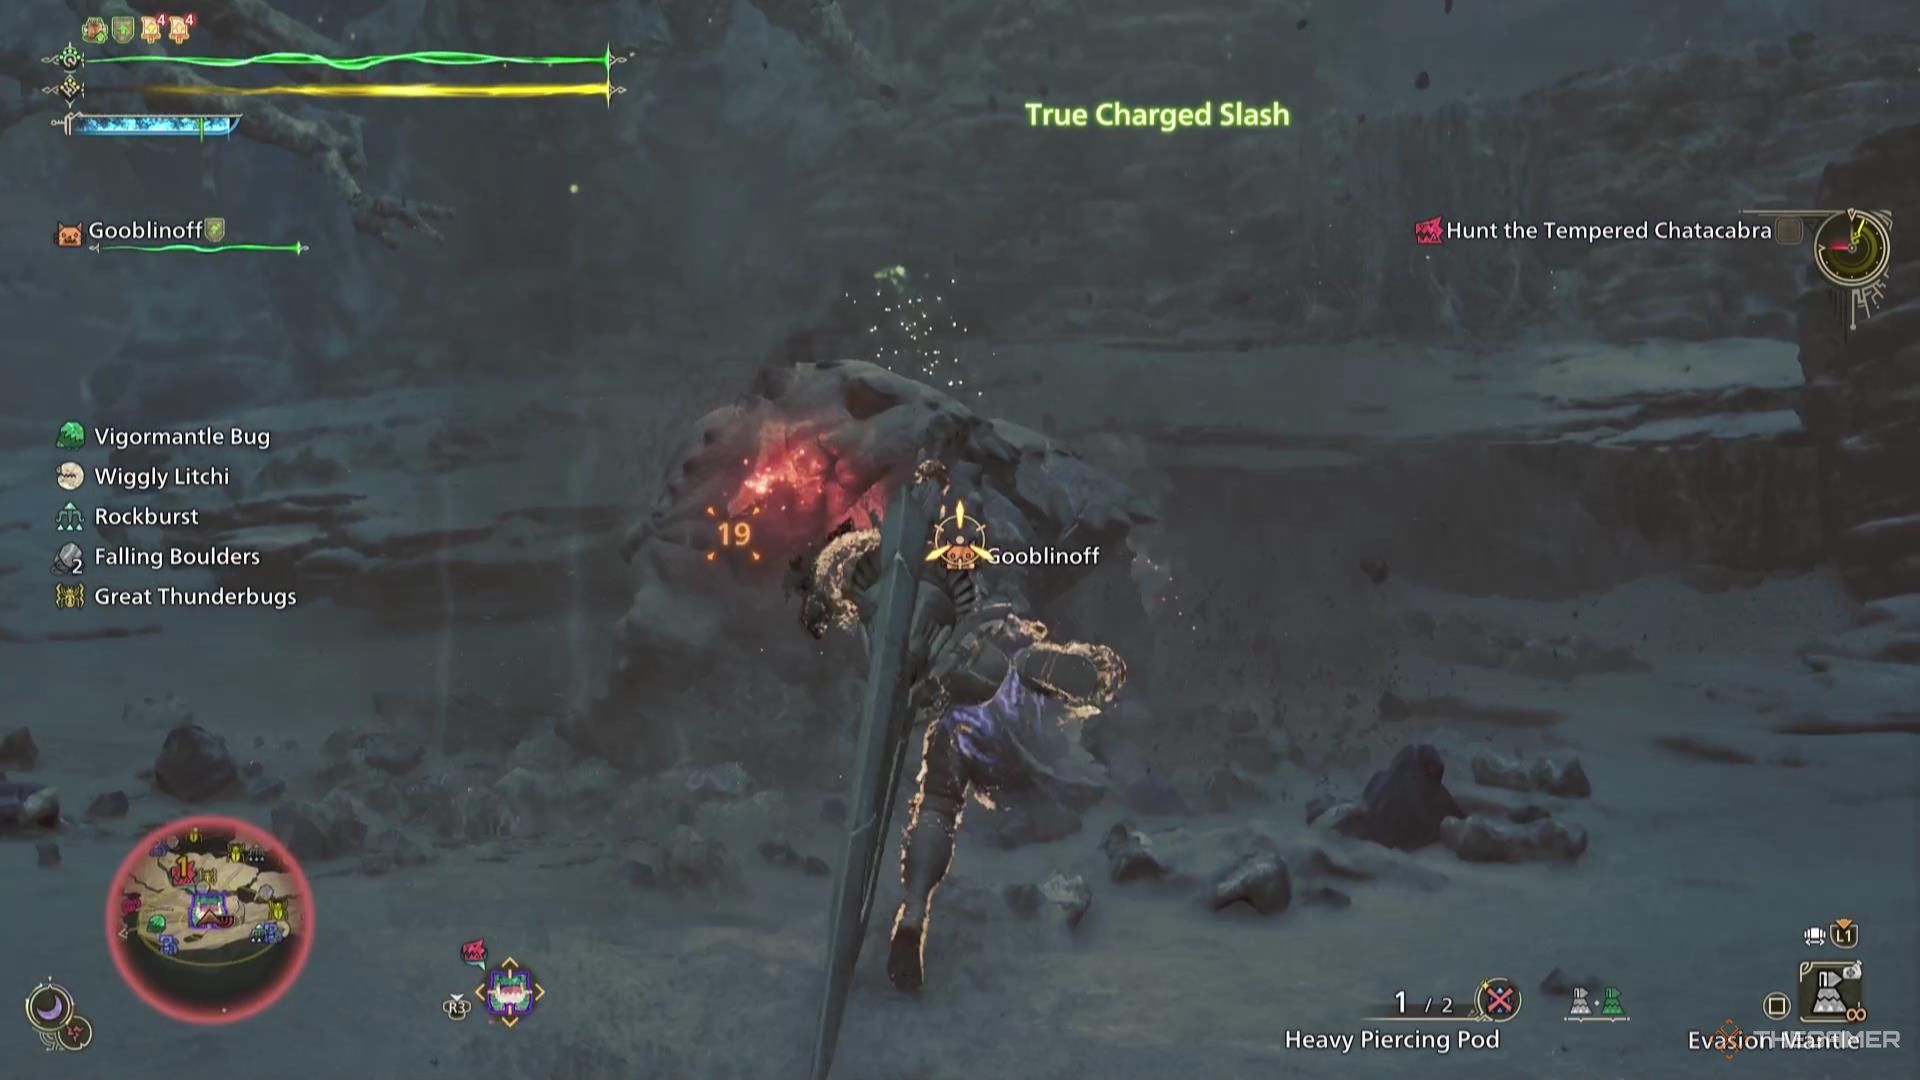
| Heroics V | This is one of the premiere skill effects for this build, amplifying our attack by 30 percent when our health is at 35 percent or lower. This is part of what’s going to amplify our damage so heavily, and what makes this build so high-risk. |
| Constitution V | This is going to reduce our stamina drain for actions by 50 percent, and combine with Stamina Surge to help keep our stamina gauge full more often, in order to make use of Maximum Might. |
| Partbreaker III | This is going to increase the damage that we deal to a monster’s wound, and increase the speed at which we break monster parts. |
| Defense Boost III | This is going to boost our defense by both a percentage and a flat increase. It’ll help keep us alive when we absorb a hit while already below 35 percent health, though certain hits are still going to finish us off. This could be replaced with a Divine Blessing, though in that case, you’ll be rolling the dice on damage avoidance. |
| Critical Boost II | This is going to increase the damage our critical hits deal by an extra percentage; combined with Maximum Might and Heroics, this is going to make for some incredible damage numbers. |
When we manage to maintain our health below 35% and consistently fill up our stamina for optimal use of Maximum Might, this build will inflict substantial damage. Partbreaker will help us break parts and cause wounds more frequently, while Focus Striking monsters will stagger them, providing chances for additional free damage.
Great Sword Choice
In our construction, we’ve opted for a Great Sword that emphasizes affinity and additional damage from elements, specifically Dragon Damage in particular. The key aspect here is the affinity bonus, which boosts our chances of landing critical hits. Moreover, when exploiting a monster’s weakness with the elemental effect, this weapon will perform exceptionally well.
How To Play This Great Sword Build
This build will be quite challenging to play and requires careful attention due to its high risk nature. We’ll likely find ourselves in precarious situations frequently, and a single mistake could lead to failure.
Once you find a flow using the Great Sword’s measured strikes and manage to stay outside the reach of enemy attacks, this weapon setup will truly shine.
As a fan, I’m thrilled about the boost in stamina we’re getting! It means I can dodge and defend more without worrying too much about my stamina draining as quickly. Plus, it fills up faster than ever before, allowing me to get back into the action right away!
As a fan, I’d be all about leveraging Maximum Might whenever possible, especially when maintaining pressure on a formidable foe. Pairing it with Heroics and Critical Boost seems like a no-brainer, and tossing in the occasional Powerhouse bonus just adds to the excitement. Frankly, I can’t help but wonder how astronomically high those damage numbers could climb!
Regarding your Palico, equipping them with either a sleep or paralysis effect will open up additional chances for you to launch daring, high-damage assaults without worry about the consequences.
Choosing the Evasion Mantle could prove quite beneficial as it assists with dodging attacks and increasing damage. It simplifies evading for us, providing a safety net for our low health, and amplifying the attack bonus we get when perfectly timing a dodge, thereby pushing our already impressive damage numbers even higher.
Read More
- Here Are All of Taylor Swift’s Albums in Order of Release Date (2025 Update)
- List of iOS 26 iPhones: Which iPhones Are Supported?
- Best Heavy Tanks in World of Tanks Blitz (2025)
- Death Stranding 2 smashes first game’s Metacritic score as one of 2025’s best games
- CNY RUB PREDICTION
- Vitality Triumphs Over The MongolZ To Win The BLAST.tv Austin Major 2025
- Delta Force Redeem Codes (January 2025)
- [FARM COSMETICS] Roblox Grow a Garden Codes (May 2025)
- Gold Rate Forecast
- Overwatch 2 Season 17 start date and time
2025-03-13 12:36