
In The Elder Scrolls 4: Oblivion Remastered, fixing the Orrery can be an extra task if you choose. This quest opens up the Orrery, a remarkable dwarven device that bestows enhanced abilities upon the Hero based on the moon’s phase. As soon as players step into the Arcane University’s Arch-Mage’s reception area, they encounter Bothiel, a Wood Elf character, who seeks to restore the Imperial Orrery.
You’ll find the Imperial Orrery’s door in the Arch-Mage’s reception area, but it stays locked. To get past this door and activate the Orrery, you must first fulfill Bothiel’s task and collect the necessary dwarven artifacts for the repair work.
How to Start Repairing the Orrery
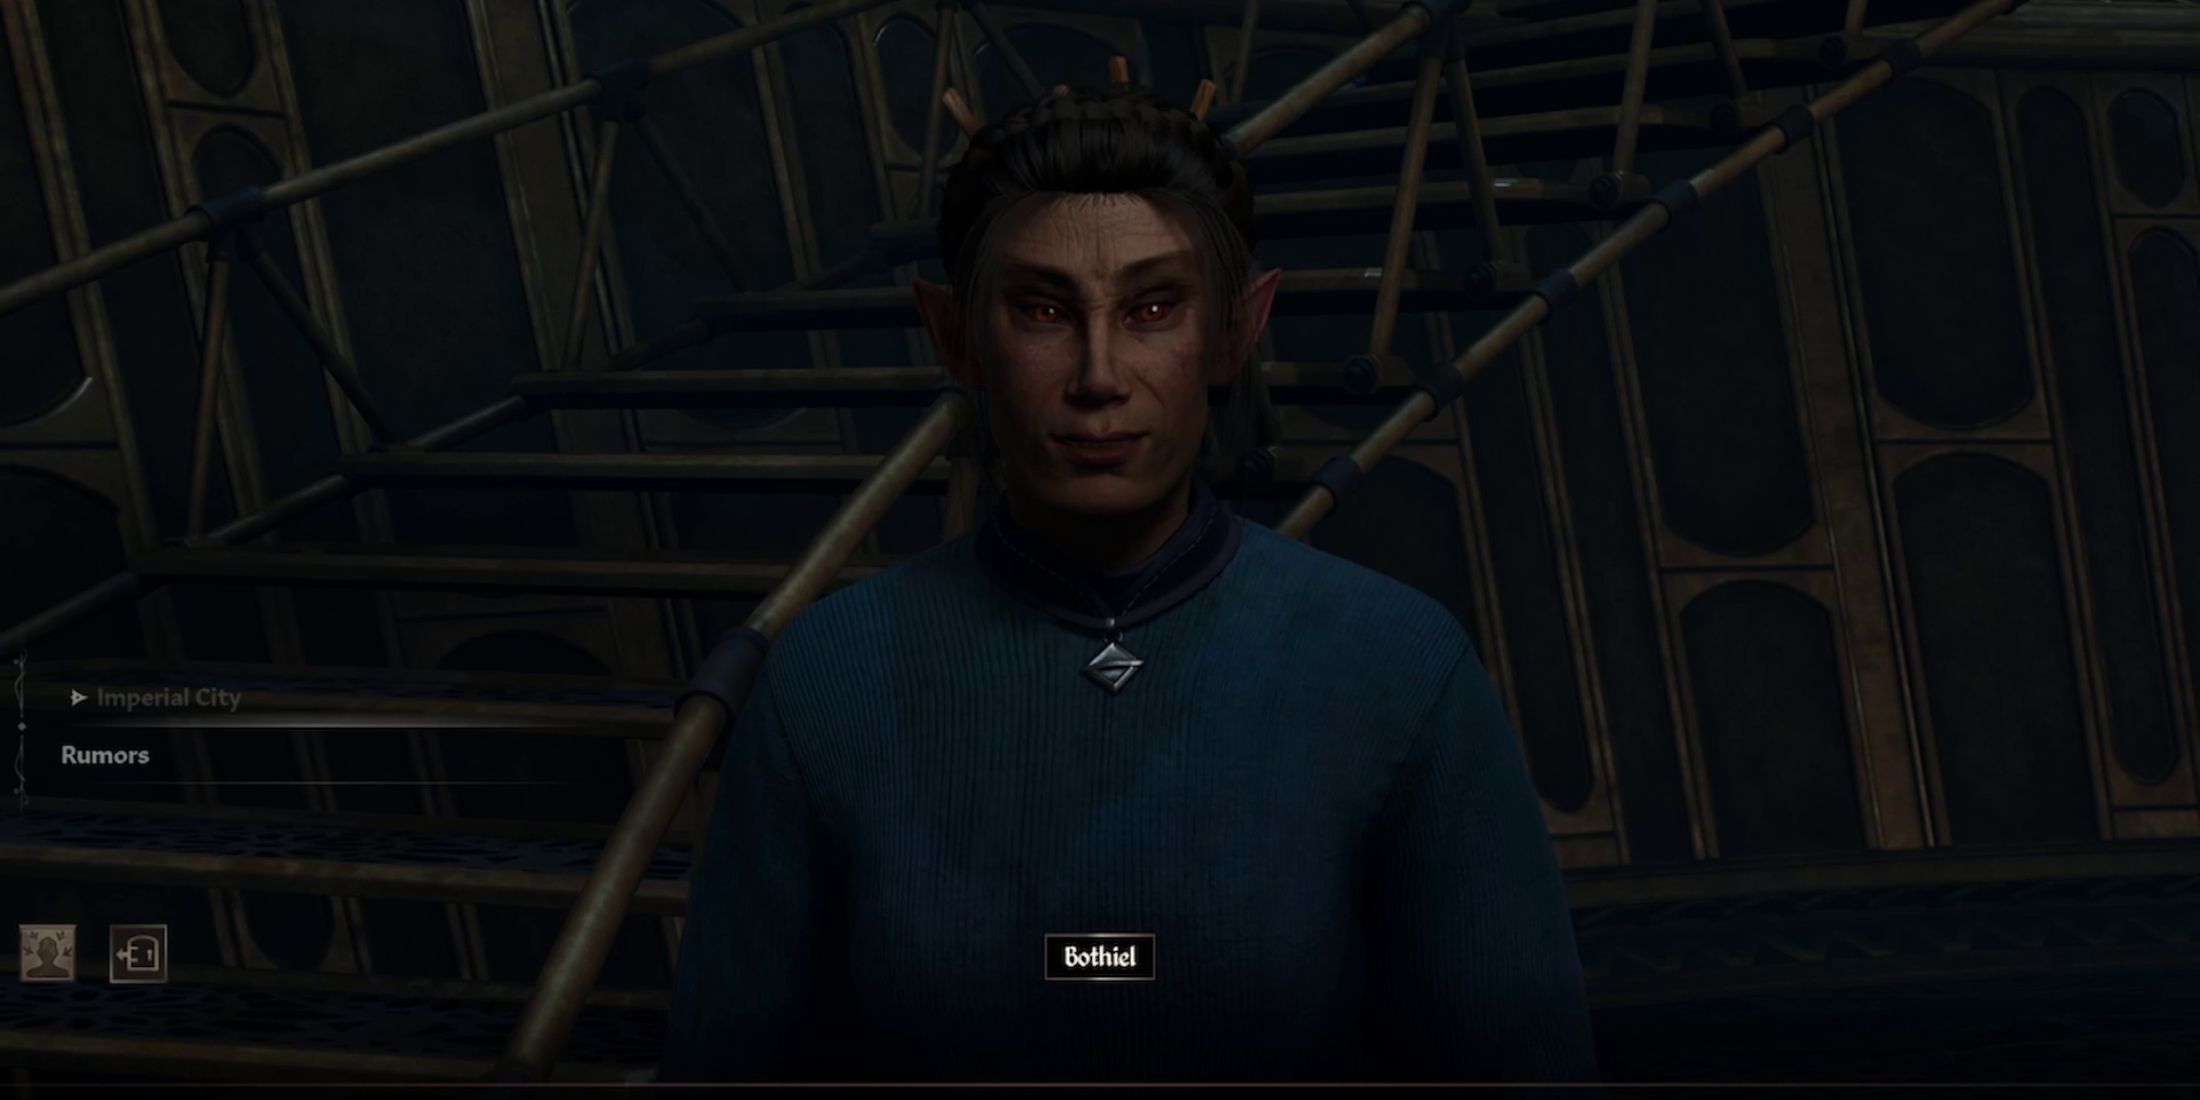
To begin with ‘Repairing the Orrery’, make your way to the ‘Arcane University’ situated in the Imperial City. Once inside, go to the Arch-Mage’s Lobby. There, you’ll find a Wood Elf mage named Bothiel. Speak to her and accept her request to collect dwarven materials necessary for repairing the Orrery. With this agreement, the quest commences.
You do not need to join the Mage’s Guild to undertake this quest.
Repairing the Orrery Walkthrough (Step-by-Step)
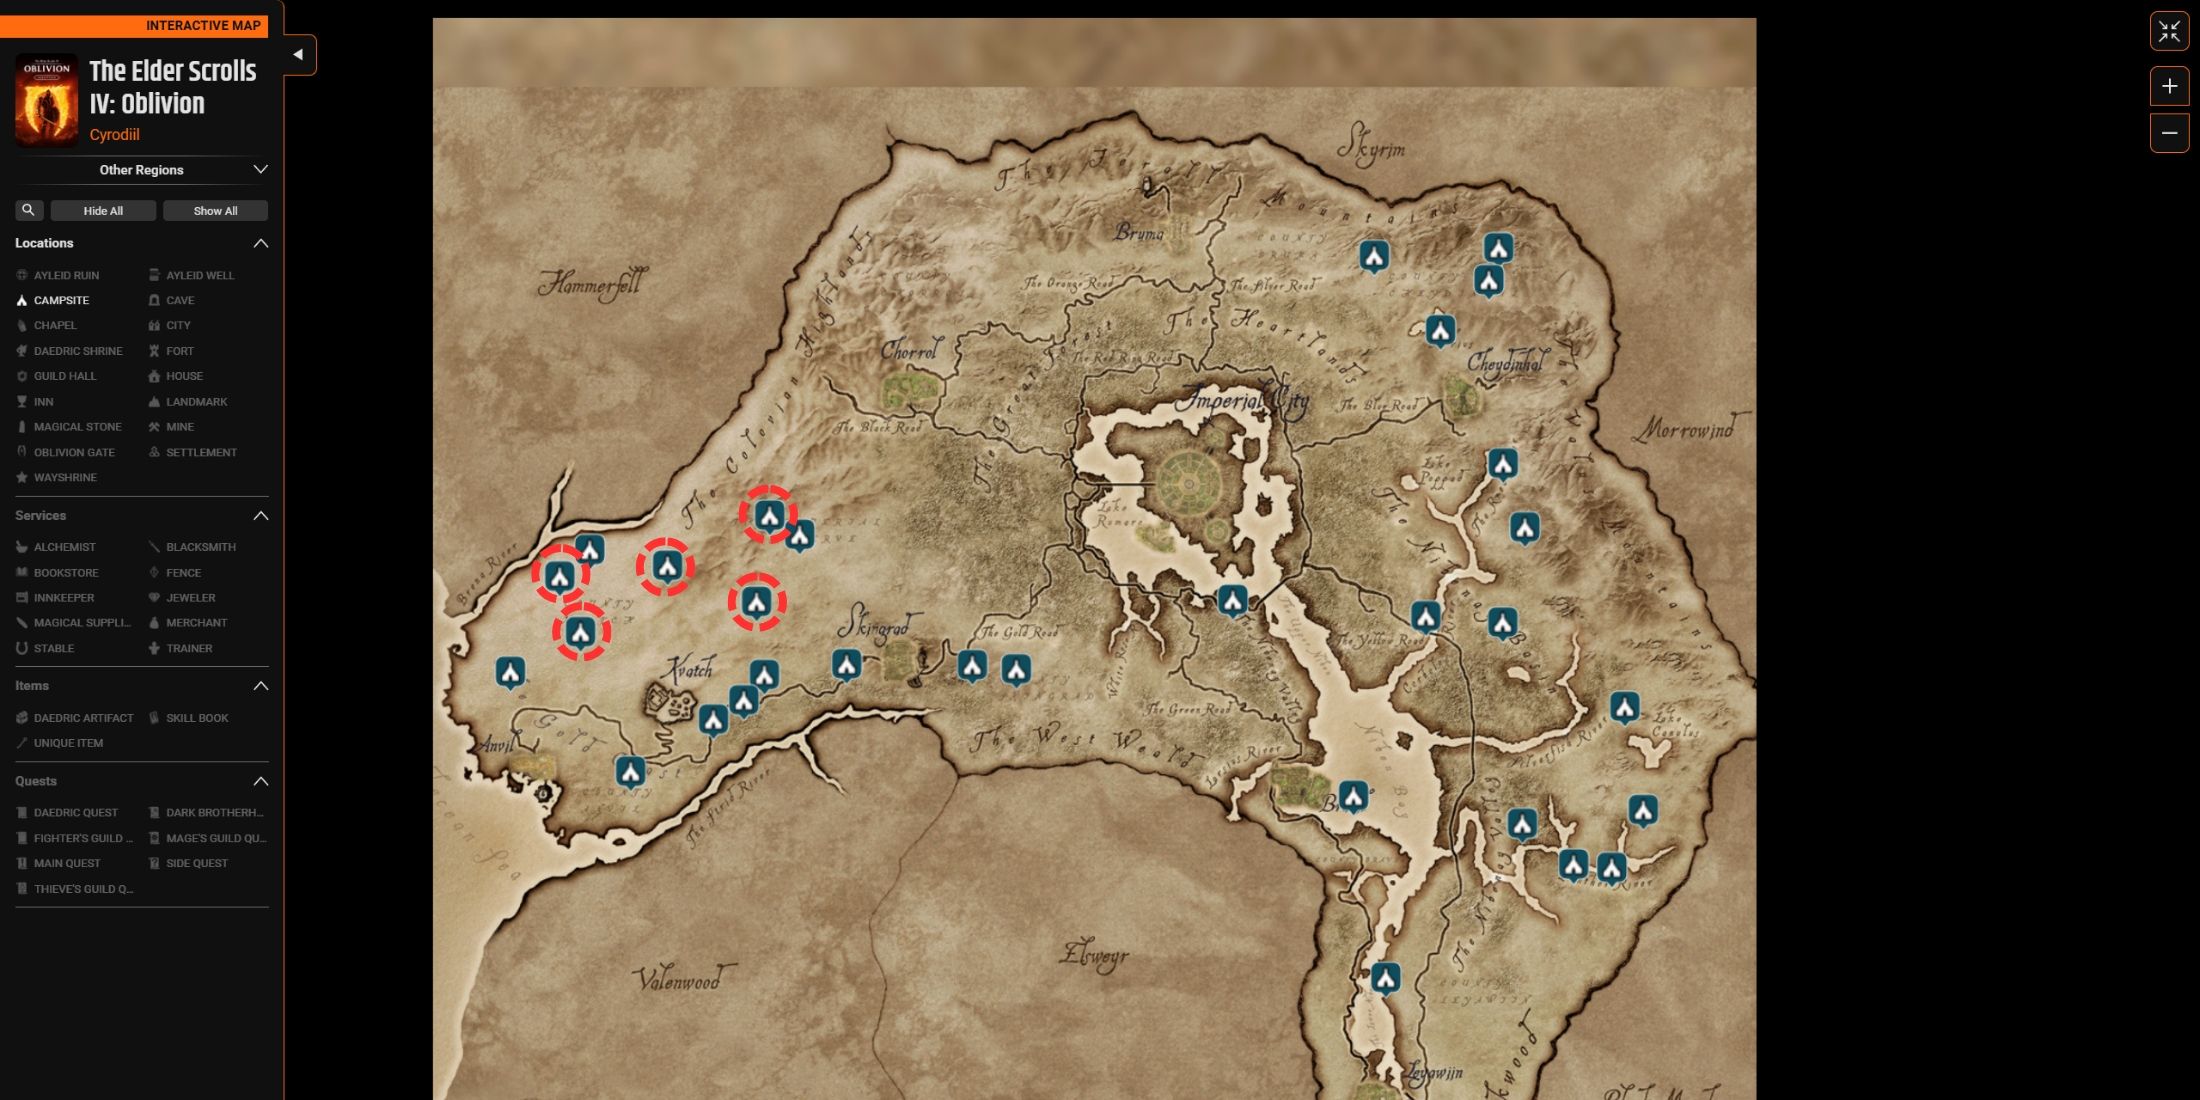
Five dwarven artifacts crucial for repairing Bothiel’s Orrery are currently in the hands of leaders at mountain-based bandit camps near Kvatch. Your journey begins by locating Camp Ales, situated north of Kvatch. Venture to Camp Ales, engage and overcome the bandits within. The leader’s body will yield a ‘Dwarven Cog’ and an ‘Unopened Letter’.
By reading ‘The Unsent Letter’, you’ll find markings for the next four outlaw hideouts on your map. Here are their locations:
1. Camp One – Coordinates X, Y
2. Camp Two – Coordinates A, B
3. Camp Three – Coordinates C, D
4. Camp Four – Coordinates E, F
- Bodean Camp (Dwarven Cylinder)
- Brotch Camp (Dwarven Cog)
- Dagny’s Camp (Dwarven Coherer)
- Varus Camp (Dwarven Tube)
During this adventure, the outlaws are equipped with costly equipment that could yield a substantial income when sold to traders. Be mindful of having sufficient additional carrying capacity to transport all the booty from each encampment.
Once you’ve collected all leftover dwarven artifacts from the outlawed camps, your mission will be revised. Head back to Bothiel at the Arcane University, deliver the artifacts, and she’ll compensate you with gold based on your rank.
How to Unlock the Imperial Orrery
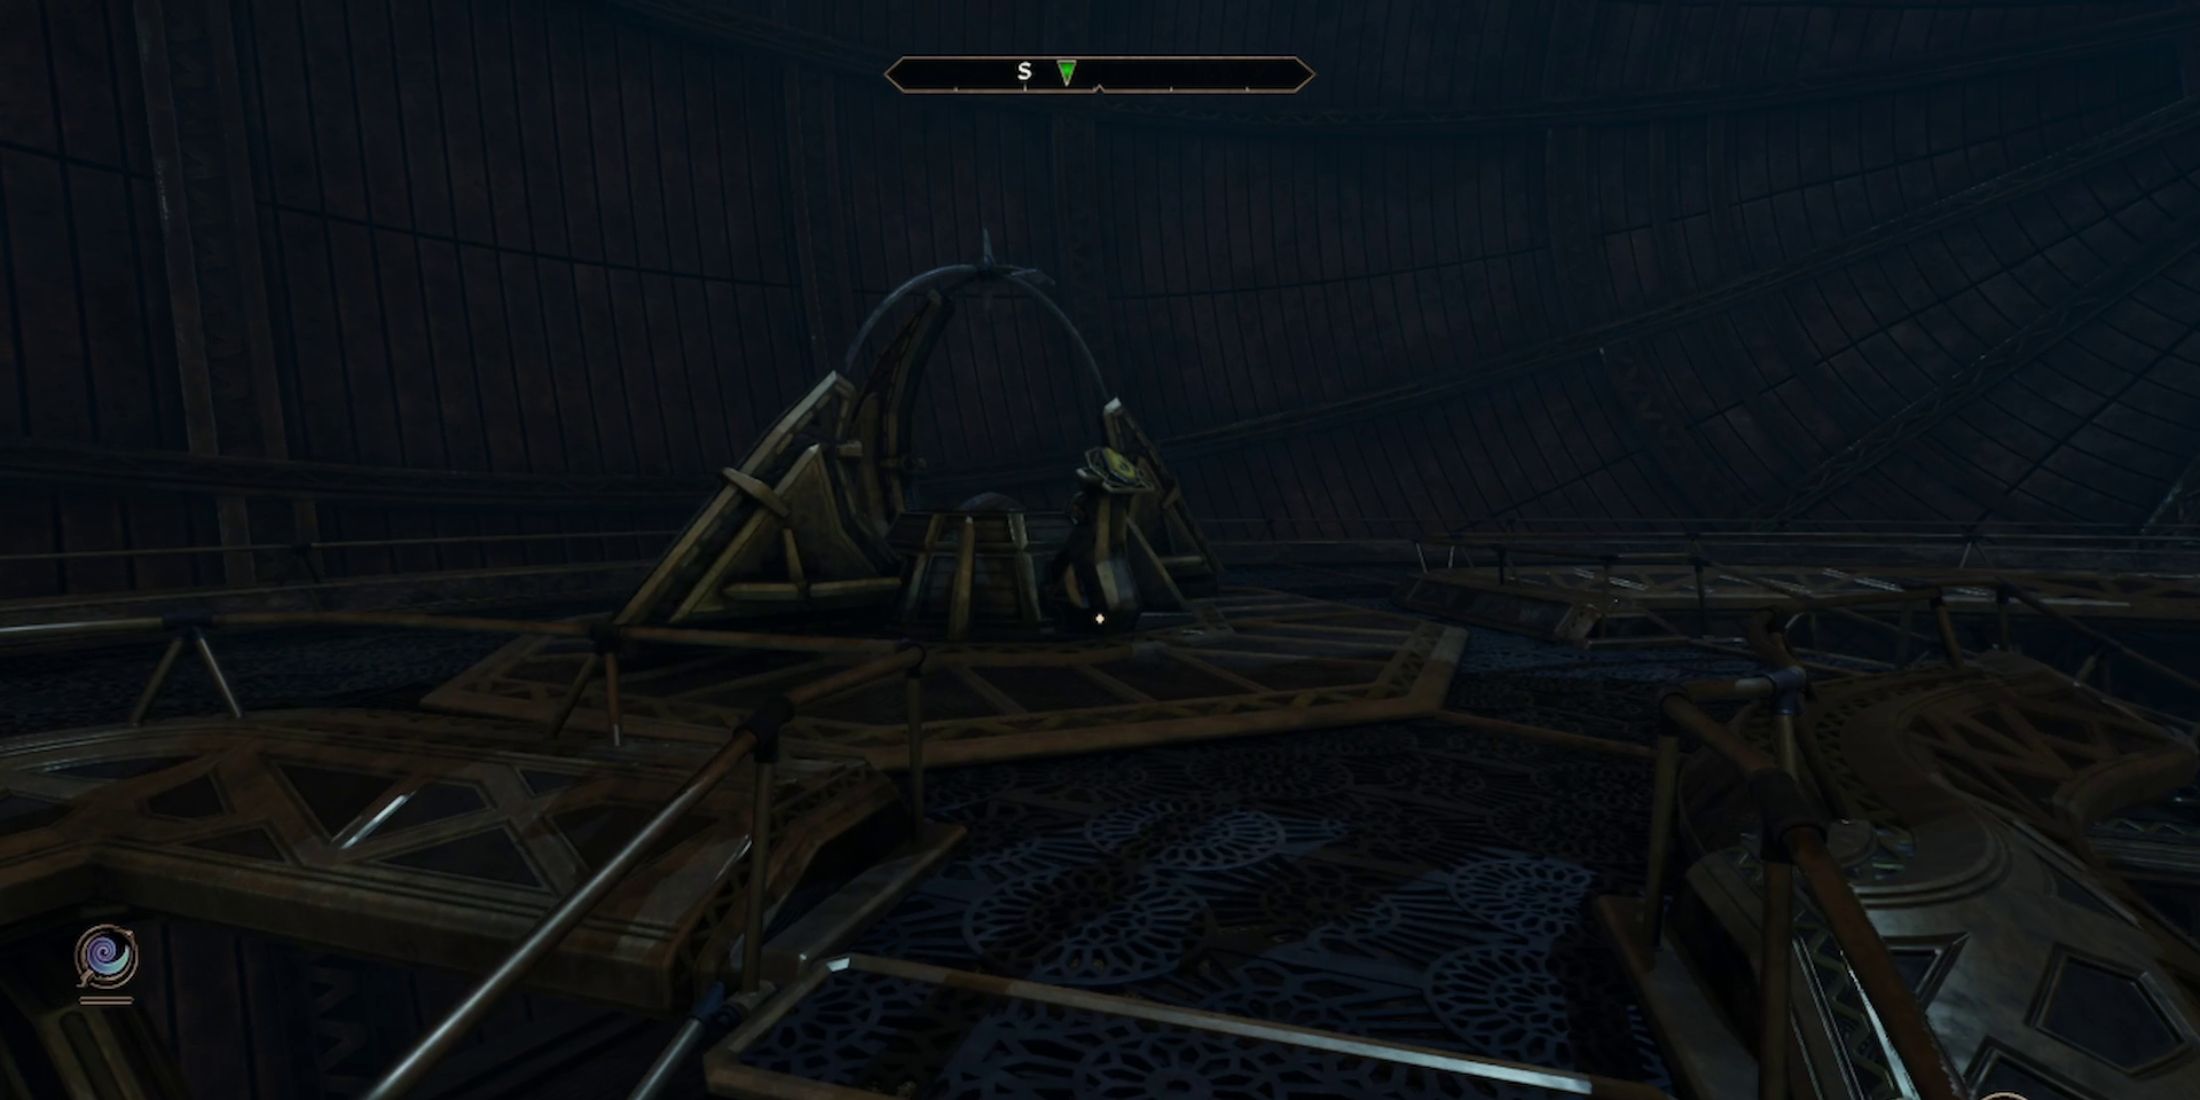
Once the Hero hands over the dwarven artifacts to Bothiel, she will proceed to the locked Imperial Orrery door for repairs with these items. To open the Orrery, you must wait 24 hours in-game. A message will then appear saying, “The Arcane University’s Orrery should be operational again.” Now, the door to the Orrery stands open, allowing you access whenever you wish.
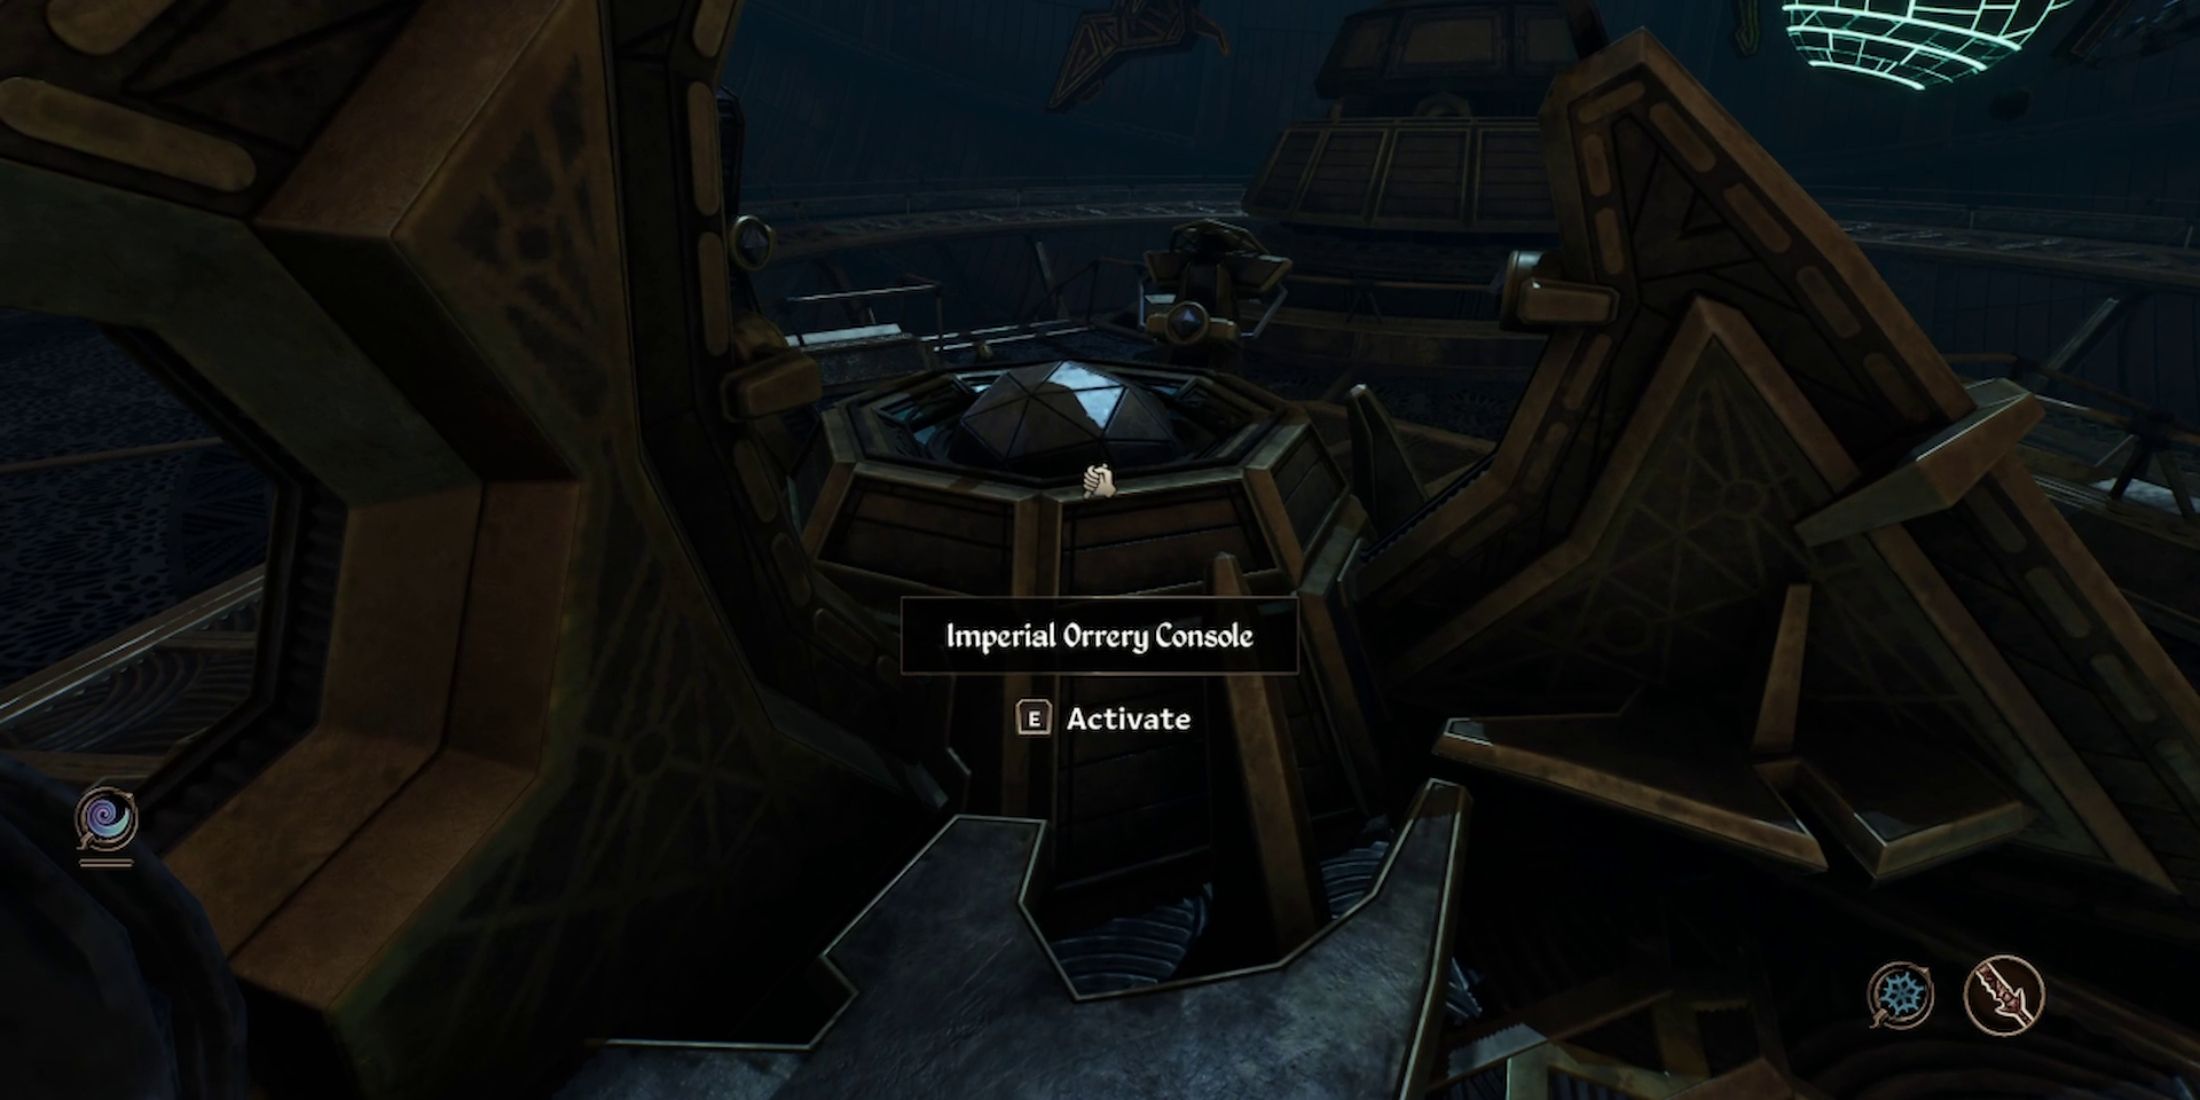
As you step into the Orrery, climb the stairway and engage with the “Imperial Orrery Control Panel” to set it in motion. Once activated, the control panel will light up, the surrounding barriers will lower, and a soft blue radiance will emanate from it.
How to Use the Orrery

The Imperial Orrery bestows special abilities, known as Greater Powers, upon the player based on Masser and Secunda’s lunar phase. These powers can be utilized once a day and they last for exactly 60 seconds. Unlike ‘Active Effects’, they operate more like ‘Spells’.
Each Orrery Greater Power possesses two impacts: Enhancing an attribute by 20 points, and Reducing another attribute by 20 points. The specific attribute that gets strengthened or weakened changes according to the moon phases, as detailed below:
Moon Phase | Affected Attribute
|
New Moon | Strength
First Quarter | Dexterity
Full Moon | Intelligence
Last Quarter | Wisdom
Crescent Moon | Charisma
Gibbous Moon (North) | Constitution
Gibbous Moon (South) | Agility
| Greater Power | Fortify Attribute | Drain Attribute |
|---|---|---|
| Masser’s Might | Strength +20 | Speed -20 |
| Masser’s Grace | Agility +20 | Endurance -20 |
| Secunda’s Will | Willpower +20 | Intelligence -20 |
| Secunda’s Opportunity | Luck +20 | Personality -20 |
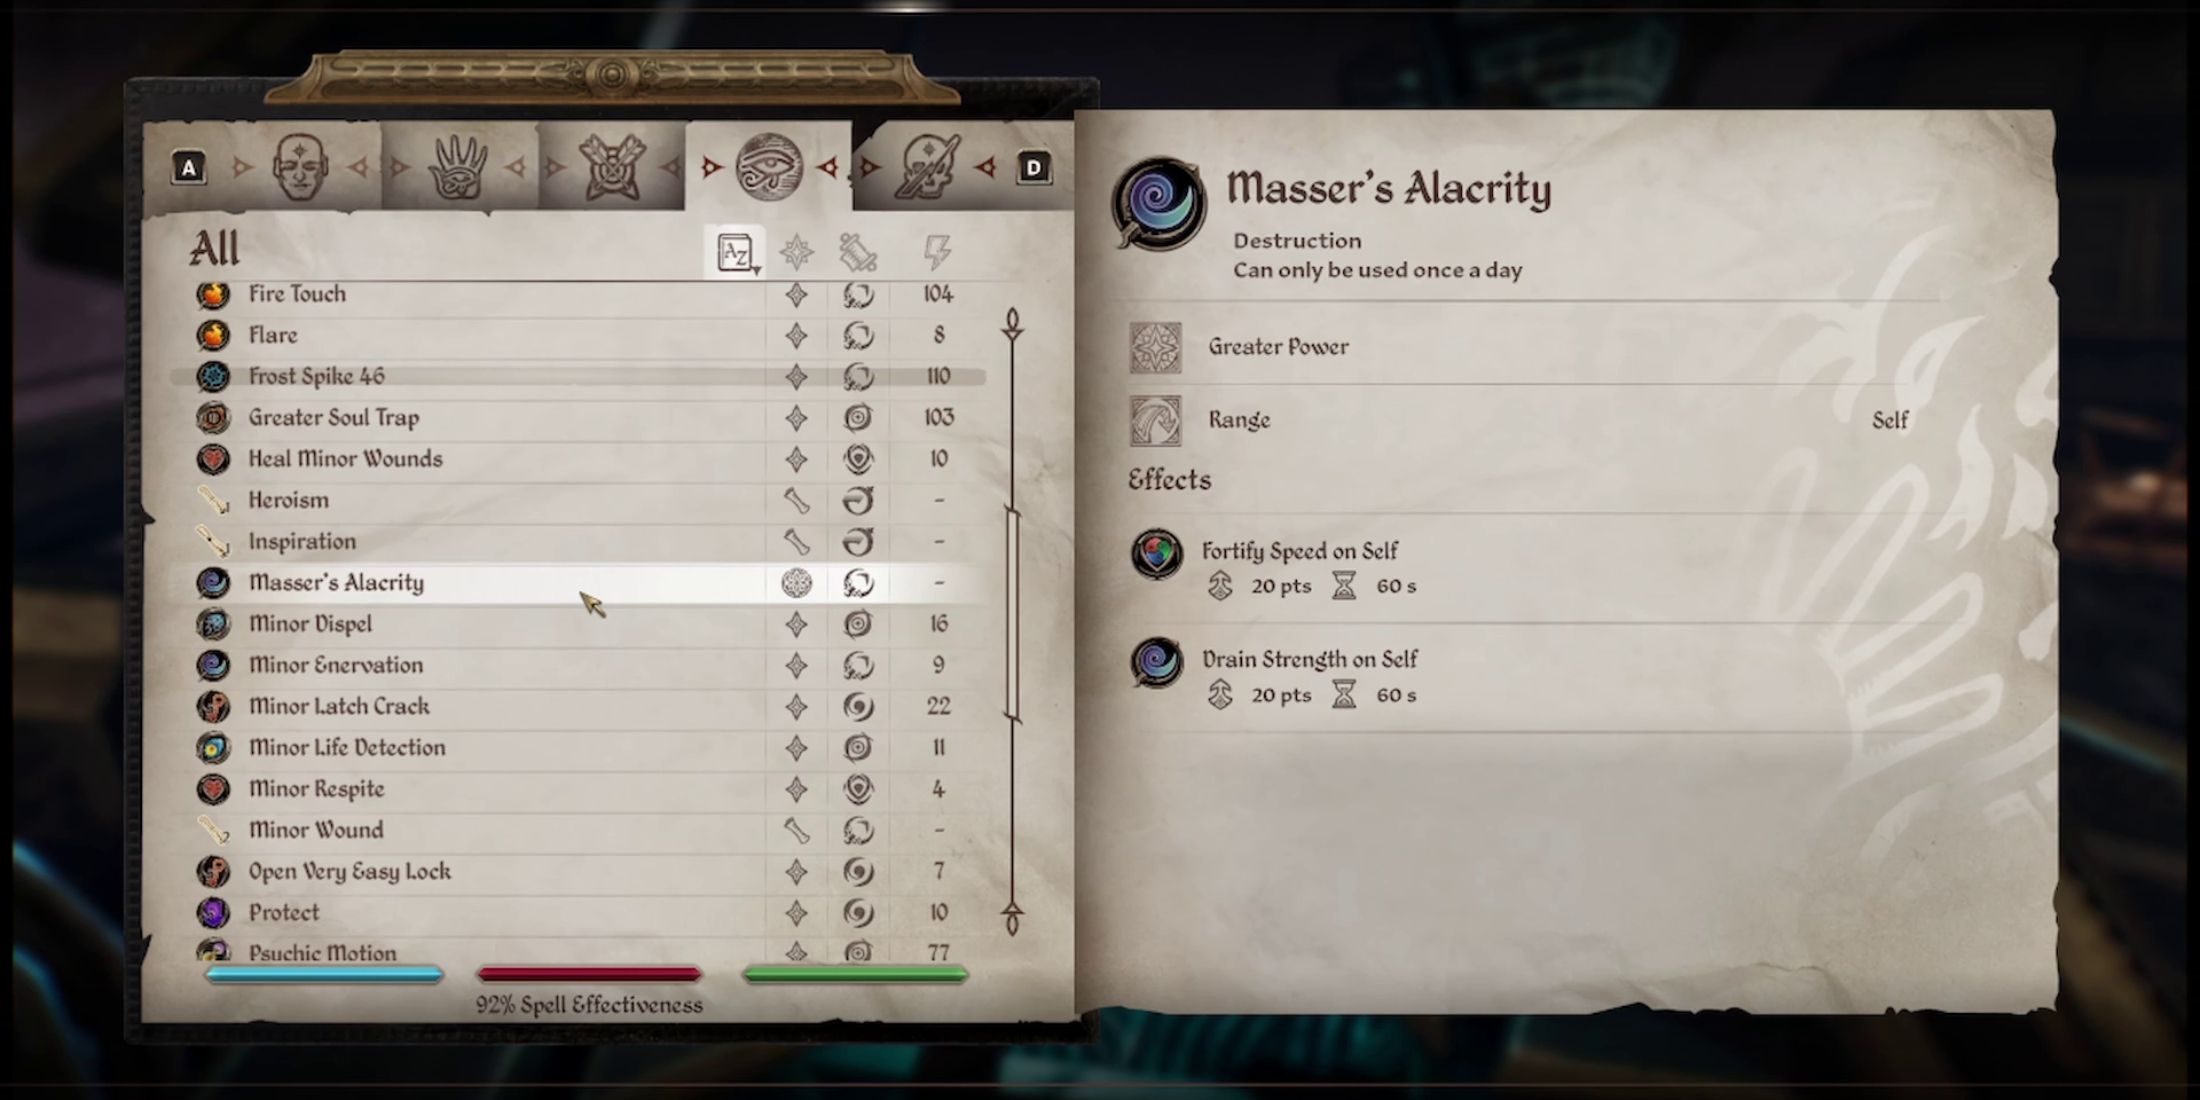
| Masser’s Alacrity | Speed +20 | Strength -20 |
| Secunda’s Magnetism | Personality +20 | Luck -20 |
| Secunda’s Brilliance | Intelligence +20 | Willpower -20 |
| Masser’s Courage | Endurance +20 | Agility -20 |
As a gamer, I find myself intrigued by the ever-changing Greater Powers in this game, which refresh every three in-game days, mirroring the moon’s phases. The sequence of these powers is shown in the table provided. For instance, if I obtain Masser’s Might during my initial visit, I can expect Masser’s Grace after a wait of three days, followed by Secunda’s Opportunity after another six days, and so forth.
An activated Orrery Greater Power remains constant until it’s swapped out. It doesn’t transform on its own according to lunar phases; instead, you must manually operate the Orrery during a different phase if you wish to change it.
Read More
- Best Heavy Tanks in World of Tanks Blitz (2025)
- Death Stranding 2 smashes first game’s Metacritic score as one of 2025’s best games
- [FARM COSMETICS] Roblox Grow a Garden Codes (May 2025)
- Delta Force Redeem Codes (January 2025)
- Here Are All of Taylor Swift’s Albums in Order of Release Date (2025 Update)
- CNY RUB PREDICTION
- Gold Rate Forecast
- Best Japanese BL Dramas to Watch
- Overwatch 2 Season 17 start date and time
- [Guild War V32] Cultivation: Mortal to Immortal Codes (June 2025)
2025-05-03 19:24