The Wilds Bow in Monster Hunter is well-suited for beginners due to its straightforward nature, but it offers a lot of advanced techniques as its mechanics are quite intricate. It’s not just about aiming and shooting arrows; there’s much more depth to it than that, which experienced players can explore.
To excel in using the Bow as a ranged weapon in Monster Hunter Wilds, it’s essential to master stamina management, leverage its mobility advantages, and familiarize yourself with its diverse set of moves. Unlike other ranged weapons, the Bow doesn’t need ammunition; however, you should monitor your Trick Arrow gauge when using coatings for optimal results. Here’s a breakdown of how to wield the Bow in Monster Hunter Wilds and its fundamental move-set.
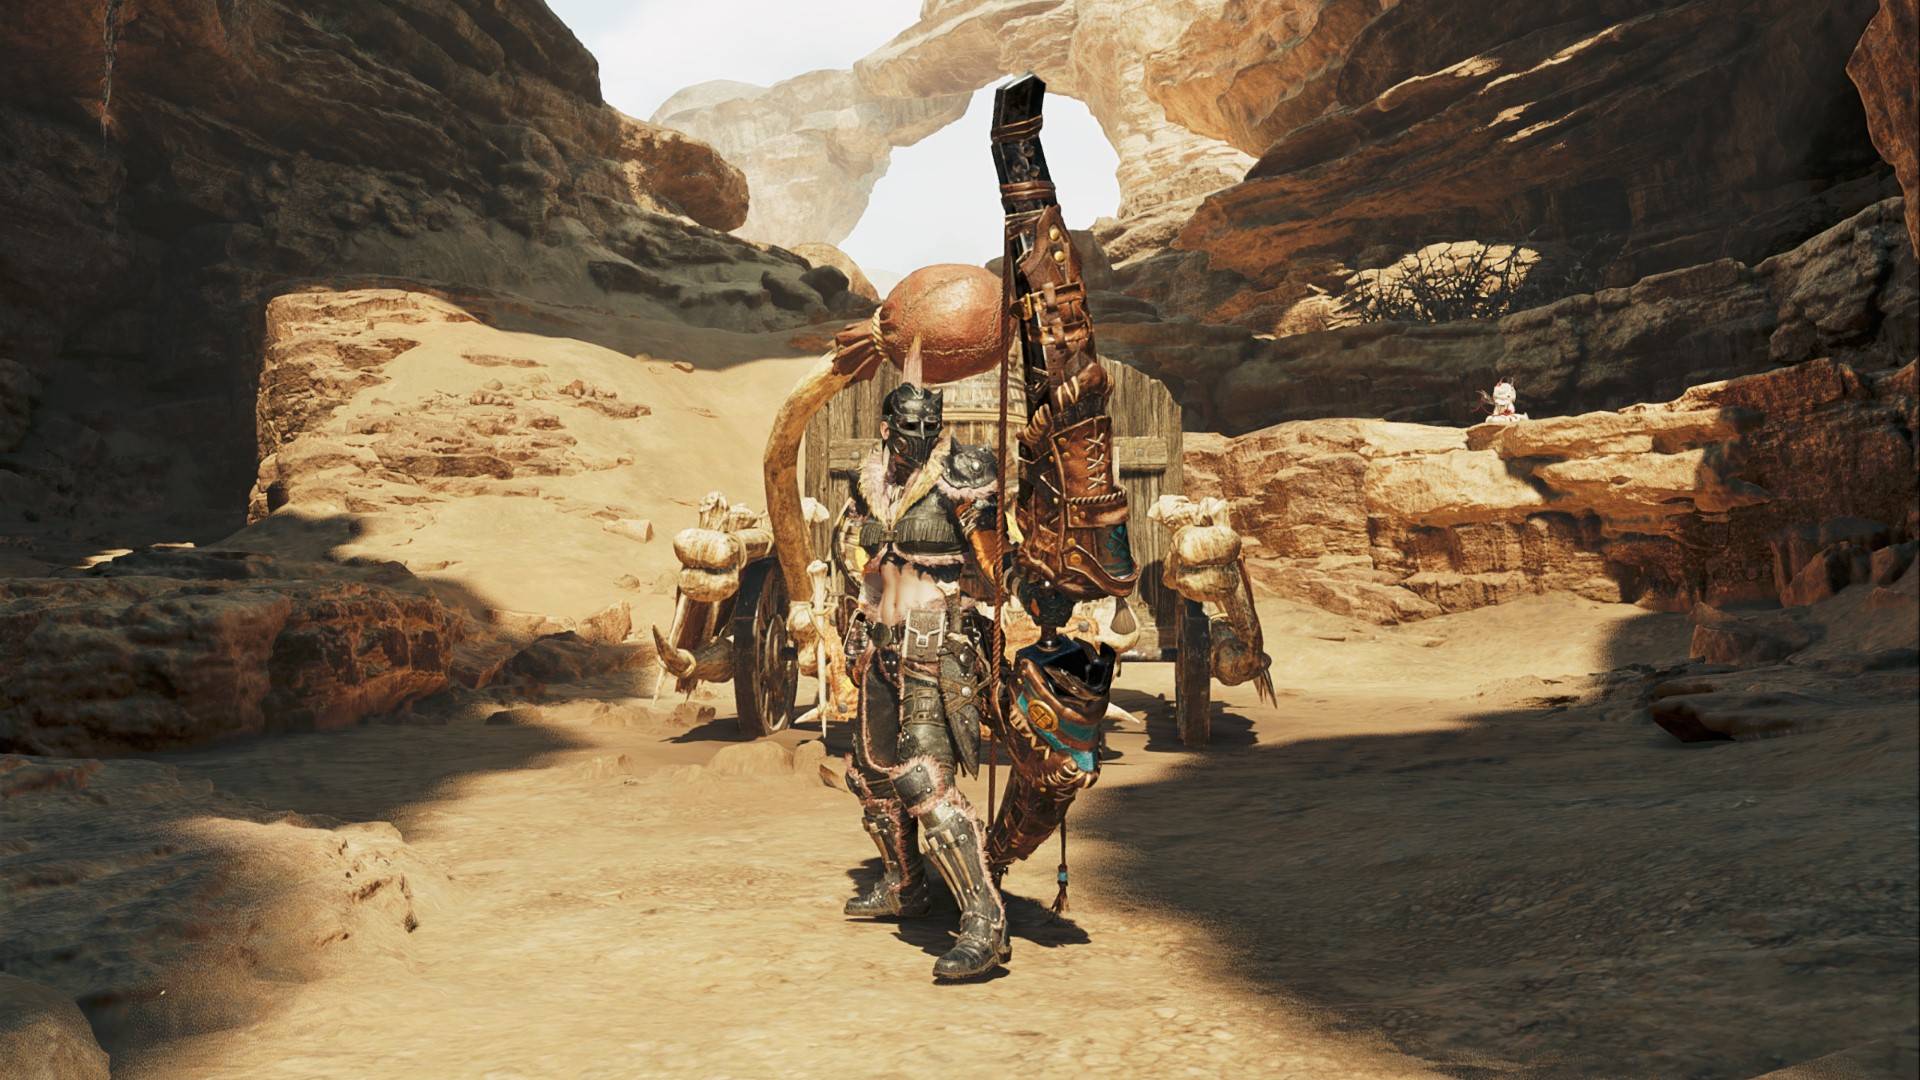
The Monster Hunter Wilds Bow explained
In Monster Hunter Wilds, the bow serves as a ranged weapon primarily for precise attacks and exploiting an enemy’s vulnerabilities, much like Hawkeye. To put it simply, you can tag specific areas of a monster with the Tracer arrow, then use specialized coatings and arrows to inflict damage and conditions that maximize the monster’s weaknesses. Remember, the bow also comes with movement abilities for when you need to retreat. However, it’s not advised to engage enemies at close range if possible. When playing multiplayer in Monster Hunter Wilds, having teammates draw the monster’s attention while you attack from a distance can be incredibly beneficial.
Ready Tracer explained
In Monster Hunter Wilds, the key feature of the Bow is probably the Ready Tracer move. This action sends an arrow with a flare, which instead of vanishing upon hitting a monster, remains embedded in its body. This lodged flare serves as a guiding signal for all further arrows fired while it’s still lit.
It’s ideal when aiming at a particular body part or injury, as it can also release numerous arrows simultaneously, like the techniques Thousand Dragons and Focus Fire: Hailstorm, which work exceptionally well in such situations.
Coatings and the Trick Arrow gauge explained
At the lower right side of your HUD, you’ll spot your Trick Arrow meter, positioned above where you choose your arrow coating. Each time you load a Tracer or equip a coating, it will deplete some of your Trick Arrow meter. Essentially, coatings are enhancements and status effects that can be added to your arrows. Here’s the complete list:
1. Bleeding: Deals continuous damage over time.
2. Slow: Slows down targets.
3. Stun: Temporarily incapacitates targets.
4. Explosive: Causes an explosion upon impact.
5. Poison: Inflicts periodic poison damage.
6. Freeze: Freezes targets, preventing them from moving.
7. Electric: Shocks targets, dealing continuous damage over time.
8. Fire: Ignites targets, causing periodic fire damage.
9. Blind: Temporarily blinds targets.
10. Silence: Prevents enemies from using abilities.
- Blast: Arrows inflict blast.
- Close-Range: Increases damage but reduces range.
- Exhaust: Arrows inflict stun.
- Paralysis: Arrows inflict paralysis.
- Pierce: Arrows can pierce through enemies.
- Poison: Arrows inflict poison.
- Power: Increases damage.
- Sleep: Arrows inflict sleep.
In Monster Hunter Wilds, it’s important to note that coating types aren’t like regular items you manage, create, or store. Instead, each type of Bow is limited to specific coatings. For instance, the Expedition Tree can only be equipped with Power and Poison coatings, whereas the Bone Tree can utilize Close-Range and Paralysis coatings. Regardless of which creatures from the Monster Hunter Wilds roster you’re facing, choose a coating that will most effectively exploit their vulnerabilities.
Stamina explained
In contrast to other ranged weapons, the bow alone depletes your stamina when you fire it, and the more powerful a shot, the more stamina it requires. Therefore, it’s crucial to monitor your stamina levels and alternate strong attacks with weaker ones. Additionally, charging attacks and the Charging Sidestep move, though not technically attacks themselves, drain stamina as well, being vital for utilizing the bow’s remarkable mobility.
Bow moveset
Here are all of the basic Bow moves and attacks:
- Shoot (hold to charge)
- PC: LMB
- PS: R2
- XB: RT
- Aim (hold)
- PC: RMB
- PS: L2
- XB: LT
- Quick Shot
- PC: F
- PS: Circle
- XB: B
- Power Shot + Volley (during combo)
- PC: F -> F
- PS: Circle -> Circle
- XB: B -> B
- Arc Shot (while aiming and charging a shot)
- PC: F
- PS: Circle
- XB: B
- Charging Sidestep (while aiming)
- PC: Space + WASD (directional)
- PS: X + LS (directional)
- XB: A + LS (directional)
- Flying Swallow Show (after Charging Sidestep)
- PC: R
- PS: Triangle
- XB: Y
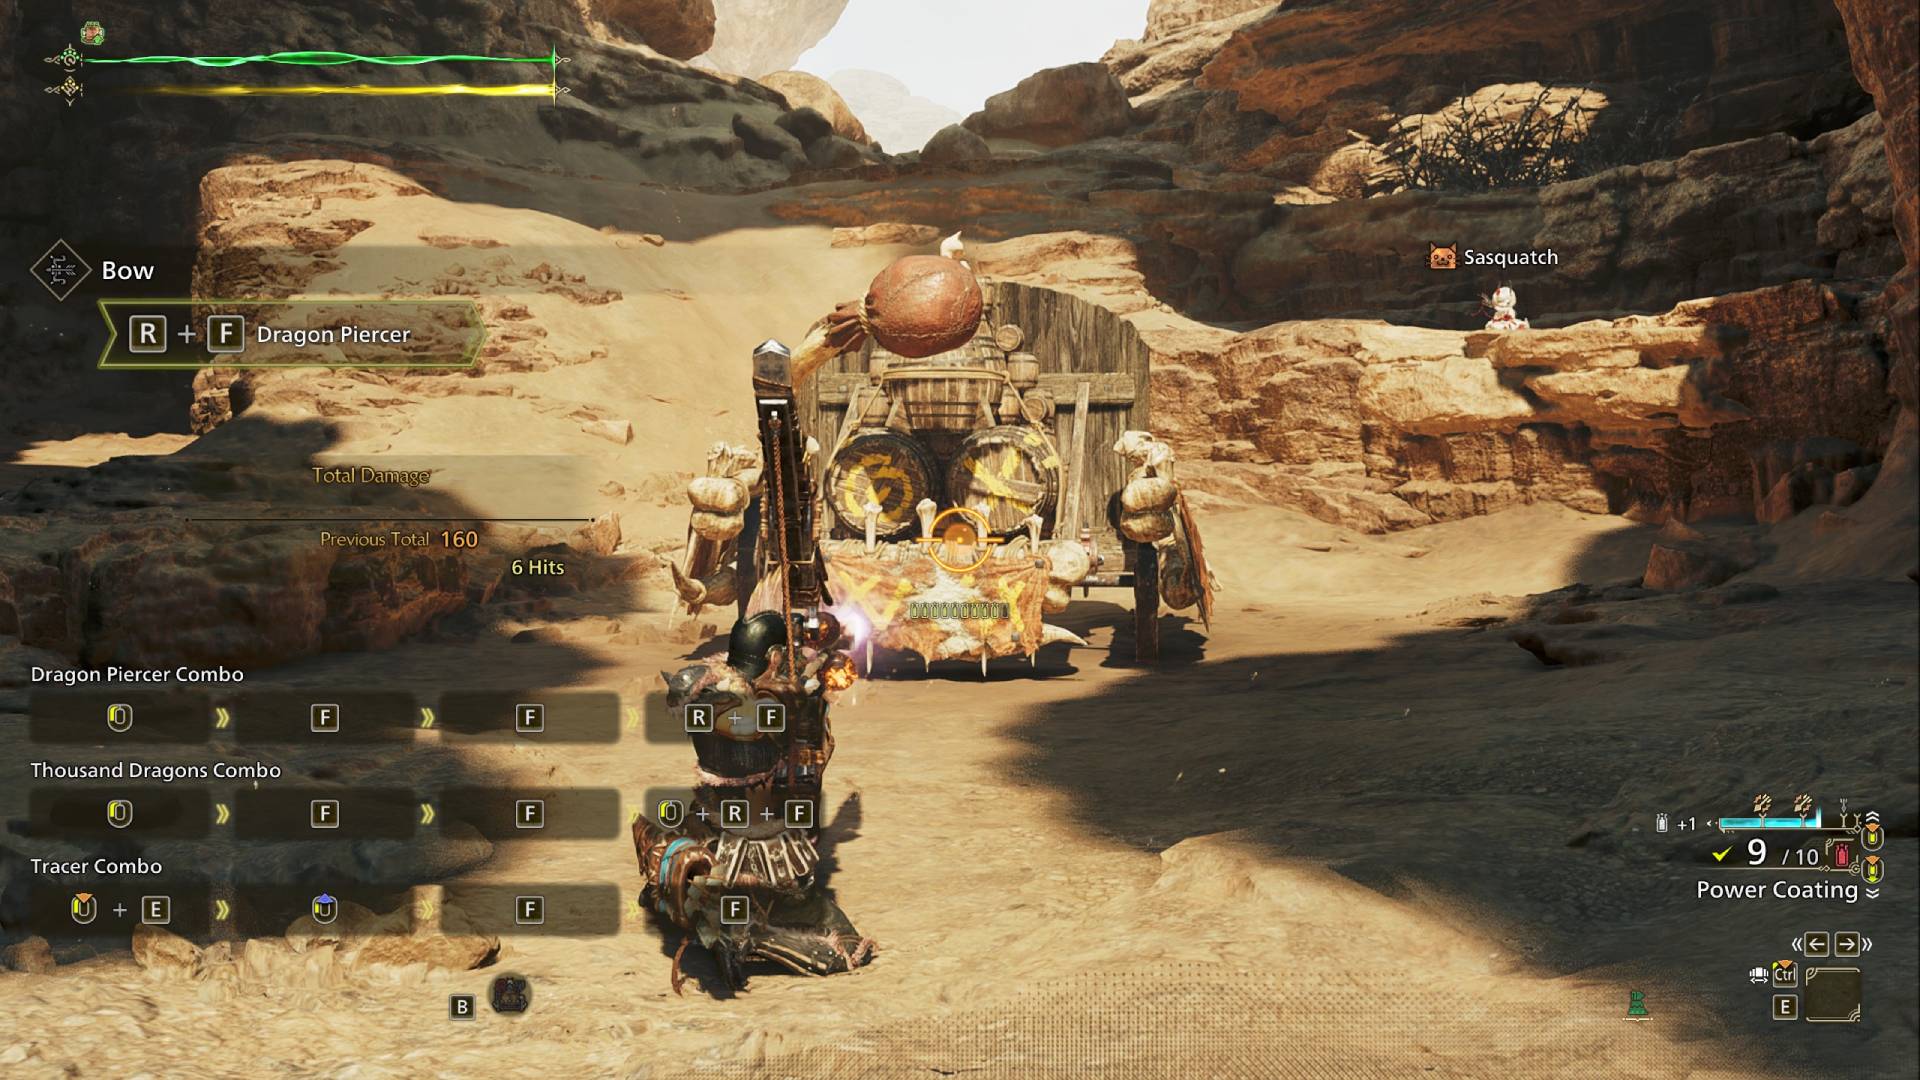
- Dragon Piercer
- PC: R + F
- PS: Triangle + Circle
- XB: Y + B
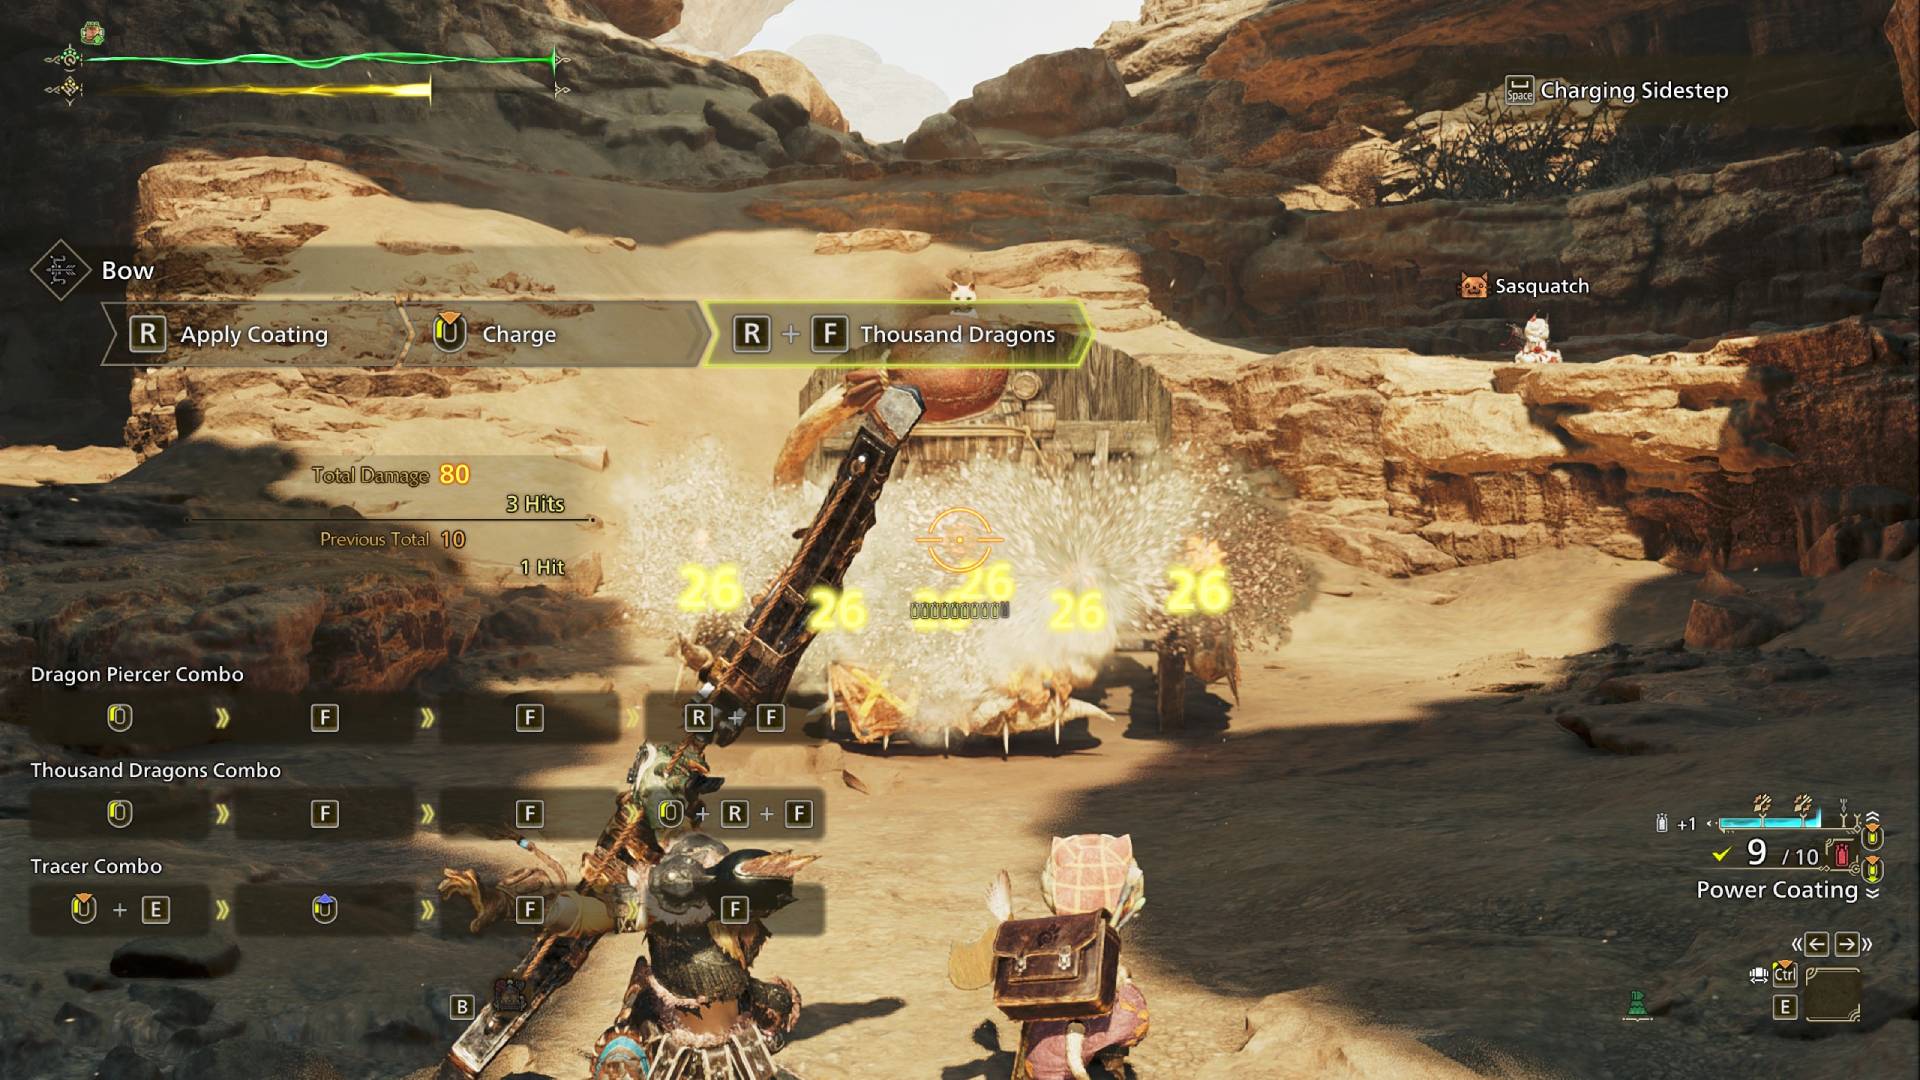
- Thousand Dragons
- PC: LMB + R + F
- PS: R2 + Triangle + Circle
- XB: RT + Y + B
- Select + Apply Coating
- PC: Mouse Wheel up/down -> R
- PS: L1 + Triangle / X -> Triangle
- XB: LB + Y/A -> Y
- Ready Tracer (while charging a shot)
- PC: E
- PS: Square
- XB: X
- Focus Fire: Hailstorm (while aiming)
- PC: Shift
- PS: R1
- XB: RB
In essence, the Bow serves as a versatile long-range weapon, yet it falls short in terms of reach compared to others. It’s crucial not to stand too far from your enemy, or else you’ll encounter an ‘out of range’ notification. When aiming, if your sight is glowing orange, that signifies you’re at a critical distance, inflicting maximum damage on the target as long as all shots connect. This aspect is particularly significant when employing skills like Thousands Dragons, which discharge multiple arrows simultaneously.
It’s usually wise to use Tracer shots whenever you can because they significantly increase the likelihood of hitting your target, allowing for precise wound placement. However, remember to monitor your stamina levels carefully. Prior to engaging in a major battle against a formidable creature like Rey Dau in Monster Hunter Wilds, think about consuming items or meals that boost your stamina.
As a fan, I’ve discovered that perfectly timing the Charging Sidestep just before an attack connects results in the elusive Discerning Dodge move. This hidden technique adds one segment to your Trick Arrow gauge. Master this technique and you’ll always have plenty of coatings and Tracers at your disposal. While Arc Shots automatically apply Tracers, they can be tricky to land if the monster isn’t standing still.
Read More
- Brody Jenner Denies Getting Money From Kardashian Family
- I Know What You Did Last Summer Trailer: Jennifer Love Hewitt Faces the Fisherman
- New God Of War Spin-Off Game Still A Long Way Off, According To Insiders
- Bitcoin Price Climbs Back to $100K: Is This Just the Beginning?
- Justin Bieber ‘Anger Issues’ Confession Explained
- All Elemental Progenitors in Warframe
- Anupama Parameswaran breaks silence on 4-year hiatus from Malayalam cinema: ‘People have trolled me saying that I can’t act’
- Superman’s James Gunn Confirms Batman’s Debut DCU Project
- Move Over Sydney Sweeney: Ozzy Osbourne’s DNA Is in Limited-Edition Iced Tea Cans
- How Taylor Swift’s Bodyguard Reacted to Travis Kelce’s Sweet Gesture
2025-02-27 14:31