
In Monster Hunter Wilds, you’ve got 14 distinct weapons to select, with many inflicting robust raw damage that’s generally effective against various monsters. On the other hand, there’s the Charge Blade, which unleashes enormous elemental damage in quick spurts. This transformable weapon packs a heavy punch with every swing, and mastering its playstyle can be more intricate compared to weapons like the Longsword.
If you like using flashy weapons that deal heavy elemental damage, this guide is for you.
Table of contents
- How to use the Charge Blade in Monster Hunter Wilds
- Best Charge Blade builds in Monster Hunter Wilds
- Best weapons
- Best armor
- Best talismans
How to use the Charge Blade in Monster Hunter Wilds
In Monster Hunter Wilds, the Charge Blade stands out as one of the intricate melee weapons due to its complex nature. Mastering it requires careful handling of its phial features and management. One key aspect about the Charge Blade is that it’s a versatile weapon capable of transitioning between Sword mode and Axe mode at your fingertips, providing distinct attacks and benefits in each form.
Instead of using Sword mode as the primary attack generator, you can boost your main energy meter by repeatedly attacking with basic strikes and combo attacks. As you build up this power, the meter’s color will change from white to yellow, then finally to red when fully charged. It is advisable to save this energy in phials for future use.
In the Axe mode, you release an assault’s worth of accumulated power in intense bursts of raw or elemental destruction, based on your chosen weapon. These powerful swings can quickly tear through monstrous hides and swiftly heal wounds, becoming even more effective if your affinity is high enough. The damage figures in Axe mode are often among the highest seen in the game.
After mastering the various modes of the Charge Blade, it’s important to understand the optimal setup for your Charge Blade weapon.
Best Charge Blade builds in Monster Hunter Wilds
A successful Charge Blade setup primarily involves creating specific weapons and armor, each with embedded abilities that cater to your playstyle, and augmenting these items with Decorations for skill boosts. Artian Weapons are typically the ideal choice due to their customizable attack, affinity, and elemental properties. However, some monster-specific Charge Blades can also be effective in the right hands.
As an ardent fan, I’ve found a fantastic way to maximize the elemental damage potential of my Charge Blade! This specific build variant focuses on unleashing powerful explosive bursts through Elemental Discharge while wielding it as an axe.
| Gear | Decorations | Skills |
| Chrono Gear (Elemental) | Any Elemental Damage Jewel Phoenix Jewel Critical Element Jewel | Elemental Damage Boost Coalescence Critical Element |
| Guardian Fulgur Helm Beta | Mighty Jewel | Agitator Maximum Might |
| Arkvulkan Mail Beta | Challenger Jewel Mighty Jewel | Weakness Exploit Agitator Maximum Might |
| Guardian Arkveld Vambraces Beta | Physique Jewel Physique Jewel Physique Jewel | Weakness Exploit Constitution |
| Gore Coil Beta | Challenger Jewel Mighty Jewel | Black Eclipse (set bonus) Constitution Agitator Maximum Might |
| Gore Greaves Beta | Challenger Jewel Sane Jewel Sane Jewel | Black Eclipse (set bonus) Antivirus Flinch Free Agitator |
| Exploiter Charm | N/A | Weakness Exploit |
| Corrupted Mantle | N/A | N/A |
If you prefer non-elemental attacks, Monster Hunter Wilds has increased the base damage of Charge Blades significantly, providing a fantastic option for raw damage variations.
| Gear | Decorations | Skills |
| Chrono Gear | Magazine Jewel Critical Jewel Razor Sharp Jewel | Load Shells Critical Boost Razor Sharp |
| Guardian Fulgur Helm Beta | Mighty Jewel | Agitator Maximum Might |
| Arkvulkan Mail Beta | Challenger Jewel Mighty Jewel | Weakness Exploit Agitator Maximum Might |
| Guardian Arkveld Vambraces Beta | Physique Jewel Physique Jewel Physique Jewel | Weakness Exploit Constitution |
| Gore Coil Beta | Challenger Jewel Mighty Jewel | Black Eclipse (set bonus) Constitution Agitator Maximum Might |
| Gore Greaves Beta | Challenger Jewel Sane Jewel Sane Jewel | Black Eclipse (set bonus) Antivirus Flinch Free Agitator |
| Exploiter Charm | N/A | Weakness Exploit |
| Corrupted Mantle | N/A | N/A |
If you’re interested in exploring various elemental weapons for your build, discovering the optimal Charge Blades that synergize well with your elemental setup could prove beneficial.
Best weapons
Just like other weapons that specialize in elements, such as the Bow, the Charge Blade offers a variety of excellent options for each of the five primary elements. It’s wise to craft one of each of these, as they can be particularly useful during hunts once you discover a monster’s vulnerabilities. This way, you can significantly reduce the time it takes to defeat them, especially with the help of Critical Element and Weakness Exploit.
- Fire: Abaddonian Pweza
- Water: Valeroje-of-the-Waves
- Thunder: Astrapi Clairaxe
- Ice: Windthrash Tamebami
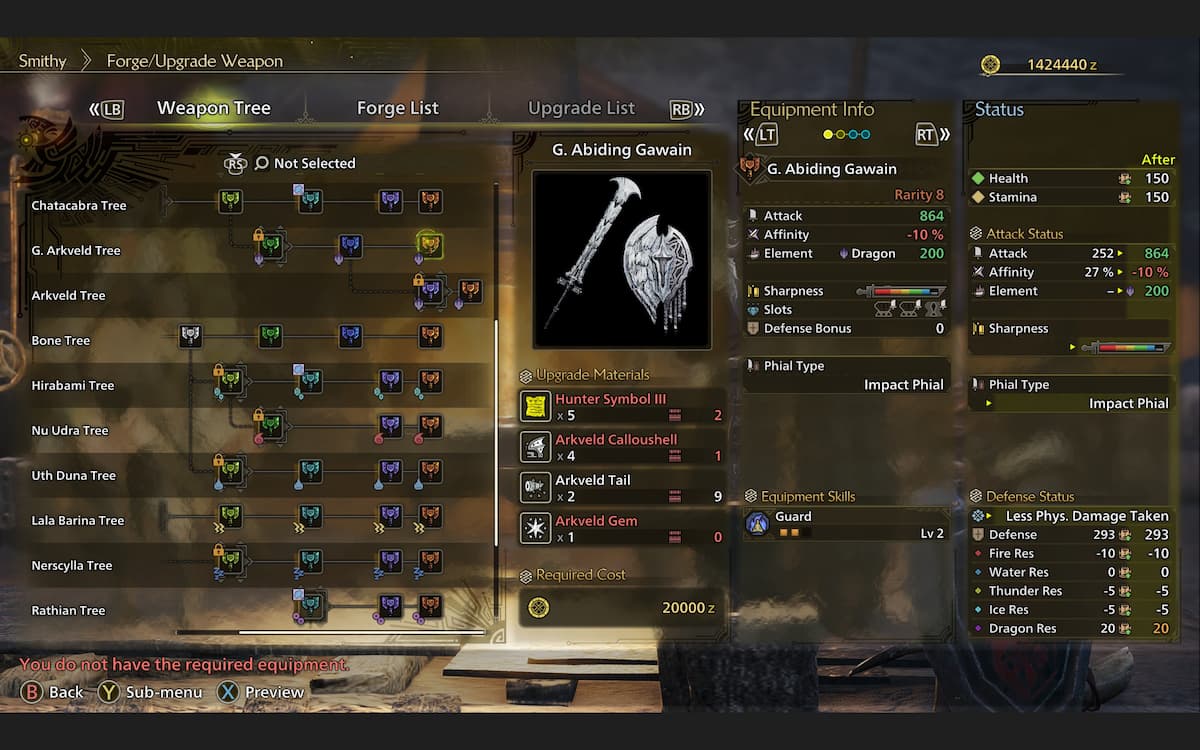
- Dragon: Guardian Abiding Gawain
To create your primary Fire-focused weapon for the endgame, consider assembling the “Abadonnian Pweza”. This unique Charge Blade, known as the “Nu Udra”, is constructed entirely from parts of the Apex Predator. Gather a few “Nu Udra Tentacles+” along with some “Nu Udra Horns+” and the elusive “Nu Udra Flamegem”. Don’t forget to include some “Hunter Symbols” in the process.
The weapon you’re after is called “Valeroje-of-the-Waves,” a powerful weapon forged from the components of an Apex Predator, specifically one known as an Uth Duna. To craft this weapon, you will require some upgraded Uth Duna Tentacles, Uth Duna Hides (in their upgraded form), and the extremely rare Uth Duna Watergem. You can obtain these items by farming the tempered versions to accumulate Hunter Symbols.
The Astrapi Clairaxe is an ideal Thunder weapon for your Charge Blade setup. This Rey Dau weapon can be crafted using readily available materials such as Rey Dau Carapaces and Rey Dau Bolthorns. To complete it, you’ll need a rare Rey Dau Boltgem and some Hunter Symbols.
You can create the Windthrash Tamebami using more commonly found components. To obtain the necessary Hirabami Webbing+ parts, it’s best to hunt for Tempered Hirabami. These will provide you with the lower-tier Hunter Symbols. Once you have gathered enough components, use a rare Jin Dahaad Icegem to complete the crafting process of the weapon.
To sum up, an excellent choice for your Dragon weapon is the resilient Guardian Abiding Gawain, skillfully made using pieces gathered from the formidable monster Arkveld. Overcome the Tempered version of Arkveld to secure Arkveld Calloushells, Arkveld Tails, the scarce Arkveld Gem, and some Hunter Symbols.
Should you prefer a Raw Charge Blade that isn’t an Artian weapon, the Hard Bone Strongarm could be an excellent selection for you. It’s relatively simple to obtain the necessary components – just gather some Monster Hardbones and Dragonbone Relics, which are quite common, and then add a Beast Gem.
Best armor
To thrive and showcase your build’s potential, it’s essential to have the appropriate armor components that will help you endure and acquire the necessary abilities.
In the initial phases of the game, it’s more beneficial to create a High Rank set using components that are readily available, and this set should come equipped with its own unique skills. Our preferred option is the Guardian Ebony Alpha Set, thanks to its advantageous early-game bonuses.
- Guardian Ebony Helm Alpha
- Guardian Ebony Mail Alpha
- Guardian Ebony Braces Alpha
- Guardian Ebony Coil Alpha
- Guardian Ebony Greaves Alpha
Gaining mastery over all five items in the collection will reward you with Tier 5 Burst, an excellent asset for characters focusing on elements, as well as Tier 3 Divine Blessing, a potent defensive enhancement. Additionally, Tier 3 Earplugs and Tier 3 Bleeding Resistance are useful skills to possess temporarily until you enhance your equipment.
To successfully hunt during the mid-point of the game, it’s essential that you assemble components from various monster collections. It is these items you should focus on acquiring to achieve optimal balance between damage and defensive adjustments for your character setup.
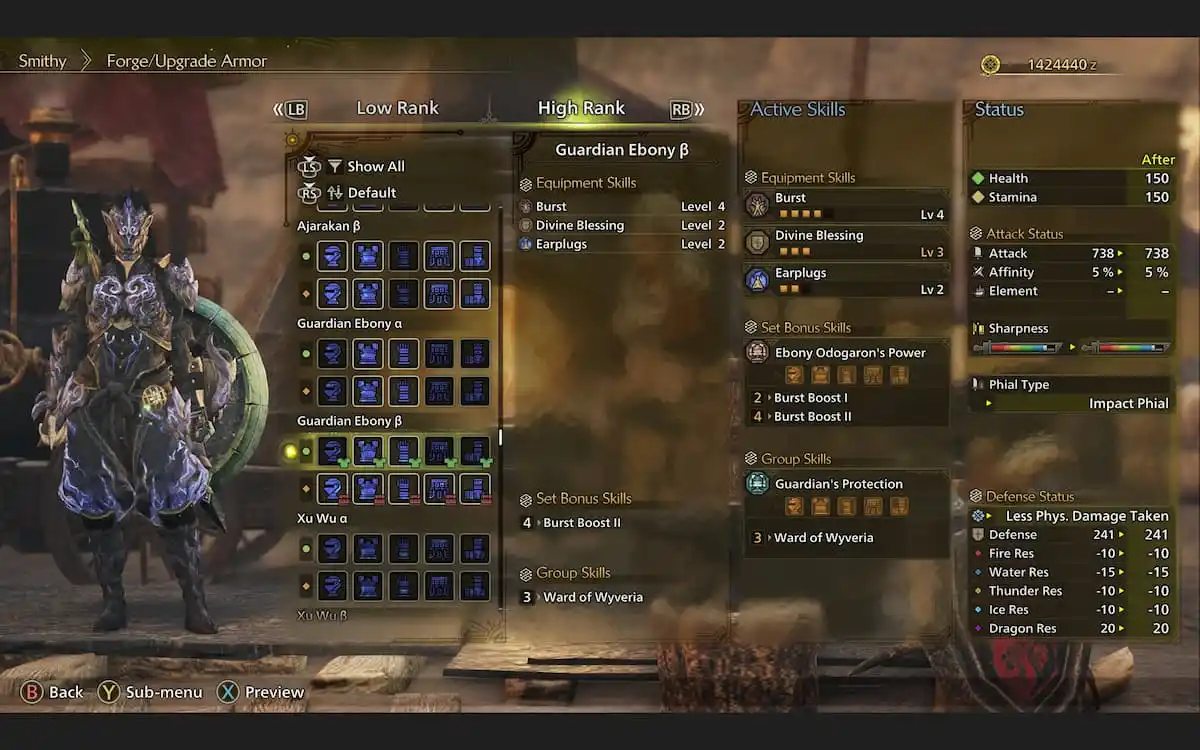
- Guardian Ebony Helm Beta
- Guardian Rathalos Mail Beta
- Guardian Ebony Braces Beta
- Dahaad Shardcoil Beta
- Guardian Rathalos Greaves Beta
Maintain the two-piece Guardian Ebony set’s bonus from your initial game setup to preserve the “Burst Boost” skill. For the remainder of your equipment, don on the Guardian Rathalos armor’s two pieces for the “Weakness Exploit” skill and gather the Scorcher set bonus for extra Fire damage. Lastly, obtain the Jin Dahaad armor piece to complete the build with the final level of “Weakness Exploit.
For the final armor set, the construction guide provided above contains all the necessary elements. After creating each component, focus on locating suitable Talismans.
Best talismans
Talismans serve as the concluding piece in any construction. These artifacts are created to boost the levels of existing abilities or compensate for skills crucial to your build that you currently lack. In the early stages of play, the most effective Talisman is often referred to as the “Blessing Charm,” bestowing a level 3 “Divine Blessing” which can prove vital in critical moments.
As you progress into the mid-game, you’ll find yourself with numerous strategies that can boost your character build. If you’re focusing on elemental damage, consider acquiring the Chain Charm to unlock higher tiers of the Burst skill. For quicker part dismantling, opt for the Chainblade Charm along with the Flayer charm and the Partbreaker charm respectively.
The “Mighty Charm” boosts your strength significantly, offering enhanced affinity, while the “Phoenix Charm” is geared towards Coalescence, amplifying your elemental damage.
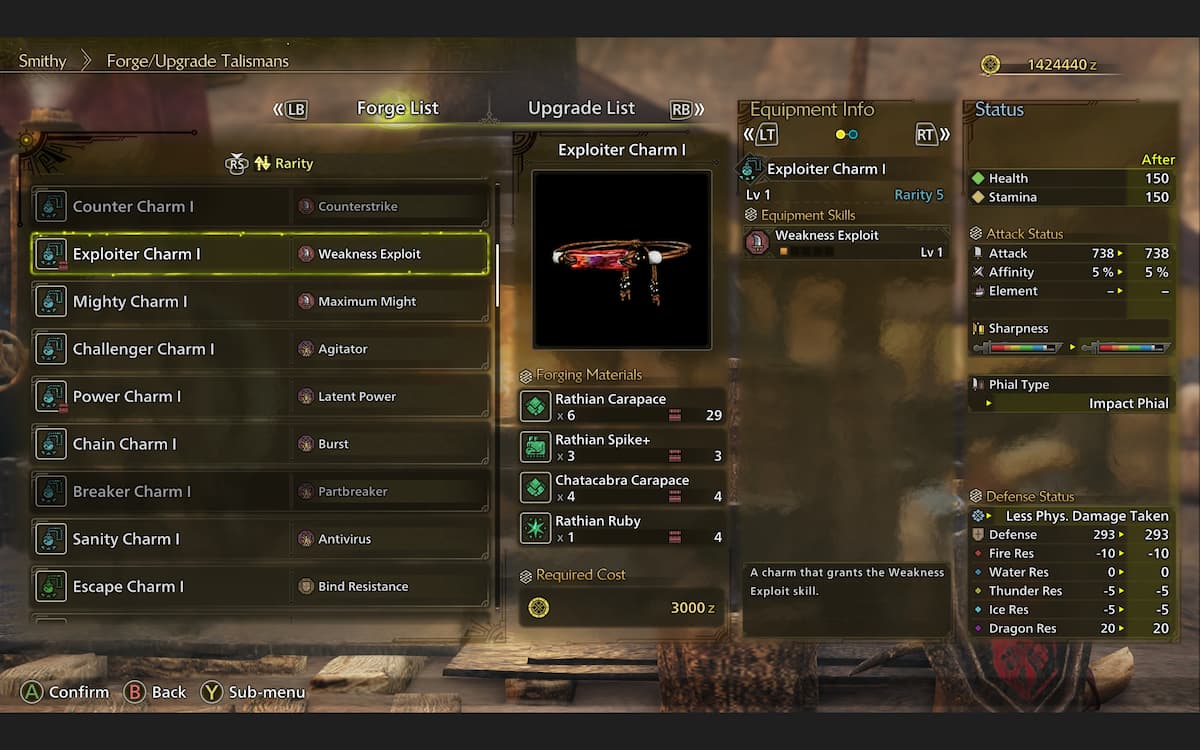
In most cases, Endgame Artifacts are used to provide an extra damage bonus at the end of a game. Among them, we recommend the Exploiter Charm, particularly if Weakness Exploit hasn’t reached its maximum level yet. Feel free to try out various artifacts to discover the ones that best suit your playstyle and requirements.
Read More
- Connections Help, Hints & Clues for Today, March 1
- Shruti Haasan is off from Instagram for THIS reason; drops a comeback message on Twitter
- Shiba Inu Sees Bullish Reversal In On-Chain Metrics, Can SHIB Price Recover?
- The games you need to play to prepare for Elden Ring: Nightreign
- Chiranjeevi joins Prime Minister Narendra Modi for Pongal celebrations in Delhi; see PICS
- Sitara Ghattamaneni: The 12-Year-Old Fashionista Taking the Spotlight by Storm!
- When To Expect Blue Lock Chapter 287 Spoilers & Manga Leaks
- BUZZ: Rajinikanth starrer Jailer 2 directed by Nelson Dilipkumar likely to go on floors from March 2025
- What Is Dunkin Donuts Halloween Munchkins Bucket?
- The Babadook Theatrical Rerelease Date Set in New Trailer
2025-03-19 13:54