The Light Bowgun is one of the ranged weapons in Monster Hunter Wilds and is one of the strongest for fast clear times. It’s also easy to use and can be picked up by new players as well, thereby offering a lot of accessibility.
Additionally, you have a fairly long range to play from, making sure that you don’t have to worry too much about dodging hits and you can instead simply focus on firing away at the monster. If you’re looking to pick up the Light Bowgun, here’s a detailed guide that will help you get a build set up quickly.
Light Bowgun Build Overview

Light Bowgun is all about ammo management, and you need to pick up the correct ammunition for the monster. While Pierce is a general-purpose build you can go with, Light Bowguns have brilliant elemental setups, and it’s worth getting one for each element.
Since it has a long reach, you can relax about avoiding attacks, but every now and then, if monsters leap onto you, you’ll need to dodge by rolling.
One key point to note about Light Bowguns is that you have to craft certain ammo, so collecting all the necessary materials is important. While Normal and Pierce ammo is infinite in number, elemental ammo is limited, and you should make sure you have enough in stock before jumping into a fight.
Finally, the Light Bowgun has very different Decoration requirements from those of your standard melee weapons. As such, you will have to spend a while farming, especially because this game has restrictions on armor and weapon Decorations. As such, getting hold of the right equipment can take some time since you will have to rely on monsters spawning with the correct Decorations.
Ideally, any Tier 3 monster will reward the best Decorations, which include all the Tempered Apex monsters such as Nu Udra, Uth Duna, and Rey Dau. Tempered Arkveld and Gore Magala are also some of the best sources for Decorations.
Light Bowgun Build Guide
Here’s a rundown of what your Light Bowgun build should look like:
| Gear Slot | Gear Name | Decorations |
|---|---|---|
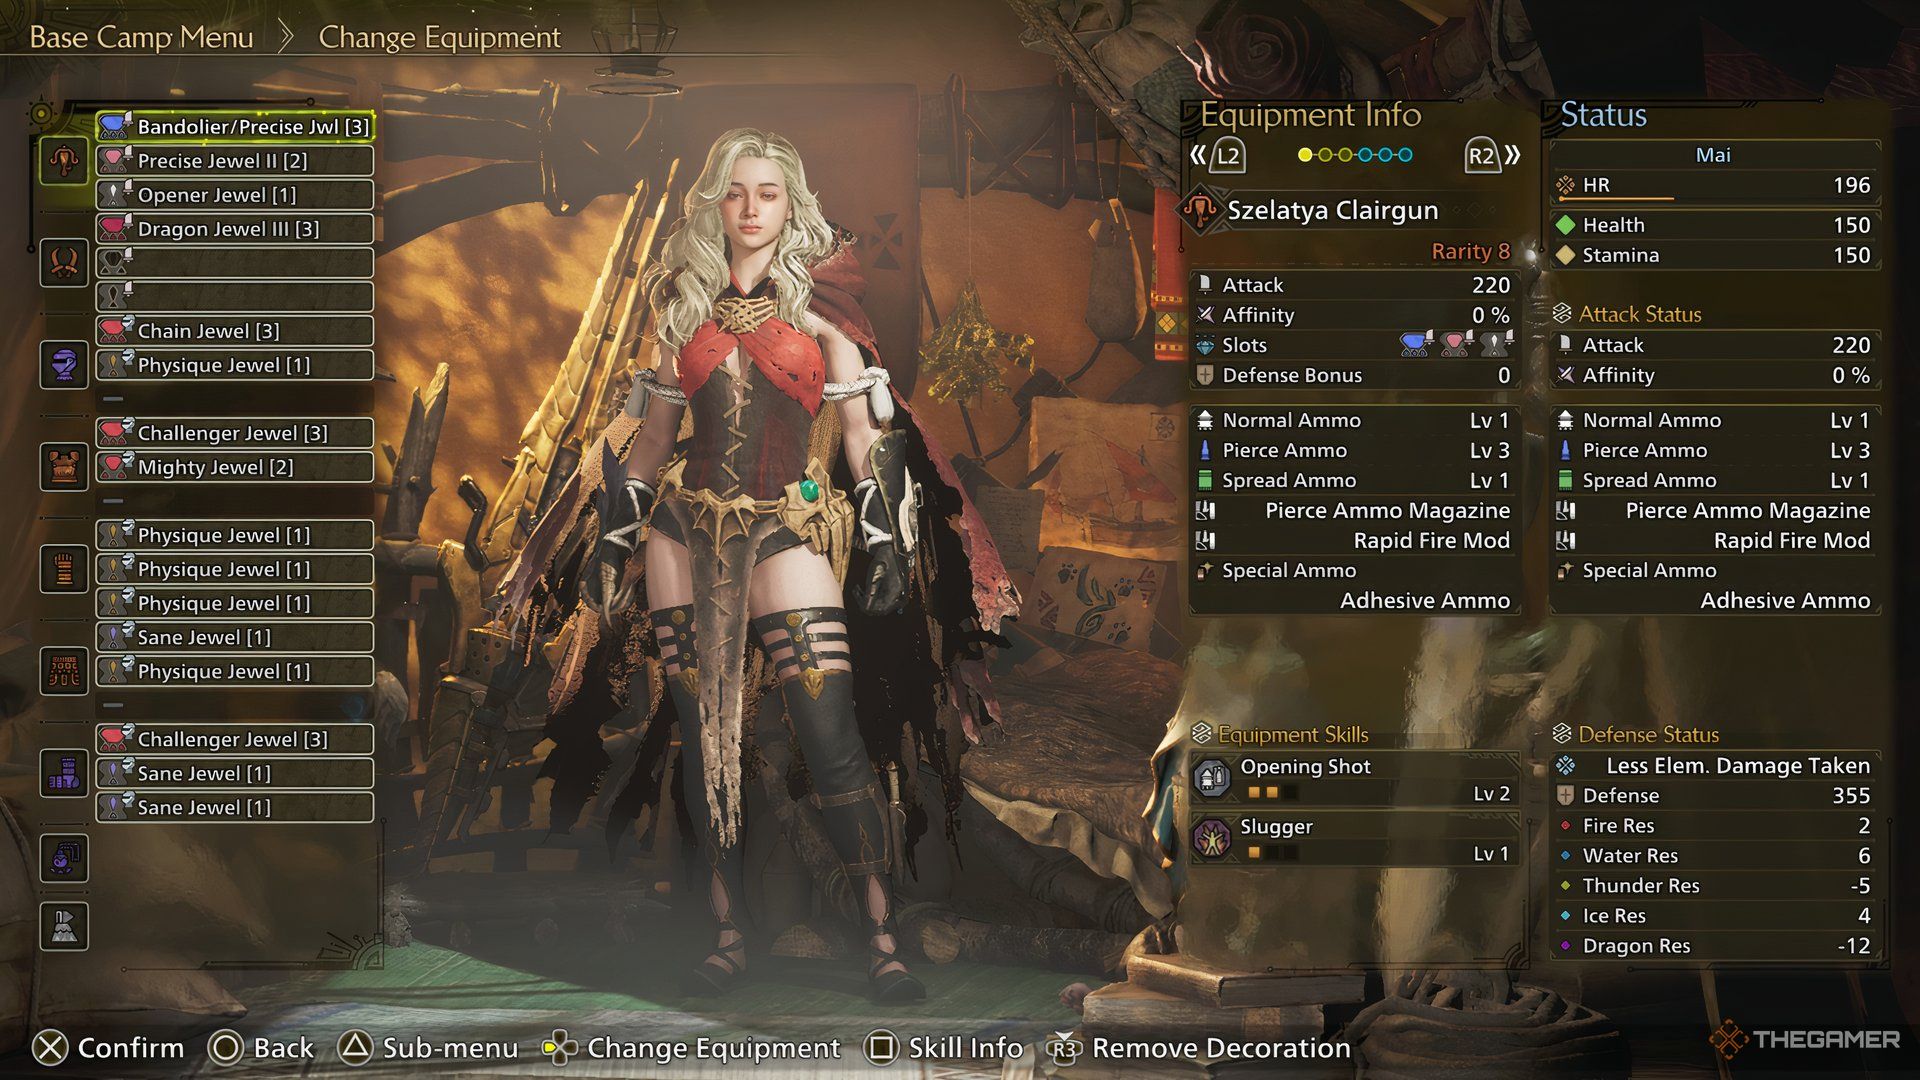
| Weapon | Szelatya Clairgun (Rey Dau Gear) | Bandolier/Precise Jewel (3), Precise Jewel (2), Opener Jewel (1) |
| Head | Gore Helm Beta (Gore Magala Gear) | Chain Jewel (3), Physique Jewel (1) |
| Chest | Arkvulcan Mail Beta (Arkveld Gear) | Challenger Jewel (3) Mighty Jewel (2) |
| Arms | G. Arkveld Vambracers Beta (Guardian Arkveld Gear) | Physique Jewel (1) x3 |
| Waist | Arkvulcan Coil Beta (Arkveld Gear) | Sane Jewel (1), Physique Jewel (1) |
| Legs | Gore Greaves Beta (Gore Magala Gear) | Challenger Jewel (3), Sane Jewel (1) x2 |
| Charm | Challenger Charm 2 |
In the weapon selection, the Szelatya Clairgun stands out as the top pick due to its additional benefits beyond the Level One, Level Two, and Level Three Jewel slots. It also provides a Level Two Opening Shot.
Opening Shot is very important as it increases reload speed and ammo damage for Bowguns. Additionally, you need to slot in Bandolier/Precise Jewel Level Three for Tetrad Shot and Ballistics. You also need Precise Jewel Level Two to increase the level of Ballistics and, finally, Opener Jewel Level One to take Opening Shot to maximum.
In the Customize Bowgun section, make sure you select Pierce Ammo Magazine as part of the Equipped Mods. If you’re going for an elemental Light Bowgun, make sure to go with an Artian weapon and use Elemental Ammo Powder. For an elemental setup, you will need one Level Three Jewel for the element, Critical Element, and Opening Shot.
In the head slot, go with Gore Helm Beta, which comes with a Level Three and a Level One Jewel slot. In the Level Three slot, go with Chain Jewel Level One for Burst Level One, and in the Level One slot, go with Physique Jewel Level One for Constitution Level One.
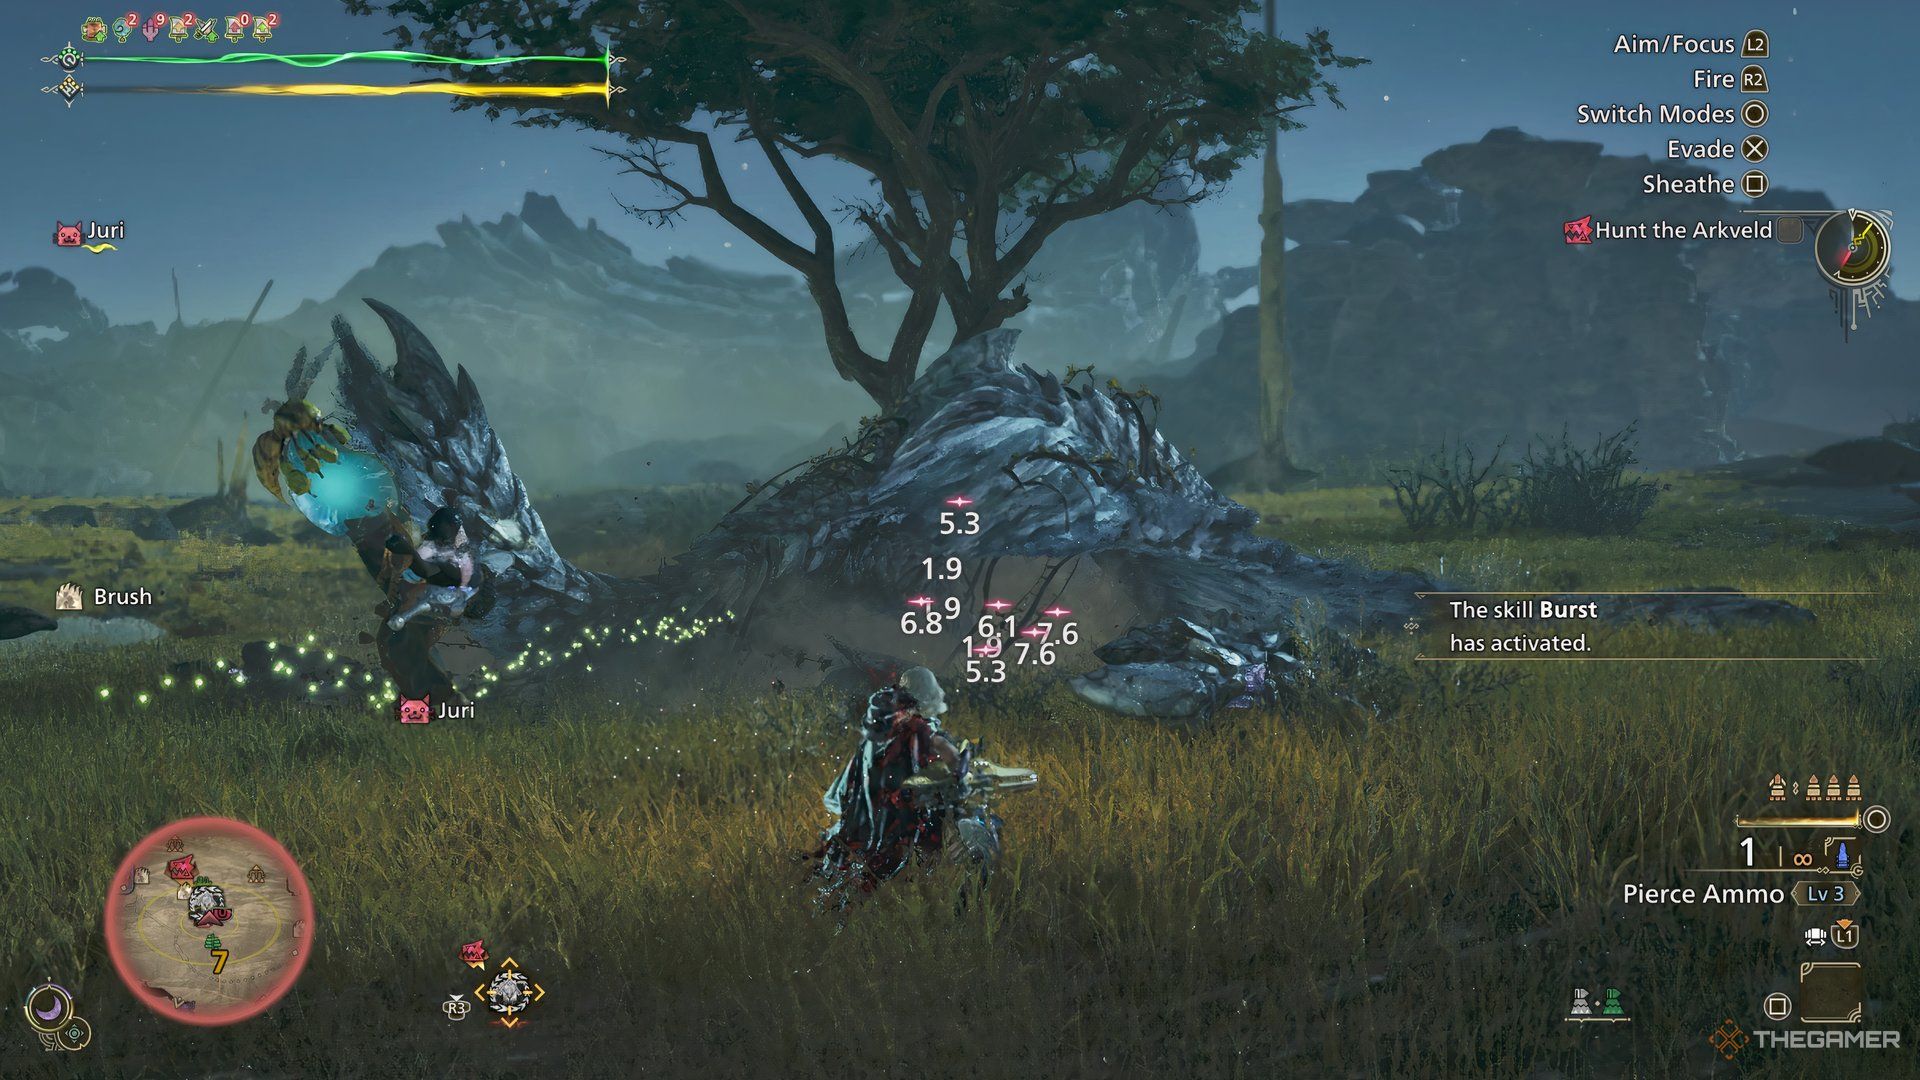
Upon landing a series of attacks, Burst provides an attack boost and an elemental surge. Meanwhile, Constitution helps slow down the rate at which stamina is depleted.
In the chest slot, go with Arkvulcan Mail Beta, which is the Arkveld armor piece, and it comes with a Level Three and a Level Two Jewel slot. Here, you need to slot in a Challenger Jewel Level Three for Agitator and a Might Jewel Level Two for Maximum Might.
In an enraged state, monsters experience increased aggression and affinity, whereas having a full stamina bar grants affinity through the use of Maximum Might.
In the arms slot, go with G.Arkveld Vambracers Beta, which is the Guardian Arkveld gear, and it has three Level One Jewel slots. You will need to slot in three Physique Jewel Level One here to increase the level of the Constitution buff. You also get Weakness Exploit Level Two from this armor piece.
In the designated slot, insert the Arkvulcan Coil Beta, which is associated with the Arkveld gear collection. This piece requires a Sane Jewel of Level One and a Physique Jewel of Level One. The Sane Jewel equips Antivirus, while the Physique Jewel maximizes your Constitution.
Finally, in the legs slot, go with Gore Greaves Beta, which is the Gore Magala gear and it has a Level Three and two Level One Jewel slots. Here you will need a Challenger Jewel Level Three and two Sane Jewels Level One.
The two-piece Gore Magala gear gives you the Gore Magala’s Tyranny buff, which inflicts you with Frenzy. Being aggressive on the monster cures the Frenzy debuff and gives affinity boost. This also triggers the Antivirus buff, which gives an even greater affinity boost.
In the Charm slot, go with Challenger Charm Two, as it provides Agitator Level Two, which further increases the level of the skill.
Skill Overview of Light Bowgun Build
Here’s how your skills will look like once the build is ready:
- Ballistics Level 3
- Opening Shot Level 3
- Tetrad Shot Level 3
- Weakness Exploit Level 5
- Constitution Level 5
- Agitator Level 4
- Antivirus Level 3
- Burst Level 1
You can drop the Chain Jewel Level Three and replace it with Challenger Jewel Level Three for maximum Agitator Level. Burst is a good skill, but if you don’t want it, that’s fine. You can also replace all the Challenger Jewels with Mighty Jewel Level Two for Maximum Might with increased affinity when stamina is full. However, Agitator gives more damage.
Tips To Play Light Bowgun Build
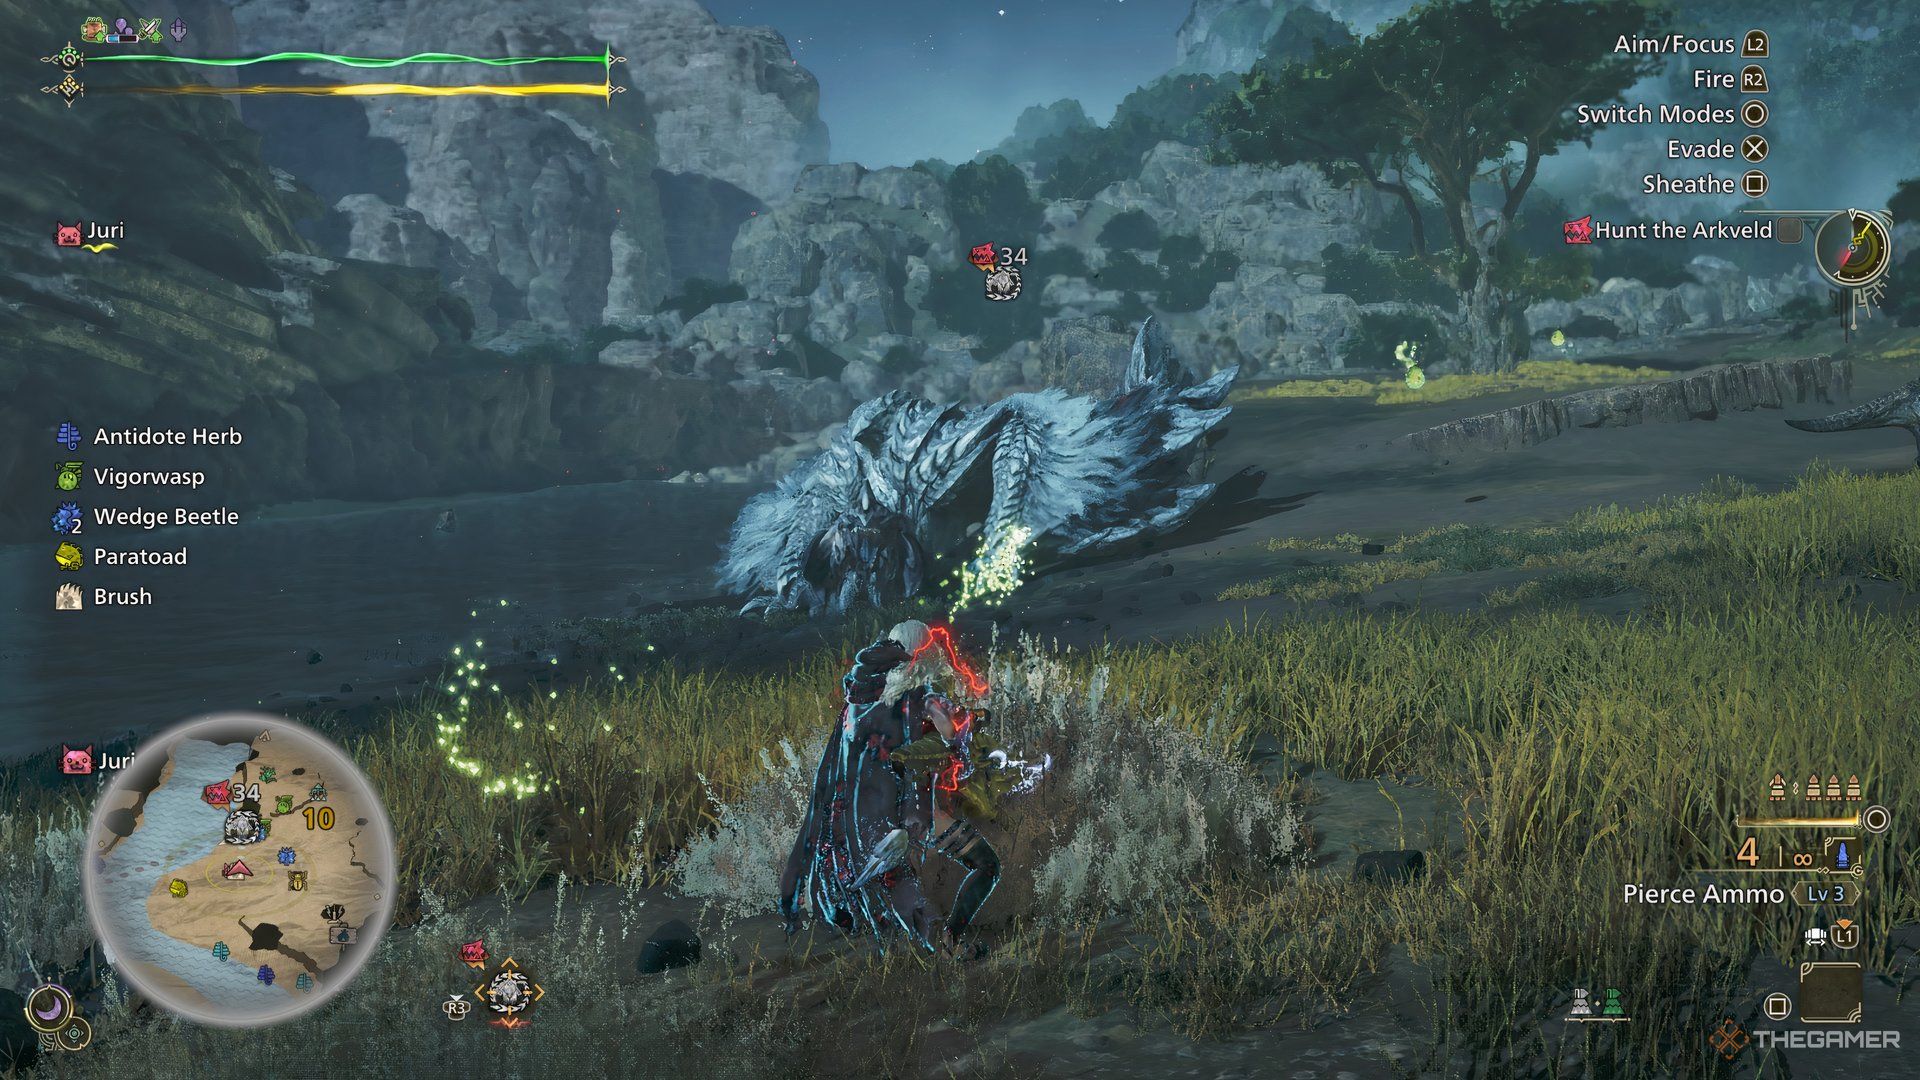
Playing the Light Bowgun build is very simple, as all you do is stand at a distance and shoot at the monster. However, you need to make sure that the correct ammo is selected. For instance, in this build, you need to make sure that you’re using the Pierce ammo, as that is how the build has been set up.
If you’re playing an elemental setup, you’ll have to make sure to collect the correct elemental ammo from your tent before jumping into a fight. If you don’t collect the elemental ammo, you won’t have it in your weapon, and you will waste a lot of time going back to the tent.
Finally, Light Bowgun has something called Rapid Fire Mode, which is denoted by a yellow bar below your ammo on the screen. You want to be in this mode as much as possible, but it isn’t infinite, and once the bar is drained out, you will have to stay in normal mode for a while before the bar is full again for Rapid Fire Mode to be active.
Read More
- Best Heavy Tanks in World of Tanks Blitz (2025)
- DBD July 2025 roadmap – The Walking Dead rumors, PTB for new Survivors, big QoL updates, skins and more
- PUBG Mobile Sniper Tier List (2025): All Sniper Rifles, Ranked
- Here Are All of Taylor Swift’s Albums in Order of Release Date (2025 Update)
- Stellar Blade New Update 1.012 on PS5 and PC Adds a Free Gift to All Gamers; Makes Hard Mode Easier to Access
- Beyoncé Flying Car Malfunction Incident at Houston Concert Explained
- Delta Force Redeem Codes (January 2025)
- [Guild War V32] Cultivation: Mortal to Immortal Codes (June 2025)
- Gold Rate Forecast
- COD Mobile Sniper Tier List Season 4 (2025): The Meta Sniper And Marksman Rifles To Use This Season
2025-03-18 22:50