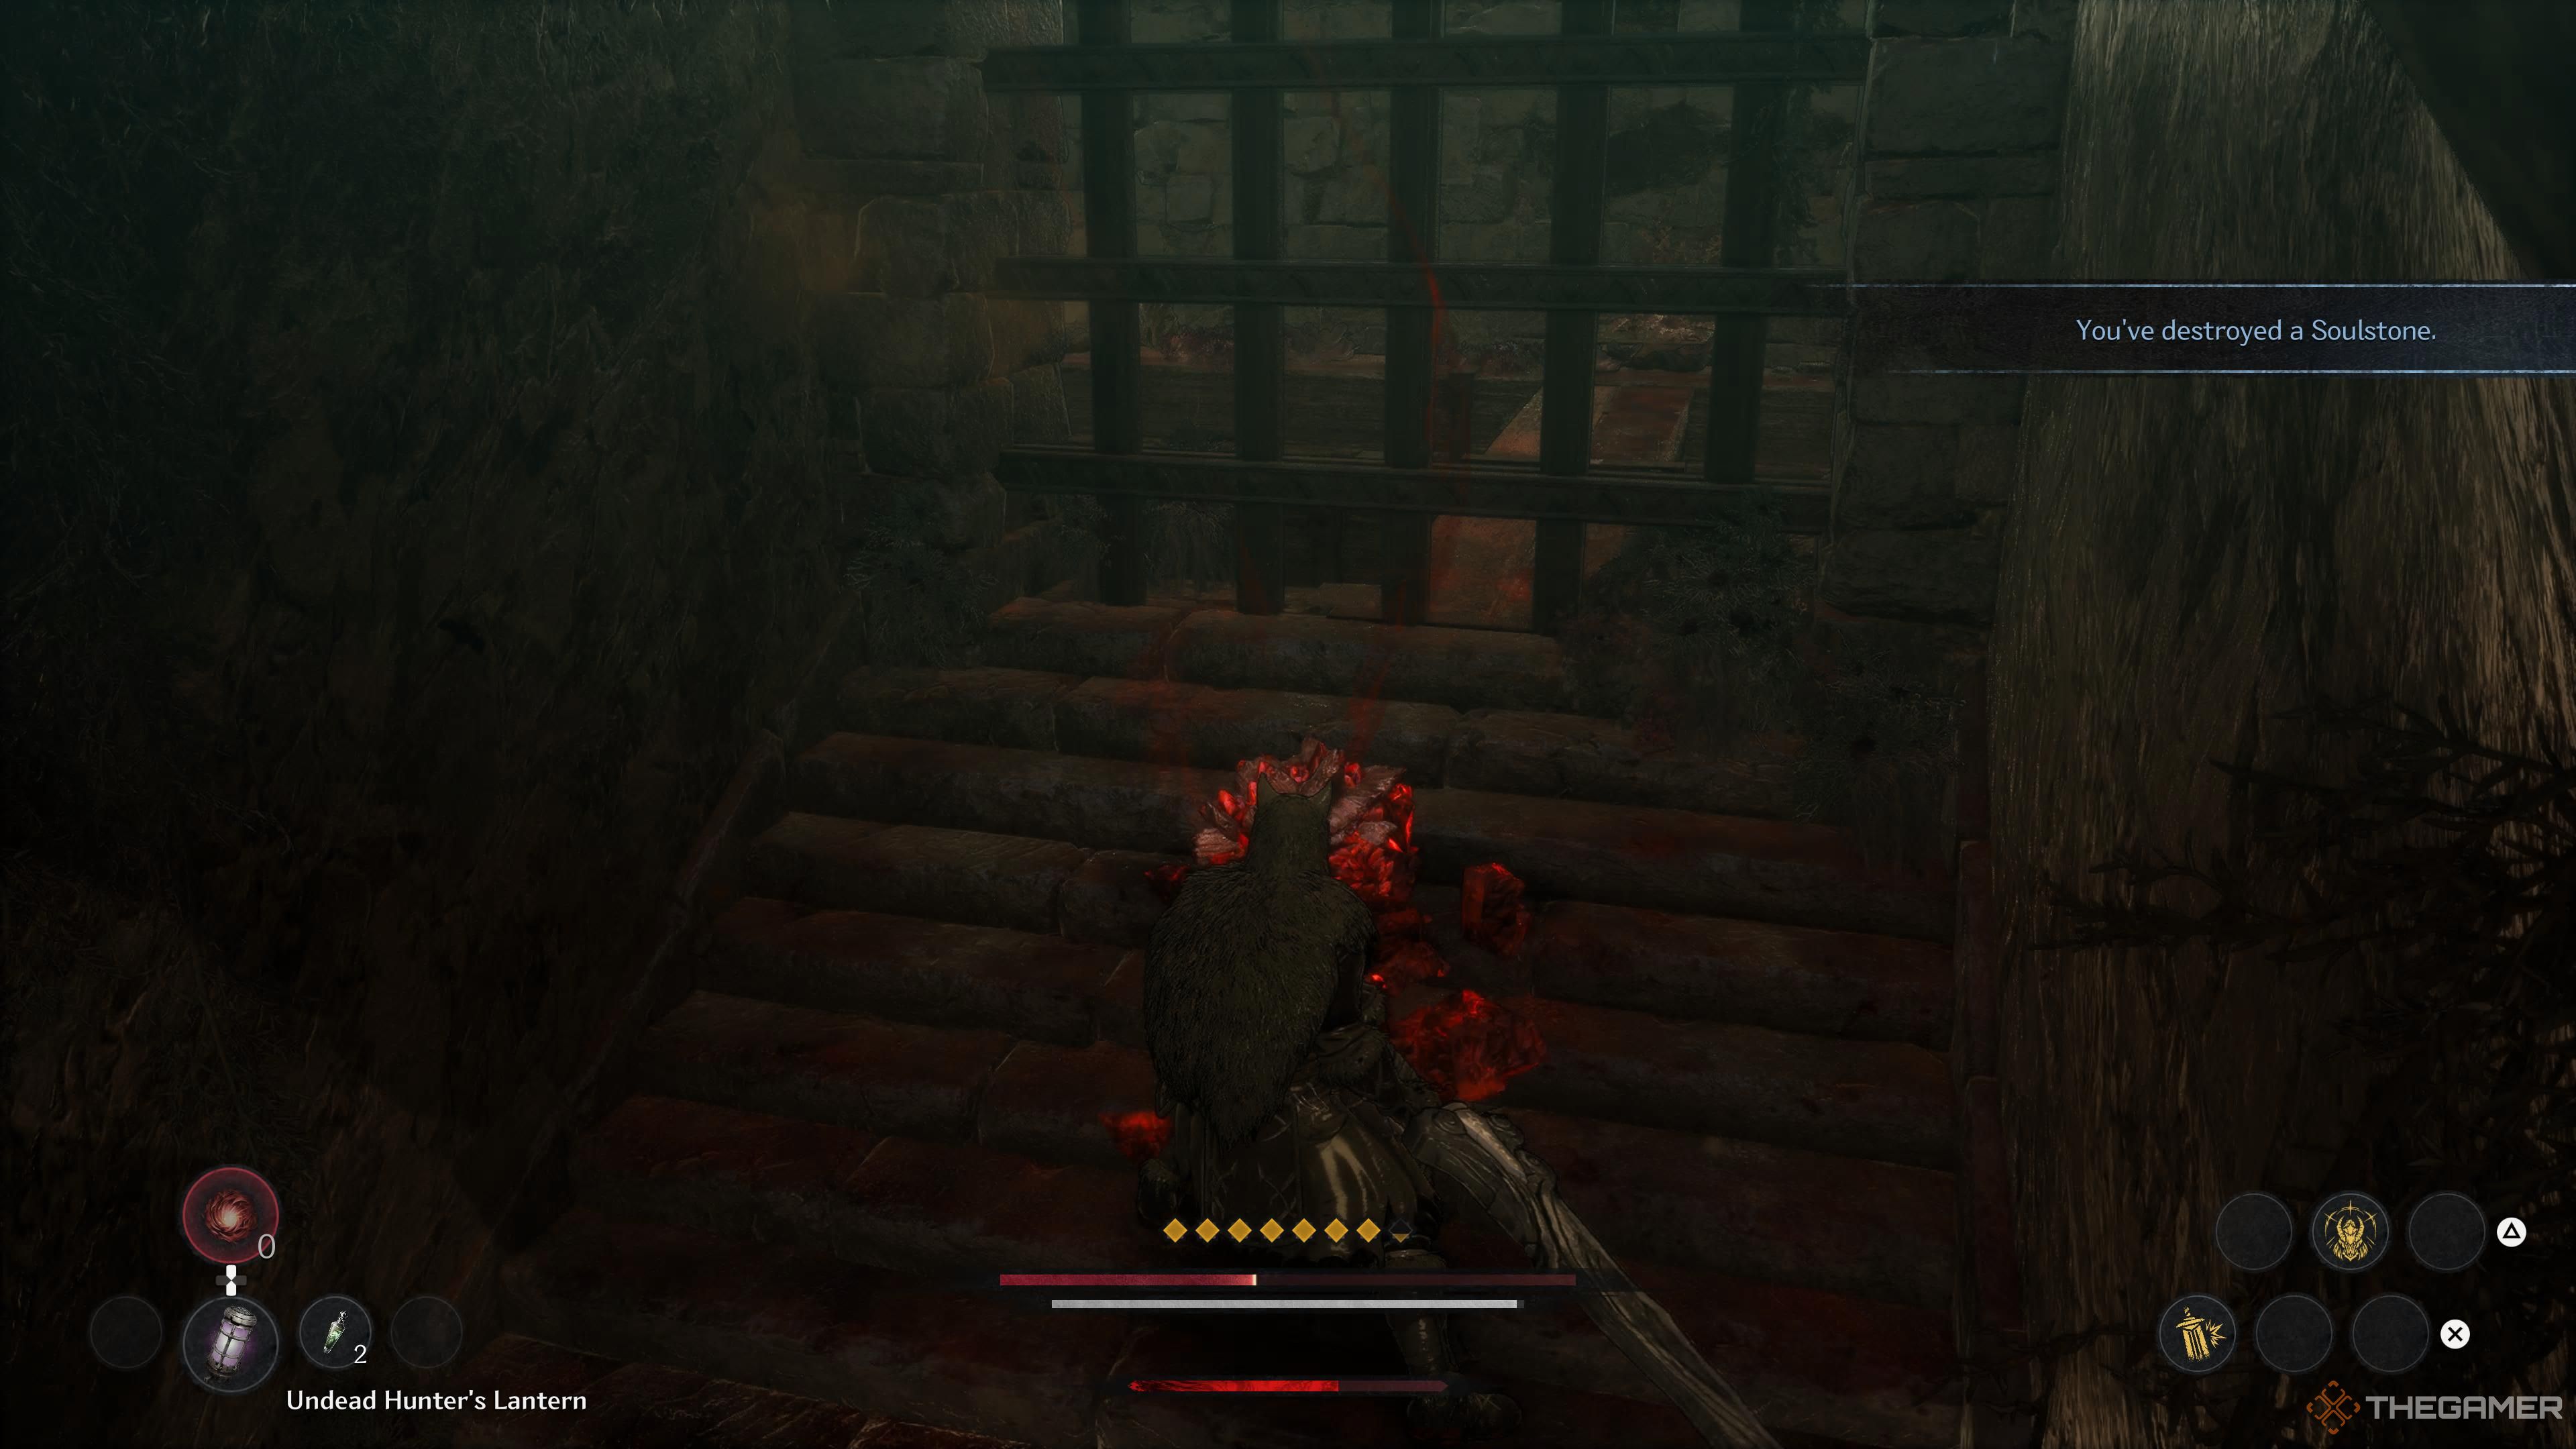
Navigating the turbulent realm of “The First Berserker: Khazan” can be quite challenging. Yet, you’re not alone in this endeavor as there are various aids available and hidden across the world to facilitate your quest. Among these resources, one particularly beneficial is the Soulstones – red mineral fragments found throughout each level that can enhance specific attributes that are otherwise tough to augment.
In the realm of Pell Los Empire, you’ll find a total of 100 Soulstones spread out. Some of these are concealed in difficult-to-access spots. This manual provides the exact locations of all Soulstones within each mission and offers guidance on how to approach them.
Charnak Mountain Range Soulstones

The initial significant area in the game, referred to as the Charnak Mountain Range, holds the first 20 Soulstones you’ll gather during your adventure. These items are dispersed throughout nine distinct missions, and once you’ve accessed each mission, they shouldn’t pose much difficulty in collecting them.
Main Mission #1 – Banished Hero
The first main mission of the game, titled Banished Hero, has two Soulstones for you to obtain.
- Soulstone #1 – From the Frosty Cave’s End Blade Nexus, head back into the cave and follow the path until the first break in the path. Turn left and then continue down this path until you see two enemies. To their left is a ledge that you can drop down, which leads to the first Soulstone of this level.
- Soulstone #2 – From the Frosty Cave’s End Blade Nexus, head outside the cave and progress down the main path until you reach the point where you need to fall down several platforms. Once you get past this point, continue forward until you see a lone Granite Jocko enemy, then turn around to see a slope. The second Soulstone for this mission is at the top of this slope.
Main Mission #2 – Trials Of The Frozen Mountain
In the game “Trials of the Frozen Mountain,” there are three collectible Soulstones as part of its primary objectives.
- Soulstone #1 – From the Snowfield Of Trials Blade Nexus, head forward until you see a slanted tree in the distance, then take a hard left. You’ll find this Soulstone tucked away in a nearby corner.
- Soulstone #2 – From the Frozen Lake Blade Nexus, head past the nearby bear enemy and progress until you walk past a slope going in the opposite direction. Go up that slope and defeat the three dog enemies that ambush you on your path. Once you reach the top, take a left and enter a nearby cave. The second Soulstone of this area rests at the end of this cave just past some soldier enemies.
- Soulstone #3 – Once you’ve unlocked the ladder shortcut near the Ice Canyon Blade Nexus, climb up and you’ll see the third Soulstone on a ledge about halfway up the ladder. You can either follow a nearby path from the top to reach this Soulstone on foot, or you can throw a javelin at it from where you can see it.
Main Mission #3 – Forgotten Temple
In the third major quest, referred to as “Forgotten Temple,” you’ll be led to the Embars Ruins, a place where you’ll find three more Soulstones.
- Soulstone #1 – From the Corner Leading to the Abandoned Plains Blade Nexus, take your first left and continue down the main path until you see a breakable barricade to your left. Break it and walk past it to find a Soulstone hidden in a nearby alcove.
- Soulstone #2 – From the Forgotten Temple Entrance Blade Nexus, head inside the temple and go past the three Dragonkin enemies in the center of the opening area. Go past the second set of stairs and into an obscured area with a few more enemies. Take them out and then look toward the back of this area to see some breakable jars, behind which is this area’s second Soulstone.
- Soulstone #3 – From the Beneath the Forgotten Temple Blade Nexus, progress until you have to defeat a Lunatic Destroyer Elite Enemy. Once you’ve done that, there will be a short puzzle where you need to turn three statues to face three identical statues in the distance. Once you’ve done that, all six statues will recede into the ground, revealing the third Soulstone behind the second set of statues in the distance. Use a javelin to destroy the last Soulstone in this level.
Main Mission #4 – First Act Of Revenge
In the fourth key objective, titled “First Act of Retribution,” you’ll be tasked with gathering three additional Soulstones as you progress through the stage.
- Soulstone #1 – From the Cabin on the Cliff Blade Nexus, take a left on the main path and head past the boar enemy. Head to the end of this short path and drop from a few platforms to reach a cave. Once inside, make your way to a ladder leading upwards, which will lead you right to the first Soulstone of this level.
- Soulstone #2 – From the Phraugh Village Dock Blade Nexus, progress until you unlock the shortcut in this area. Once you’ve done that, open the nearby door that lets you continue through the rest of the level. After opening this door, take a left to find a Soulstone tucked away in a nearby corner.
- Soulstone #3 – From the Central Storehouse Entrance Blade Nexus, progress down the main path until you defeat the Double-Edged Butcher Elite Enemy. You can find the third Soulstone of this level on a nearby platform to the area you fought the enemy in.
Main Mission #5 – Strange Stench
In the fifth major quest, dubbed “Strange Stench,” you’ll be led to a toxic, web-filled cavern where you’ll find three additional Soulstones waiting to be shattered by you.
The fifth significant mission, nicknamed “Funny Smell,” guides you into a harmful, spider-laden cave where you encounter more Soulstones to obliterate – a total of three.
- Soulstone #1 – From the Collapsed Mine Blade Nexus, progress through the area as you would normally by climbing the rafters until you unlock the first shortcut back to the Blade Nexus. Once you’ve done that, continue just past the Red-Eyed Boulder Bat enemy, after which you’ll find a few spiders and a Crypt Devourer. Once you’ve defeated all of these, head to the edge of the nearby cliff where you’ll see a Soulstone just past two waterfalls, which you can destroy with a well-placed javelin.
- Soulstone #2 – From the Poisoned Depths Blade Nexus, head down the spiraling slope while keeping a close eye on the area to the right of the slope. If you look down off the right side of this slope, you should see a Soulstone hidden in an alcove between the slope and the wall. You can either walk down to the Soulstone or destroy it with a javelin from above.
- Soulstone #3 – From the Bottom of the Cave Blade Nexus, head into the nearby poison pool and defeat the few spider enemies nearby. From there, stick to the right side of the poison pool, and you should eventually find the third Soulstone of this area tucked behind some rocky formations.
Side Mission – Jar Enthusiasts
This side quest mainly serves to introduce a new collectible within the game called Jarlings. Additionally, it offers an opportunity to gather two Soulstones during this particular quest, which is known as “Jar Enthusiasts.
- Soulstone #1 – From the Jar Observatory Blade Nexus, progress through the area until you fight an Undead Assassin enemy near an open area with several flowers. You can find this first soulstone of this mission behind a large jar in the corner of this area.
- Soulstone #2 – From the Jar Observatory Blade Nexus, progress all the way to the end of this area near where you find the sixth Jarling. You can find the second Soulstone tucked away behind a wooden structure. This Soulstone is located in the exact same spot as the second Soulstone in the mission First Act of Revenge, since these two missions share the same map.
In the course of playing the game, you’ll come across a secondary mission called “Jar Enthusiasts” which is the second such mission you can access. Interestingly, the first side mission, labeled as “Stormpass’ Phantom of Combat”, doesn’t include any Soulstones. Consequently, it isn’t highlighted separately in this guide. It’s worth noting that this mission, along with one other in the game, is unique in not having any Soulstones.
Side Mission – Night Of Tragedy
During your journey through the level, you’ll find an additional pair of Soulstones hidden within the Night of Tragedy side quest.
- Soulstone #1 – From the Bhangau Lot Blade Nexus, head inside the house on the left underneath the wooden bridge with the archer on top, You’ll find the first Soulstone of this level sitting inside out in the open.
- Soulstone #2 – From the Bhangau Lot Blade Nexus, progress through the area until you drop down from a ledge. To your right there should be another wooden bridge, where you should also see a Soulstone just under it that is slightly out of your reach. Use a javelin to destroy this one.
Side Mission – Blacksmith’s Heirloom
In the Charnak Mountain Range, there are still two Soulstones remaining for you to gather in the final side quest, titled Blacksmith’s Heirloom.
- Soulstone #1 – From the Dead Spider’s Lair Blade Nexus, defeat the Granite Jocko and Wild Jocko enemies in the area, then turn left near where the Granite Jocko was patrolling prior to your fight. You should see a Soulstone tucked away next to a ledge.
- Soulstone #2 – From the Jocko Hill Blade Nexus, defeat the Red-Eyed Boulder Bat Elite Enemy as well as the several Wild Jocko enemies in the area. Once you’ve done that, you should see a wooden staircase nearby, at the top of which is the second Soulstone of this level.
Pell Los Plateau Soulstones
In The First Berserker, the second area, Khazan, specifically the Pell Los Plateau, hosts twenty-eight Soulstones hidden in eleven distinct missions. These levels are tougher than the Charnak Mountain Range and offer more content within each mission, which means you might find it challenging to locate everything in this region compared to the one you’ve previously explored.
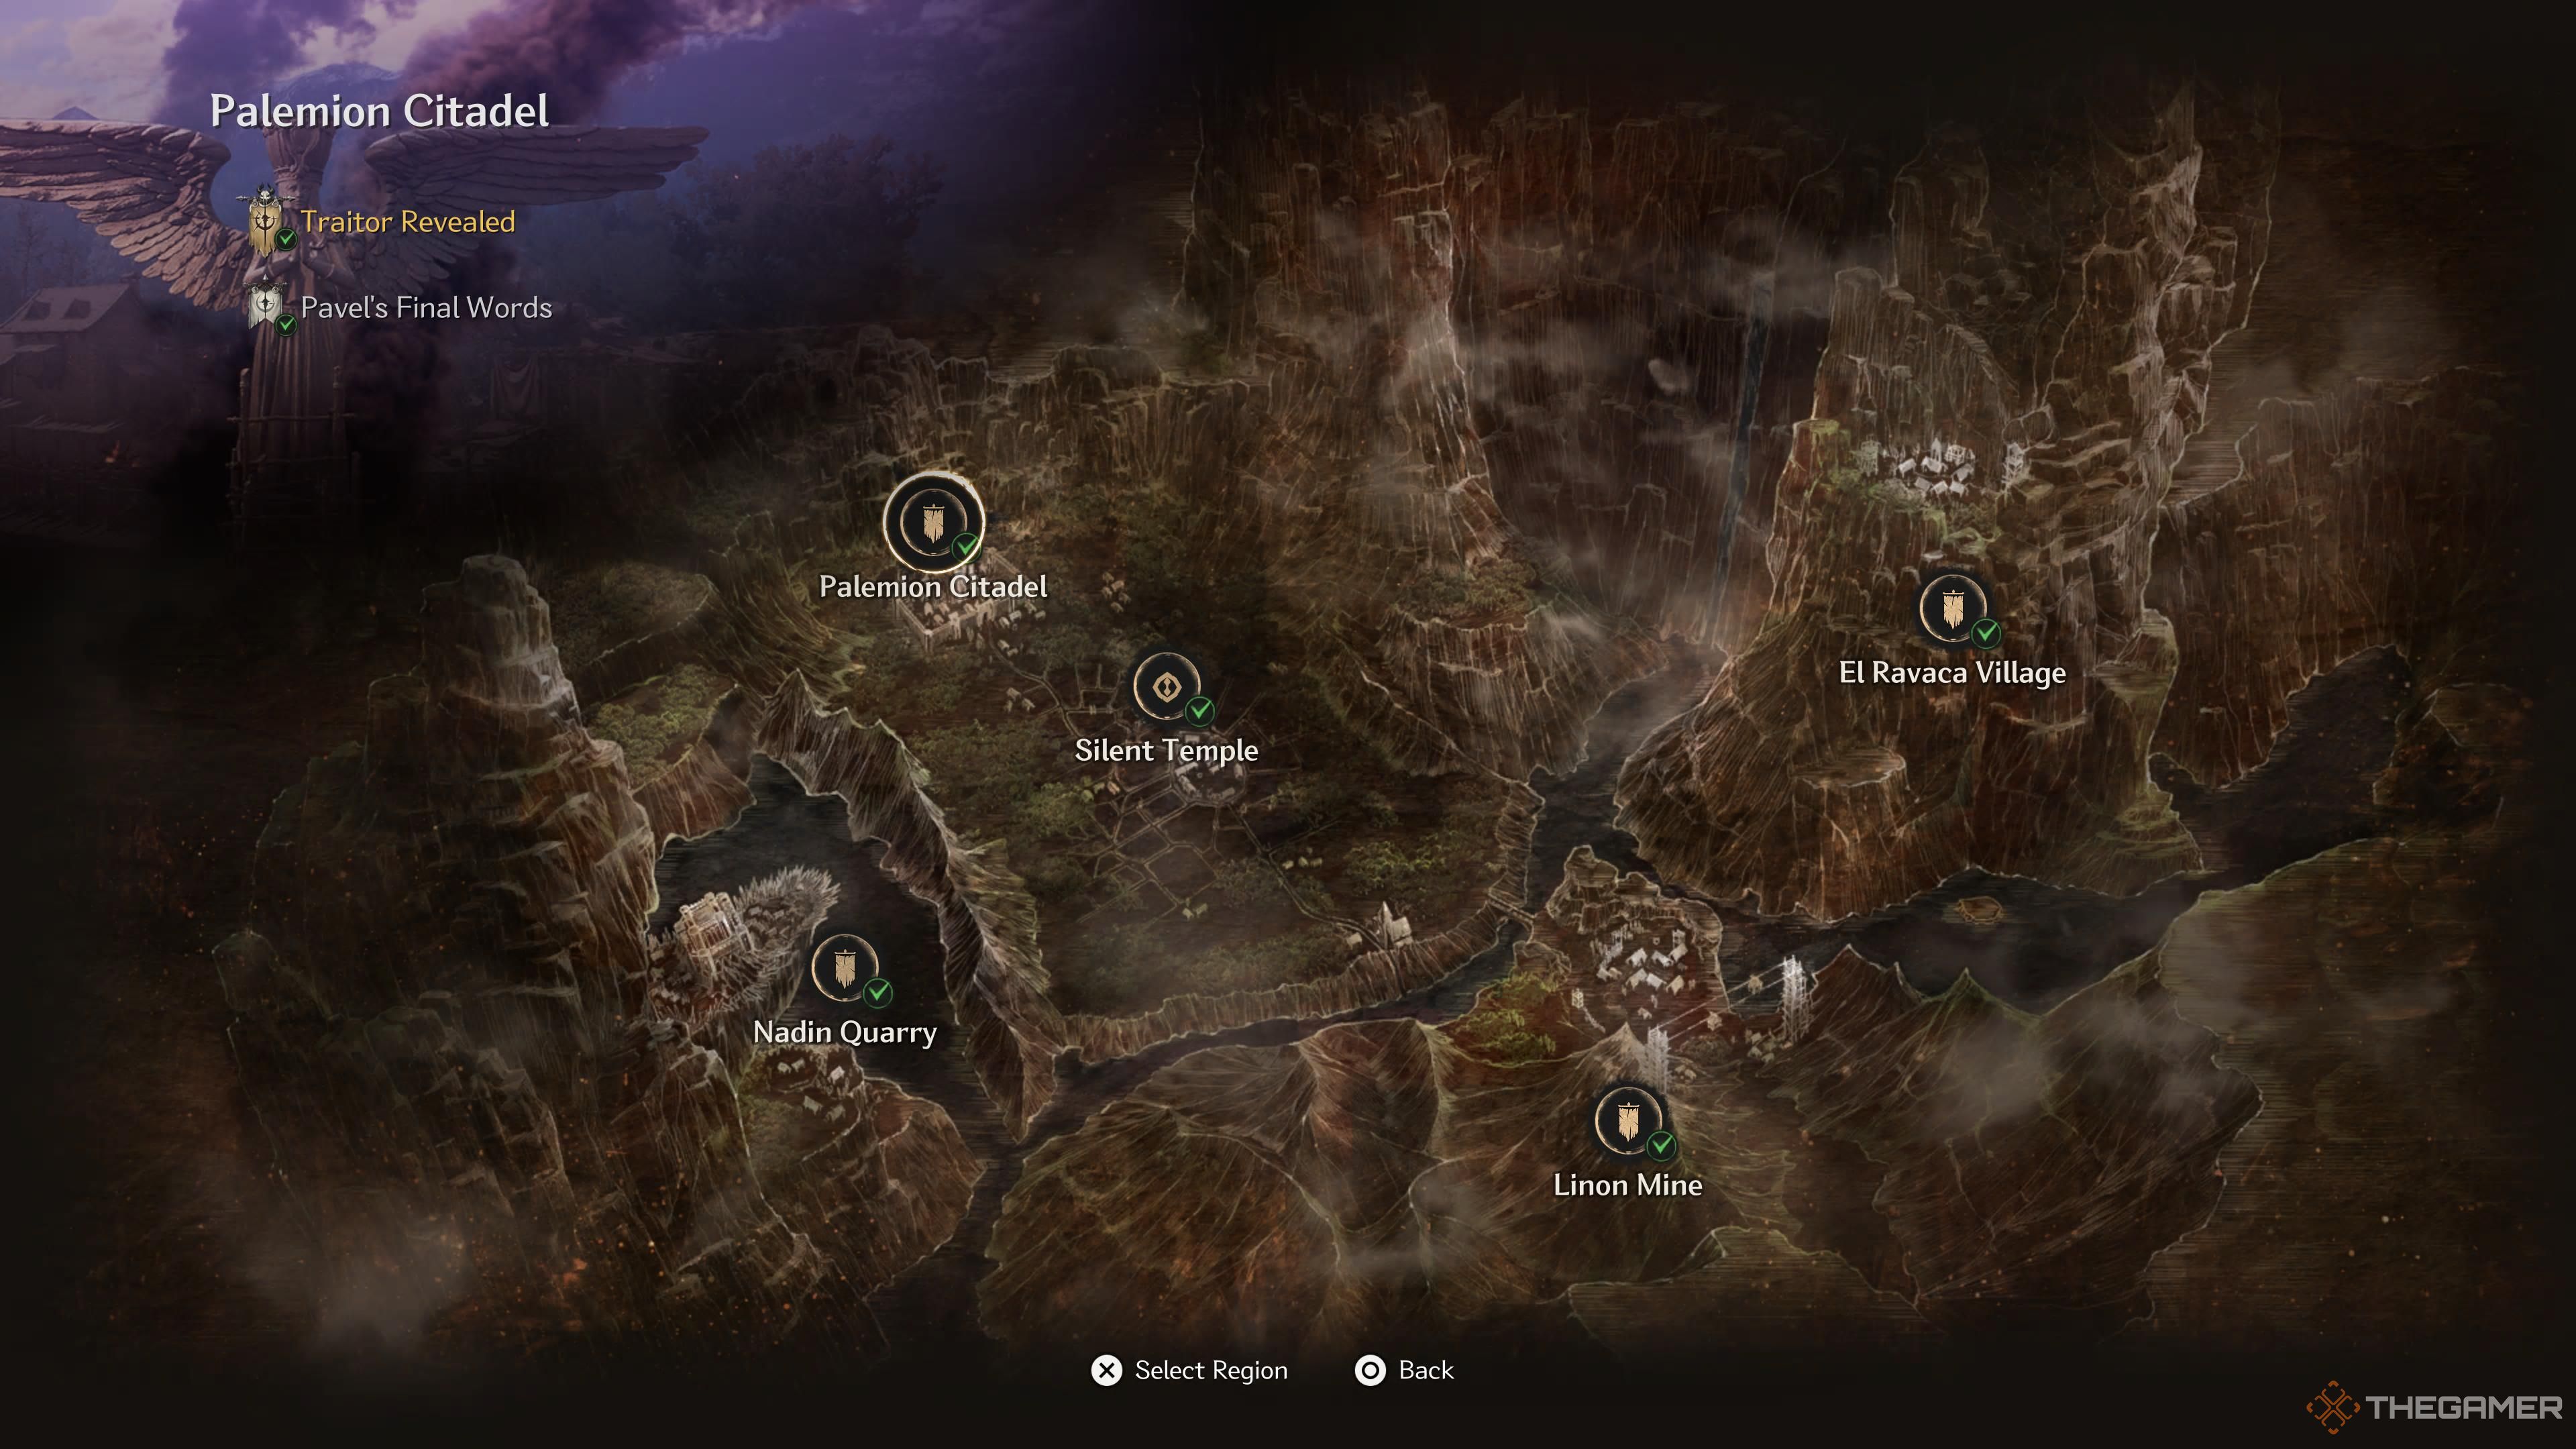
Main Mission #6 – Traitor Revealed
In the sixth key quest of the game called “Traitor Revealed,” you’ll find yourself gathering four distinct Soulstones.
For your sixth major task in the game named “Traitor Revealed,” you’ll be searching for and collecting a total of four unique Soulstones.
- Soulstone #1 – From the Burning City Blade Nexus, progress through the area until you climb up a ladder onto the roof. If you turn around once you reach the top, you’ll see a Soulstone on a nearby roof that you can destroy by throwing a javelin.
- Soulstone #2 – From the Burning City Blade Nexus, progress until just before you get to the Fallen Citadel Blade Nexus. Once you’re in the open area that leads to the next Nexus, head to the nearby alley that allows you to enter the house that leads to a raised bridge you can lower. Instead of cutting the chain to lower this bridge, head back inside and you’ll see a Soulstone at the end of the platform.
- Soulstone #3 – From the Fallen Citadel Blade Nexus, progress until you get the Palemion Citadel Key. From there, open up the gate near the Nexus, and progress until you see a Soldier and an Archer next to a set of stairs. Head downstairs and then keep going until you see an Axe-Wielding Soldier and a Dog enemy at the end of the hallway. On the left should be an archway that’s blocked up with bricks, which you can actually break down by attacking it, which reveals a Soulstone behind it.
- Soulstone #4 – From the Fallen Citadel Blade Nexus, progress through the level until you encounter the NPC named Andell. After talking to him, drop down onto the nearby platform and descend the ladder, before dropping onto several more platforms until you reach the bottom. From there, turn left and climb up the nearby ladder, and continue until you reach an elevator. Before you get on, look across from you to see a Soulstone on a wooden beam that you can destroy by throwing a javelin at it.
Main Mission #7 – Veiled Knives
In the seventh significant quest of The First Berserker: Khazan, labeled “Veiled Knives,” there are four Soulstones concealed in challenging spots across the stage.
- Soulstone #1 – From the Quarry Camp Site Blade Nexus, progress through the area until you unlock the first shortcut back to this checkpoint. From there, continue until you defeat the first Elite Enemy of this area, then climb up the nearby ladder. There will be several spider enemies around here, including a large spider that keeps spawning smaller exploding spiders to charge at you. Once you defeat the largest spider, turn to your right and you should see the first Soulstone of this level.
- Soulstone #2 – From the Bandit’s Citadel Blade Nexus, go up the stairs to your left, defeat the enemies, and then take the next set of stairs downward into the nearby building. You’ll see the second Soulstone just behind a small group of enemies.
- Soulstone #3 – From the Bandit’s Citadel Blade Nexus, progress until you drop down next to two sets of stairs, one going up and one going down. Head down the set of stairs to the right and break through the barricade. The third Soulstone will be at the end of this short passage behind some enemies.
- Soulstone #4 – From the Bandit’s Citadel Blade Nexus, progress until you get to the pair of staircases near Soulstone #3. This time, go up the stairs on your left and go across the bridge. Once you get across, drop down and open up the nearby door to create a shortcut back to the Blade Nexus. Once you’ve done that, head to the top of the big staircase and look to your left, where you’ll see a Soulstone on a raised platform that you can destroy with a javelin.
Main Mission #8 – Devoured Village
In The First Berserker’s eighth primary mission, Khazan (also called Devoured Village), there are a grand total of four soulstones that need your destruction scattered across the region for you to tackle.
- Soulstone #1 – From the Village Entrance Blade Nexus, turn around and head back to the beginning of the area, near where the initial cutscene for this mission took place. Once you’re there, look to your left and you’ll see the first Soulstone of this level in an alcove.
- Soulstone #2 – From the Underground Water Facility Blade Nexus, progress until you’ve opened the shortcut back to the Nexus. Once you’ve done that, head back through the gate and look to your right to see a breakable barricade. Destroy that and enter the next room to discover the second Soulstone in this level.
- Soulstone #3 – From the Sinister Prison Blade Nexus, progress until you’ve opened the shortcut back to the Nexus, then proceed until you see the cutscene where Elamein is trapped. After that, head up the stairs into the nearby room with a few Dragonkin enemies. One of these enemies will be blocking a tight corridor, at the end of which is a glowing book. Interact with this glowing book to cause the bookshelf to move aside, revealing the third Soulstone for this level.
- Soulstone #4 – From the Underground Laboratory Entrance Blade Nexus, progress until you reach an elevator that acts as a shortcut to the Blade Nexus. Once you’ve activated the elevator, hop back on it and walk off once you see the opening in the wall that leads to a secret area. From there, turn left and drop onto the pipes, then follow them until you enter the room with the fourth Soulstone for this level.
Main Mission #9 – Inconceivable Truth
For the Pell Los Plateau Region’s ultimate objective, named “Incredulous Reality,” there are three additional soulstones left for collection as you traverse this region.
- Soulstone #1 – From the Imperial Army Lookout Post Blade Nexus, open the door and head down the set of stairs in front of you. Once you’ve defeated the enemies in front of you, head inside the house directly ahead and then exit through the door on your left. From there, turn to your right and circle around the house, where you’ll see a wooden shield blocking a path. Break through this shield and you’ll see the first Soulstone of this area guarded by a sword-wielding enemy.
- Soulstone #2 – From the Underground Shaft Blade Nexus, look up and to the right to see a Soulstone sticking out on a wooden beam. You can either destroy this right now with a well-thrown javelin, or progress through the area until you unlock the shortcut back to this Blade Nexus, which is right next to this Soulstone, allowing you to destroy it on foot.
- Soulstone #3 – From the Cave of Gloom Blade Nexus, drop down and head to the right. Once you’ve defeated the nearby enemies, keep an eye on the right side of this pathway, as the third Soulstone for this area is hidden by some of the red crystals on the walls.
Side Mission – Kaleido
The side mission Kaleido contains only one Soulstone for you to obtain.
- Soulstone #1 – From the Depths of the Temple Blade Nexus, turn around and essentially go through the level in reverse. Once you climb the staircase past the row of flamethrowers, you’ll reach a ladder that goes down. If you look across from that ladder, you should see a lone Soulstone on top of a wall that you can destroy by throwing a javelin.
Side Mission – Pavel’s Final Words
During your exploration, you’ll find two Soulstones hidden within the game zone in the side quest titled “Pavel’s Last Words”. Enjoy your hunt!
- Soulstone #1 – From the Path to the Citadel Blade Nexus, exit the initial room then take a left, then turn right to face the main hallway. Instead of taking the next right that leads to the next Nexus, continue straight into a room with several enemies and a wooden coffin, behind which is the first Soulstone for this side mission.
- Soulstone #2 – From the Cavern Beneath the Citadel Blade Nexus, turn around and head back up the elevator that led you to this Nexus in the first place. If you haven’t already defeated the Knivesveil Leader Elite Enemy, go ahead and do so before facing the opposite side of the hallway from the elevator. Looking up here will reveal the second Soulstone for this side mission.
Side Mission – Human Xilence
In the upcoming side quest titled “Human Xilence,” your journey centers around a benevolent Dragonkin character named Xilence. This initial adventure with Xilence offers an exciting opportunity for you to discover two fresh Soulstones, essential items to aid him in his pursuit of vengeance.
- Soulstone #1 – From the Cavern Corridor Blade Nexus, progress through the area until just after you climb up the first ladder. Once you’re at the top, turn right and fight a nearby spear-wielding Dragonkin enemy. In the area with this enemy should be two statues facing each other, with the one on the right holding a Soulstone in its hand that you can destroy with a javelin.
- Soulstone #2 – From the Main Cavern Stairway Blade Nexus, turn around and go back down the elevator. From there, backtrack through the hallway with a Dragonkin Brute enemy and some archers, until you reach a door that should be on your right. Enter that door and take the next right, fighting off some more Dragonkin enemies until you eventually find a Soulstone tucked away in a corner.
Side Mission – Final Conquest
In Xilence’s storyline, the side quest named “Final Conquest” comes as the second in a series, offering an opportunity for you to gather additional Soulstones.
- Soulstone #1 – From the Destroyed Corridor Blade Nexus, progress through the area until you climb up the first ladder past some Dragonkin enemies. Instead of going forward to fight the Lunatic Destroyer Dragonkin enemy, turn right and go down the nearby staircase. You’ll find the first Soulstone in this level at the end of this short path.
- Soulstone #2 – From the Silent Ground Blade Nexus, turn around and look up toward the top of the nearby gate to see the second Soulstone of this level, which you can easily destroy by throwing a javelin.
Side Mission – Why Have You Forsaken Us?
In this optional quest named “Why Have You Left Us Behind?”, you’ll find three fresh soulstones scattered across the stage for you to gather.
- Soulstone #1 – From the Laboratory Wing Entrance Blade Nexus, progress through the area until just before the first Elite Enemy. Before descending the ladder to fight it, destroy the nearby test tube to discover the first Soulstone in this mission.
- Soulstone #2 – From the Sector No. 4 Laboratory Entrance Blade Nexus, exit the room and head straight into the next room. Turn left and you’ll see a statue across a short gap, with another Soulstone next to it, which you can take out with a javelin.
- Soulstone #3 – From the Sector No. 4 Laboratory Entrance Blade Nexus, head down the elevator shortcut you unlocked earlier, and head into the room with several lasers and enemies. Toward the far end of this room is a breakable test tube, behind which is the third and final Soulstone of this side mission.
Side Mission – Escaping Linon Mine
In the second-to-last side quest of the Pell Los Plateau Region, named “Escaping Linon Mine,” there are still two more Soulstones left to be gathered.
- Soulstone #1 – From the Mine No. 2 Central Management Hub Blade Nexus, progress through the area until just after you climb up the first ladder. From there, climb up the next two sets of stairs while keeping a lookout on the right for a Soulstone. You can actually see both Soulstones from this area, but this first one is easier to get from here with a javelin, since it’s closer and behind some spider eggs you can see from your vantage point.
- Soulstone #2 – From the Mine No. 2 High Ground Blade Nexus, descend the nearby ladder to find the Soulstone next to some large reddish gemstones. You could also destroy this one earlier in the level by throwing a javelin if you so desire.
Side Mission – Last Command
In the Pell Los Plateau area of The First Berserker: Khazan, the concluding side quest named “Last Command” offers a single Soulstone for you to acquire.
- Soulstone #1 – From the Execution Ground Blade Nexus, turn around and head down the main set of stairs. On your right, you should see a Soulstone that you can destroy with a javelin.
Heart Of Pell Los Soulstones
In The First Berserker: Khazan, the third area called Pell Los Core, contains 33 Soulstones hidden within 13 distinct missions. With the bosses being more powerful than ever and the nearby enemies growing stronger too, you’ll need to stay alert if you want to gather these power-ups without any issues.
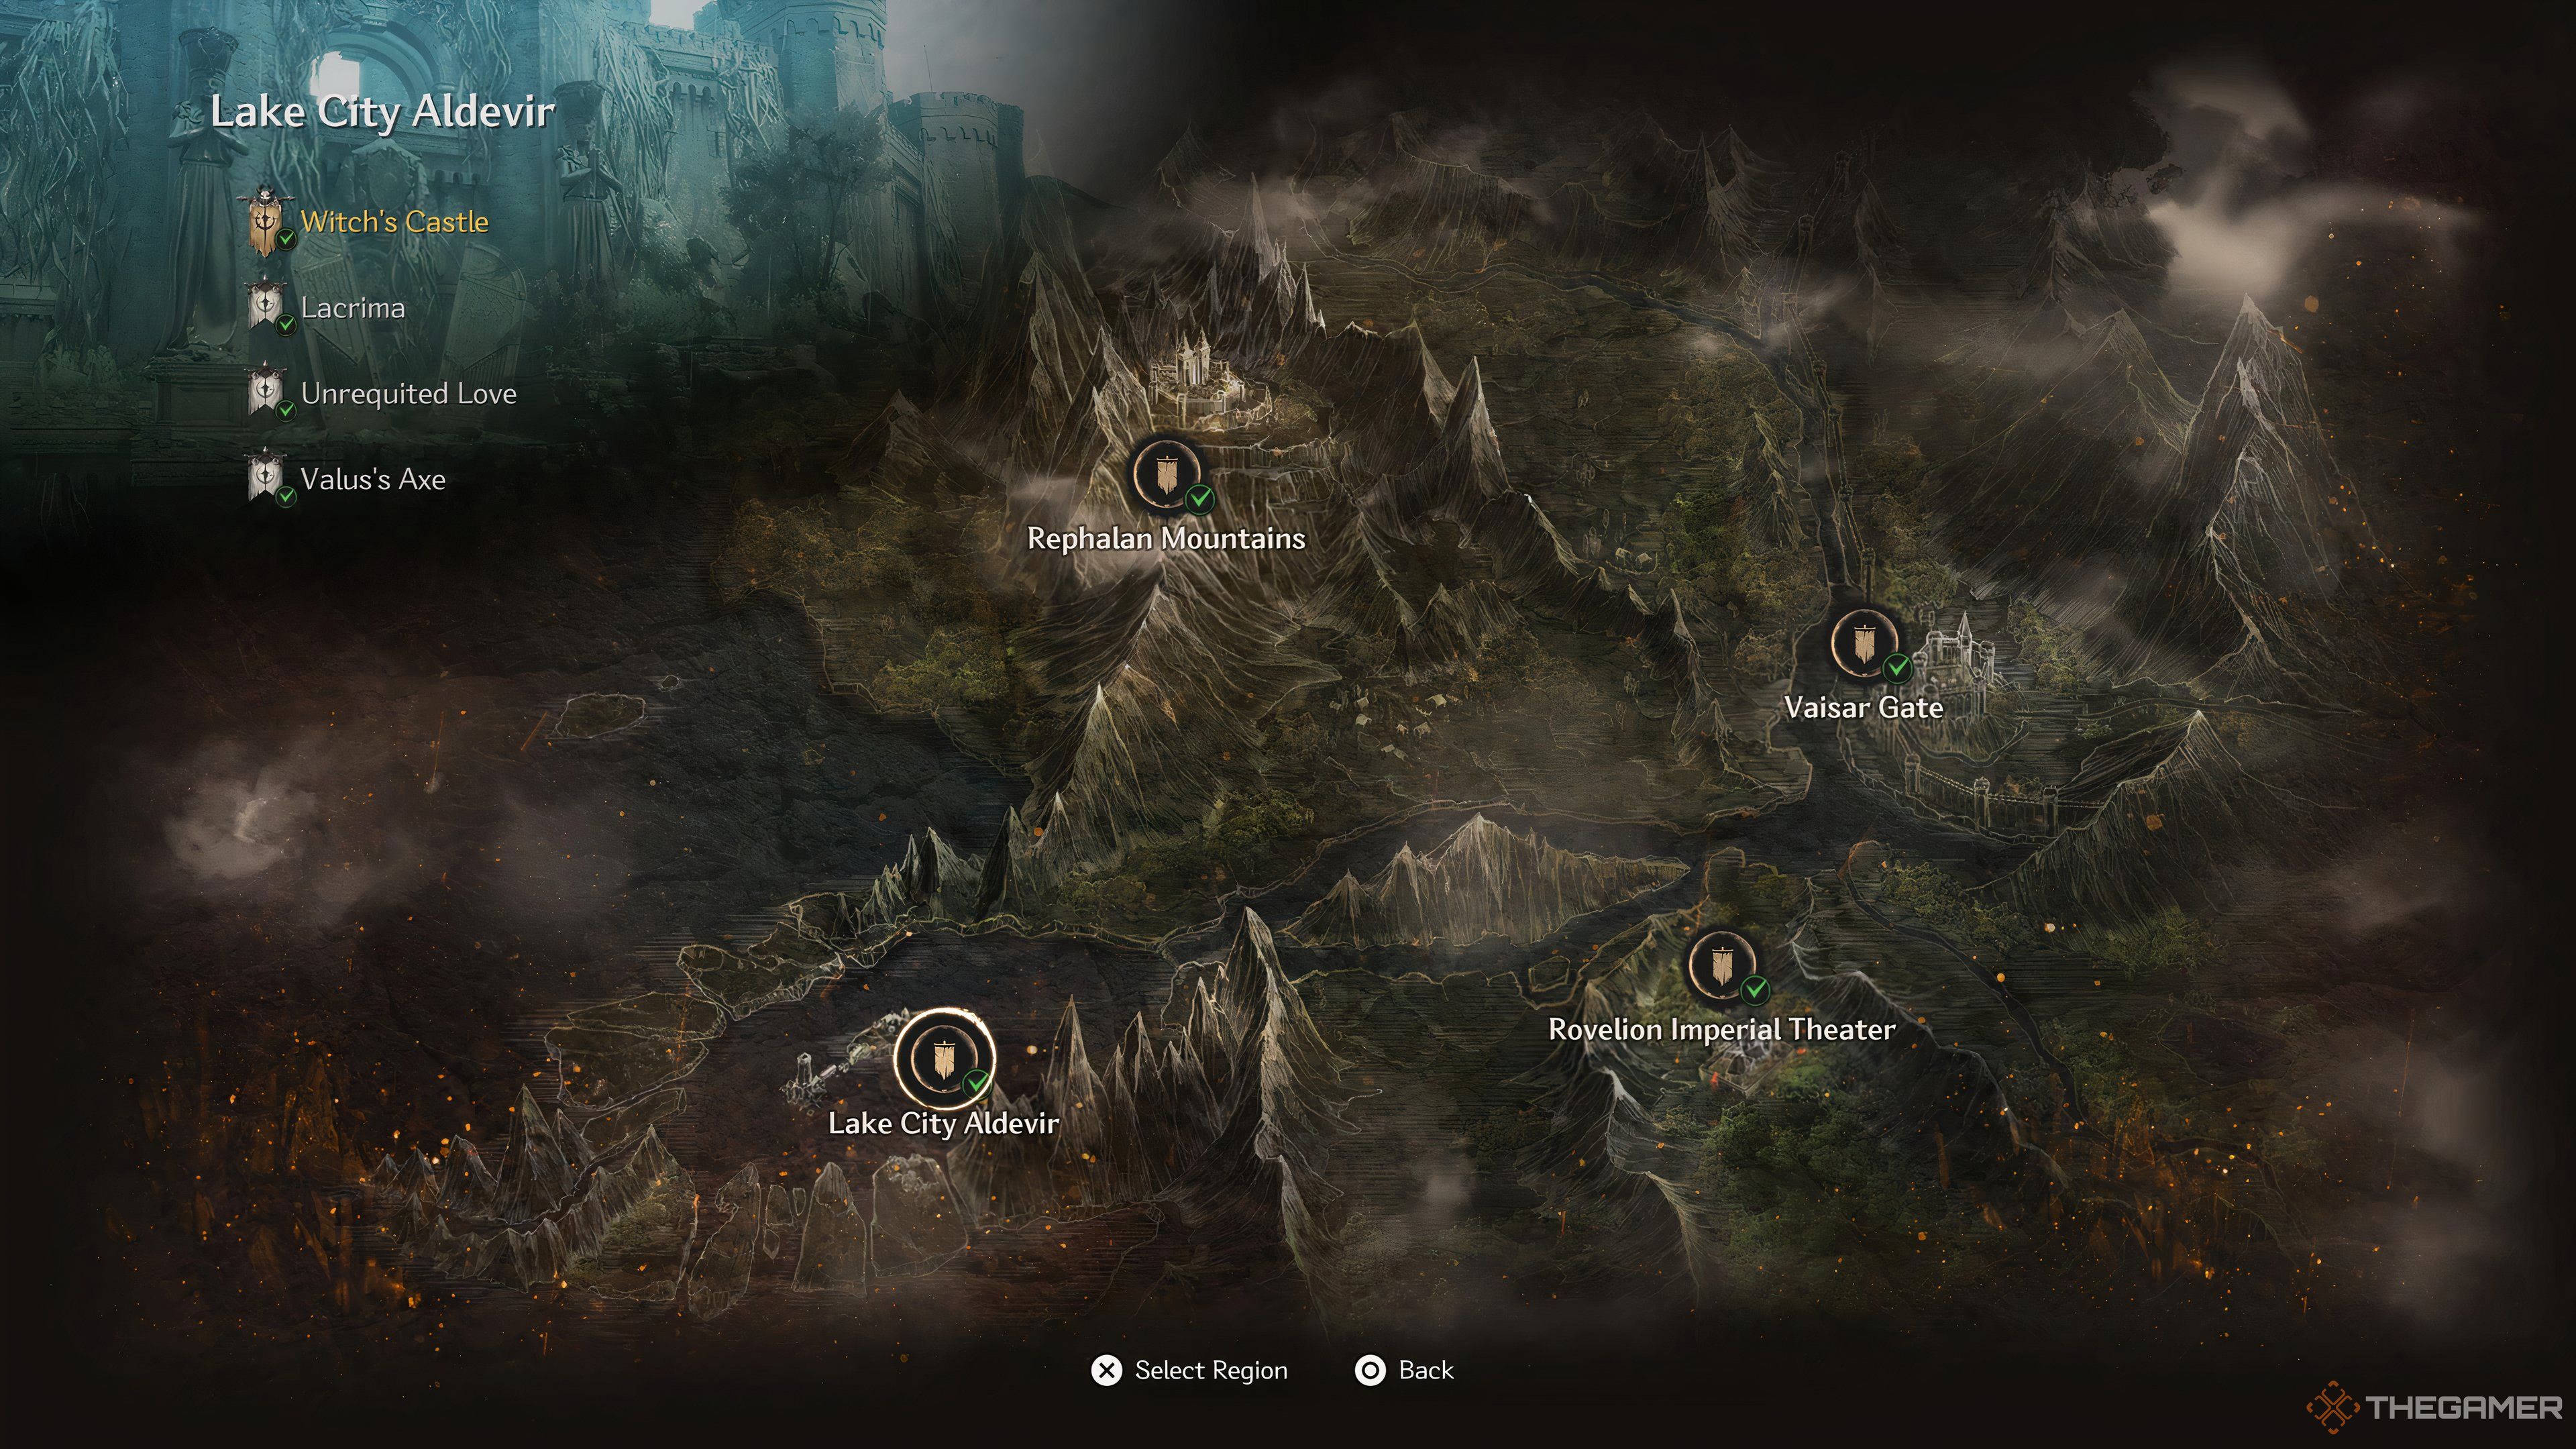
Main Mission #10 – Witch’s Castle
In the Heart of Pell Los Region, famously called Witch’s Castle, your primary objective involves shattering a total of five Soulstones – more than any other single mission attempted thus far.
- Soulstone #1 – From the Commercial District Blade Nexus, head straight up the stairs and open the locked gate. From there, go down the next set of stairs and drop onto the platform, then turn right and follow the edge to find the first Soulstone of this level.
- Soulstone #2 – From the Floodgate Blade Nexus, turn left and go back into the building that led you here. Head back up the stairs and follow the path until you reach a ladder, then descend it. Go down the stairs on your left and follow the path ahead until you reach a door barricaded with wooden planks. Break through these and enter the house to find the second Soulstone of this level.
- Soulstone #3 – From the location of the second Soulstone, exit the building and head straight. Take the first two right turns followed by a left turn. You should soon see a set of stairs going down with a statue on the right side. Go down these stairs and take a left, then follow the path until you reach a door. Open it and the third Soulstone should be right inside.
- Soulstone #4 – From the Aldevir Citadel Blade Nexus, head forward and open the gate, then proceed up the next set of stairs and take a right. Follow the path until you enter a room with several undead enemies, then turn right and climb the ladder. Follow the path until you enter a long room with a greatsword-wielding undead at the end, to the left of which should be your fourth Soulstone for this level.
- Soulstone #5 – From the Adlevir Citadel Blade Nexus, head forward and climb up the central set of stairs, then take a left. You should enter a library area with several bookshelves. Head up the nearby staircase, then take the next two left turns. At the back of this area should be a bookshelf with a glowing book. Interact with this book to reveal a secret room where the fifth Soulstone resides.
Main Mission #11 – Hermit Mountains
In the thrilling world of The First Berserker: Khazan, nestled among the Hermit Mountains, lies my next big challenge – the eleventh main mission. Scattered across this level are four Soulstones I’ve got to track down and collect. Let’s see if my gaming skills can help me uncover these elusive gems!
- Soulstone #1 – From the Hermit’s Cave Blade Nexus, head straight and take the first right. Continue on the path past the plague-ridden trees until you get to a staircase. Take the first flight of stairs, then turn around to see the Soulstone hidden on one of the shelves embedded in a nearby wall.
- Soulstone #2 – From the Abyssal Bridge Blade Nexus, enter the nearby portal to be transported to another area. From there, head straight and take the first left, then continue straight until you can take two more lefts, where you should see a Soulstone sitting on an island that you can destroy with a javelin.
- Soulstone #3 – From the Hermit’s Cave Blade Nexus, this time continue forward and take the path on the left. Continue down this path until you’re able to see the portal in the distance, then take a right. After defeating a few enemies, you should see a Soulstone perched on the edge of a nearby cliff.
- Soulstone #4 – From the Hermit’s Cave Blade Nexus, head straight down the stairs and take the middle path. Continue straight and then hang to the right of this upcoming area to find the fourth soulstone against a wall just behind some spider webs.
Main Mission #12 – Corruptors’ Fortress
In the twelfth key objective for The First Berserker: Khazan (also called Corruptors’ Stronghold), there are five Soulstones that need to be demolished within the fortress grounds.
- Soulstone #1 – From the Breached Room Blade Nexus, progress until you reach a long hallway with an undead rapier-wielding enemy at the end. One of the archways on the left side of the wall is actually an illusory wall, so either attack or dodge through it, and you’ll find the first Soulstone of this level behind it.
- Soulstone #2 – From the Vairsar Watchtower Blade Nexus, progress through the area as normal until you have to drop off a ledge to the right. From there, continue forward and climb the nearby ladder. Once you’re at the top, you’ll see another ladder descending into the tower. Go down it and you should be right next to the room with the second Soulstone, which is hidden behind a few breakable boxes.
- Soulstone #3 – From the location of the second Soulstone, progress through the level until just after the spear-wielding elite enemy. From that enemy’s location, continue straight and then take a left up a set of stairs. Follow the outside wall and you’ll find the third Soulstone of this level tucked away at the end of a short path on the side of this tower.
- Soulstone #4 – From the Massive Gate Blade Nexus, once you’ve opened up the gate, head straight across the bridge and turn left to go up the stairs of the second large archway. Once inside, climb up the ladder to get to the top of the tower. Enter the next room and you’ll find the fourth Soulstone in the back corner.
- Soulstone #5 – From the Vampire Gate Blade Nexus, head up the first set of stairs and move to the right side of the room. There’s an archway near the back here that is actually an illusory wall. Destroy this wall and you’ll find the fifth Soulstone of this level.
Main Mission #13 – Strange Melody
In The First Berserker: Khazan’s Heart of Pell Los area, a critical mission called Strange Melody, requires the destruction of four Soulstones scattered across the level.
- Soulstone #1 – From the Banquet Hall Entrance Blade Nexus, progress through the area normally until you reach the third floor of the area. You should find a door on this floor that, when opened, will reveal a purple collectible. Walk toward it, however, and you’ll fall straight through the floor and land in front of the first Soulstone of this level.
- Soulstone #2 – From the location of the first Soulstone in this level, continue progressing through the level until just after the second time you attack the Mysterious Voice. Continue on the main path from there and you’ll see a glowing wall. Go through this illusory wall and you’ll find a painting similar to the one that brought you into this area. Go through it, and you’ll end up near the Bard NPC that has appeared in a few levels before this point. Just behind him is a piano that has the second Soulstone just behind it.
- Soulstone #3 – From the Path to the Museum Blade Nexus, continue through the area normally until you come across a fireplace. Just above this fireplace on the mantle is the third Soulstone, which you can destroy by throwing a javelin.
- Soulstone #4 – From the Path to the Museum Blade Nexus, progress until you open the chest that contains the Grand Central Theater Key. To the right of this chest is an illusory wall that hides the fourth Soulstone of this area.
Side Mission – Lacrima
In the initial side quest of the Heart of Pell Los region, named Lacrima, there’s just a single Soulstone waiting for you to find it.
- Soulstone #1 – From the Outskirts of Aldevir Central District Blade Nexus, progress through the area normally until you climb up your first ladder. From there, go across the wooden bridge and take the left path to find the first Soulstone of this area in front of a gate.
Side Mission – Unrequited Love
In the second side quest of this area called ‘Unrequited Love’, there are three Soulstones for you to eliminate as you advance in the gameplay.
Or, more casually:
In the mission named ‘Unrequited Love’ for this region, you’ll find three Soulstones that need to be destroyed as you move forward.
- Soulstone #1 – From the Vine-Covered Entrance Blade Nexus, head to the right and go up the nearby staircase. At the end of this short path is the first Soulstone of this area, hidden behind a few breakable boxes.
- Soulstone #2 – From the Vine-Covered Entrance Blade Nexus, progress through the area normally until you reach the central chamber with an Elite Enemy in the middle of the room. Once you’ve defeated the Elite Enemy, face the stairs in the middle of the room from where the enemy way, then turn right and look up. You should see a Soulstone sitting on a ledge that you can destroy by throwing a javelin at it.
- Soulstone #3 – From the Ivy Garden Blade Nexus, turn to your left to see the third Soulstone sitting atop a ledge, which you can destroy by throwing a javelin.
Side Mission – Valus’s Axe
The side mission Valus’s Axe has two more Soulstones for you to find.
- Soulstone #1 – From the Laboratory Basement Blade Nexus, progress through the area normally until you get to the second switch that turns off the lasers. Look to your right and then look up to see the first Soulstone for this mission.
- Soulstone #2 – From the Laboratory Basement Blade Nexus, progress until just after you’ve defeated the first Elite Enemy in this mission. From there, take a left to enter the next room, then take another left and move to the end of the room. You’ll find the second Soulstone tucked away on the left behind a large test tube.
Side Mission – Atlante The Precise
In this area’s upcoming side quest, named “Atlante the Meticulous,” there is a single Soulstone waiting to be gathered by you.
- Soulstone #1 – From the Destroyed Ruins Blade Nexus, progress through the area until you see an undead enemy come through an illusory wall, dispelling it in the process. Go through where that illusory wall used to be and look to your left to find the only Soulstone in this mission.
Side Mission – Crimson Trace
In the Valsar Gate region, the initial side quest named “Crimson Trace” contains a pair of Soulstones for you to gather.
- Soulstone #1 – From the Bloodstained Fountain Blade Nexus, turn to your left and head up the nearby staircase to find the first Soulstone of this area at the end of the hall.
- Soulstone #2 – From the Bloodstained Fountain Blade Nexus, progress through the area normally while keeping an eye out on your left for a Soulstone beneath a wooden structure, which you can destroy by throwing a javelin.
Side Mission – Last Sentinel
The next side mission, known as Last Sentinel, has two more Soulstones for you to obtain.
- Soulstone #1 – From the Fortress’s Great Bridge Blade Nexus, progress through the area until you reach the room with the shaman enemy and two brute enemies. Defeat them and then look toward the right side of the room to see an illusory wall. Go through this and you’ll see the first Soulstone of this level that you can destroy with a javelin.
- Soulstone #2 – From the Fortress’s Great Bridge Blade Nexus, progress through the area normally until you have to open a set of doors. This will take you to a room with an altar in the middle, behind which is the second Soulstone of this mission.
Side Mission – Transcendental Sword
In the upcoming quest for this area called “Transcendental Sword,” you’ll find an extra pair of Soulstones scattered within the level for you to gather.
- Soulstone #1 – From the Passage to Darion Castle Blade Nexus, go down the first staircase in front of you, then take the next two right turns. This appears to lead you to a dead end, but to your left is actually a breakable wall which leads straight to the first Soulstone of this mission.
- Soulstone #2 – From the Tomb of the Forgotten Blade Nexus, progress through the area normally until you reach the large bridge with a large Servant of Chaos enemy at the end. To the left of this bridge is a cage hanging from a statue, inside which is the second Soulstone of this mission.
Side Mission – Centurial Order
In the next-to-last side quest of the Centurial Order region, there’s just a single Soulstone left for you to eliminate.
Or:
The final task before wrapping up the side mission in the Centurial Order region involves the destruction of a solitary Soulstone.
Both sentences convey the same meaning but use slightly different phrasing and sentence structures, offering variety in reading.
- Soulstone #1 – From the Annex Corridor Blade Nexus, progress through the area until you reach the first bridge with a few enemies on it, including an enemy wielding a spear and shield. Once you’ve taken out these enemies, look to your right to see a large stained-glass window, where the only Soulstone of this mission rests at the bottom on its mantle.
Side Mission – Remnants Of Chaos
In the last side quest of the Heart of Pell Los territory, called “Remnants of Chaos”, there’s just a single Soulstone left for you to discover, once found, it will allow you to advance to the final region within the game.
- Soulstone #1 – From the Path to El Ravaca Blade Nexus, turn around and head toward the wilderness area. Down a short path you’ll find the only Soulstone in this mission at the end of a small corridor.
Vitalon, Capitol Of The Empire Soulstones
Following all the hardships and challenges you’ve faced in the last three regions, your adventure in The First Berserker: Khazan is nearing its conclusion. The concluding part of the game, Vitalon, the Imperial Capital, contains the last 19 Soulstones hidden within 6 missions.
In the final region, Charon’s Chains side mission stands out as it is unique, being one of just two missions throughout the whole game that do not include any Soulstones. The other such mission is the Stormpass’ Phantom of Combat, located in the Charnak Mountain Range region.
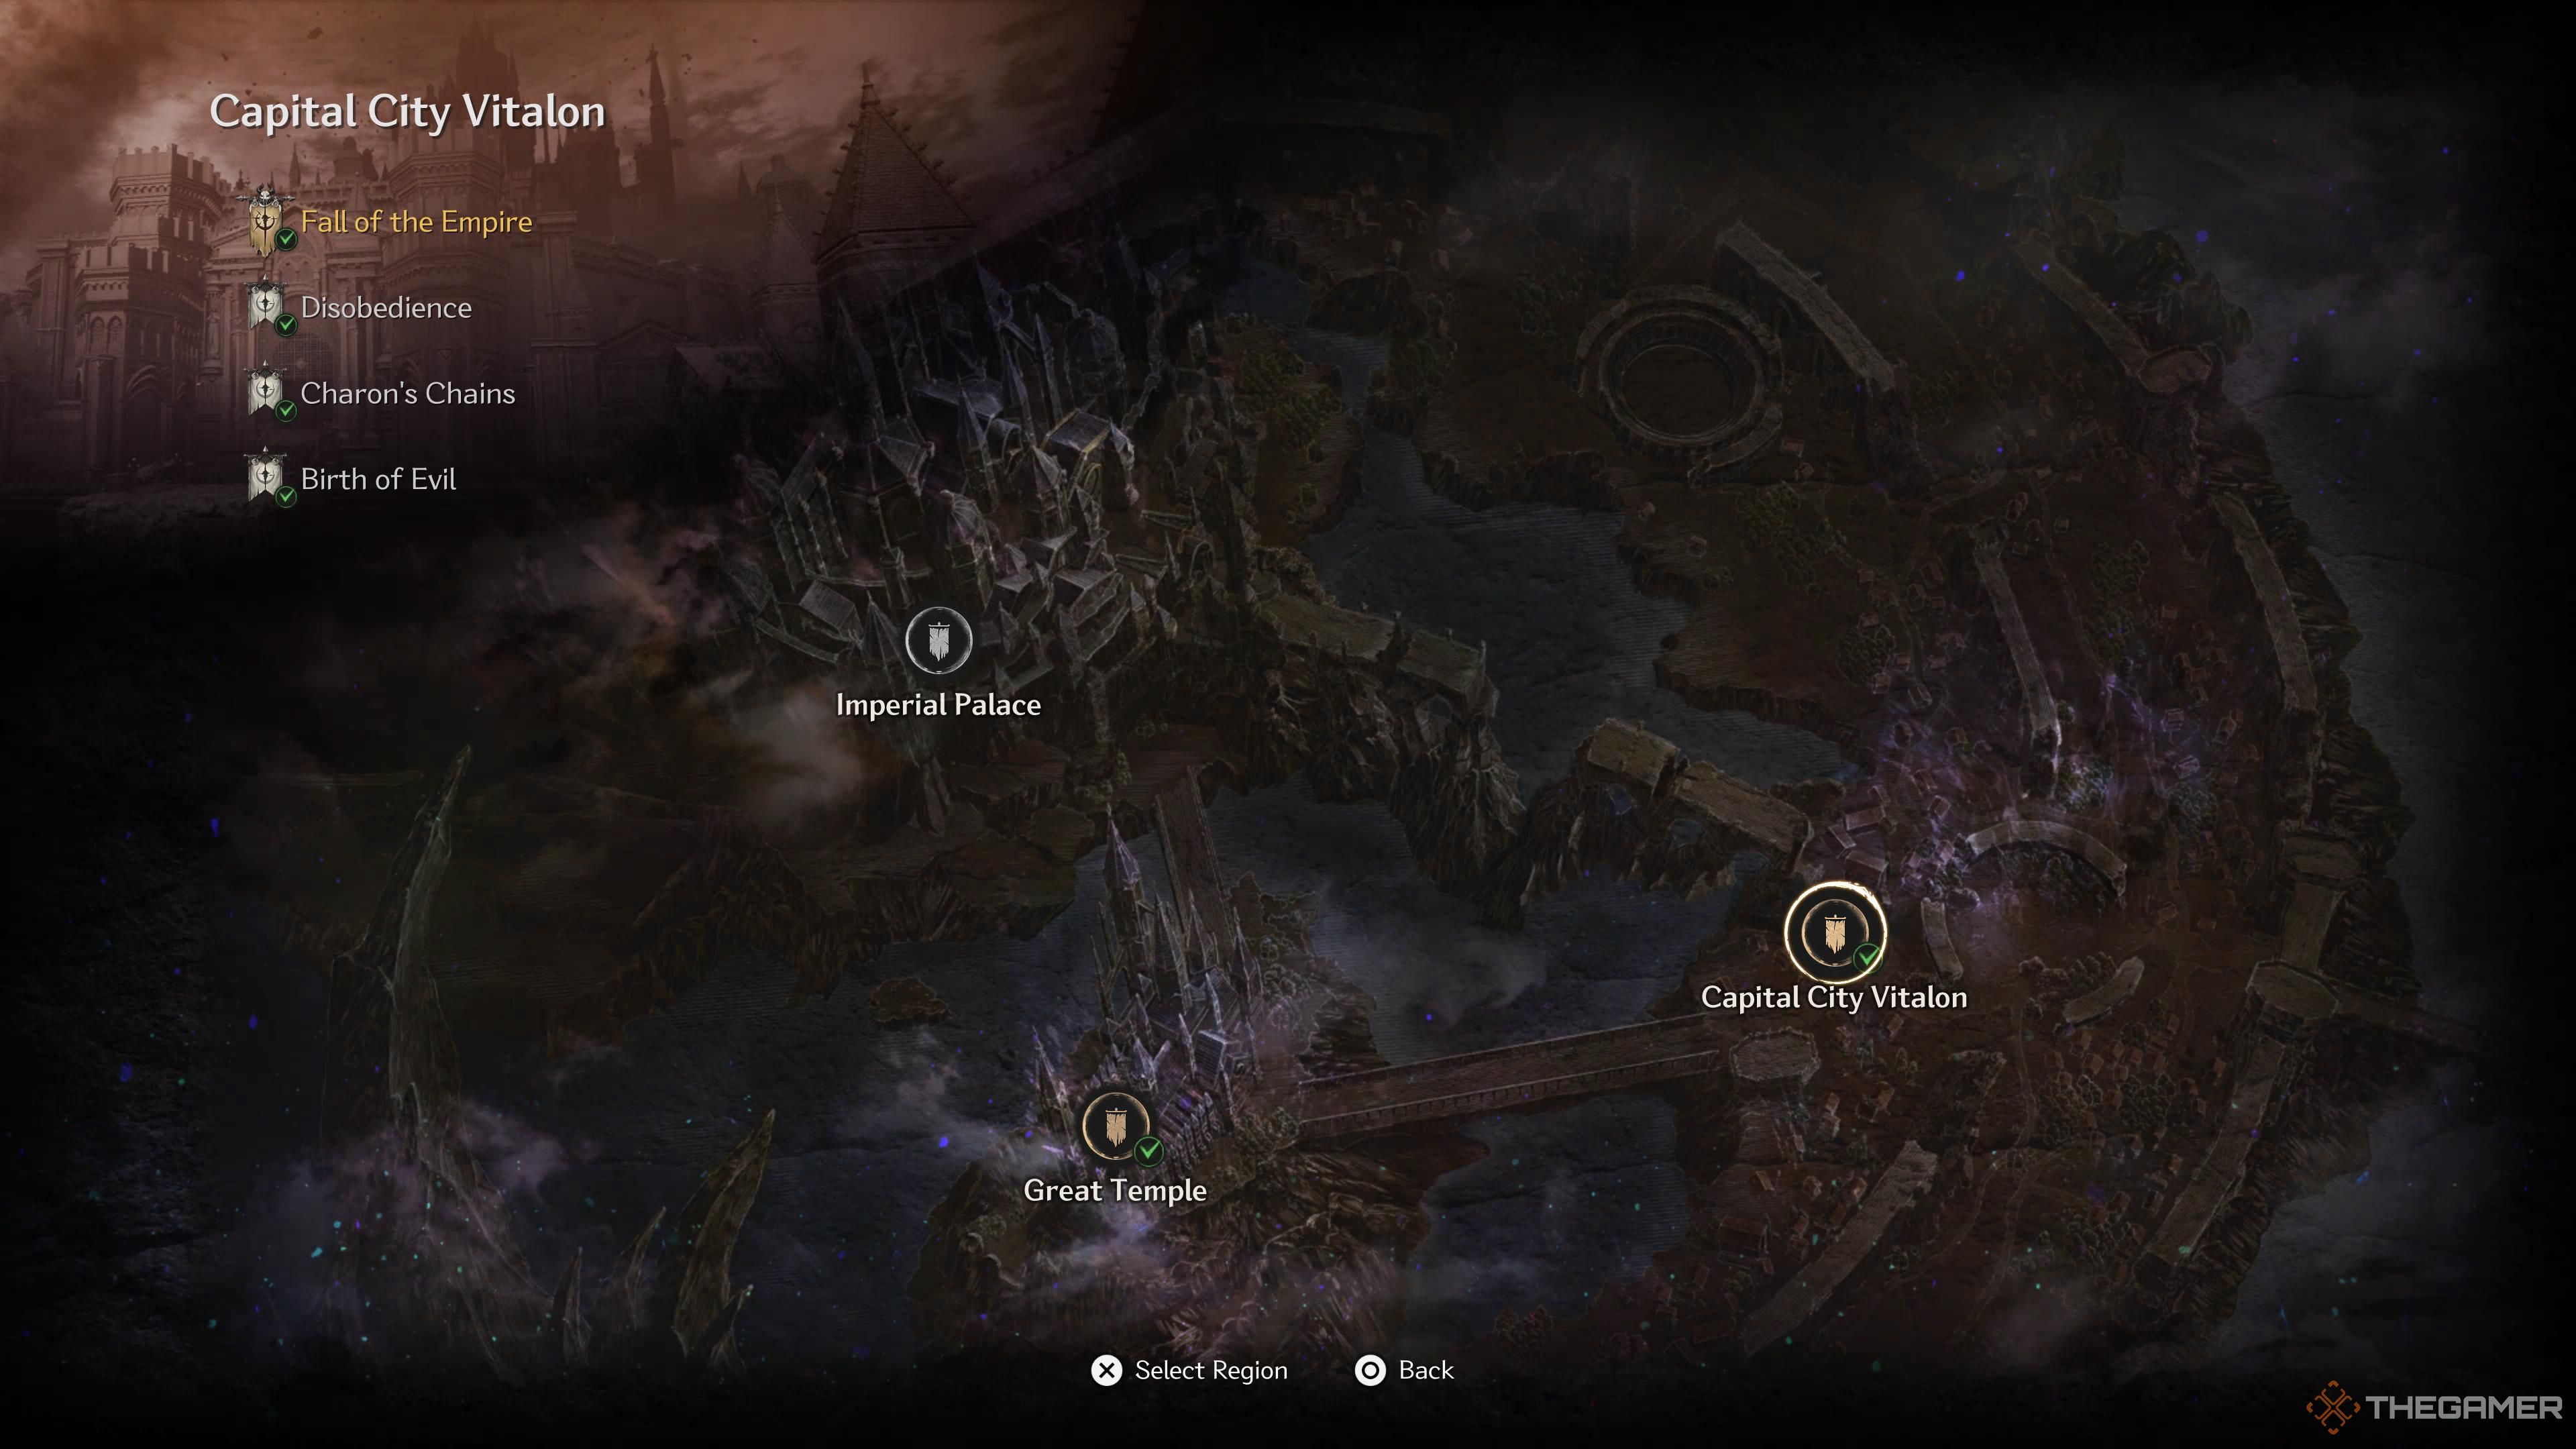
Main Mission #14 – Fall Of The Empire
In the Vitalon region, called “Fall of the Empire,” your primary objective involves gathering five Soulstones. Once you’ve collected them all, you’ll be ready to confront the fearsome Berserk Dragon, Hismar.
- Soulstone #1 – From the Old Town Blade Nexus, turn around and go to the right to see a breakable wooden barricade. Go through this and you’ll see a lone Soulstone sitting at the opposite end of the area.
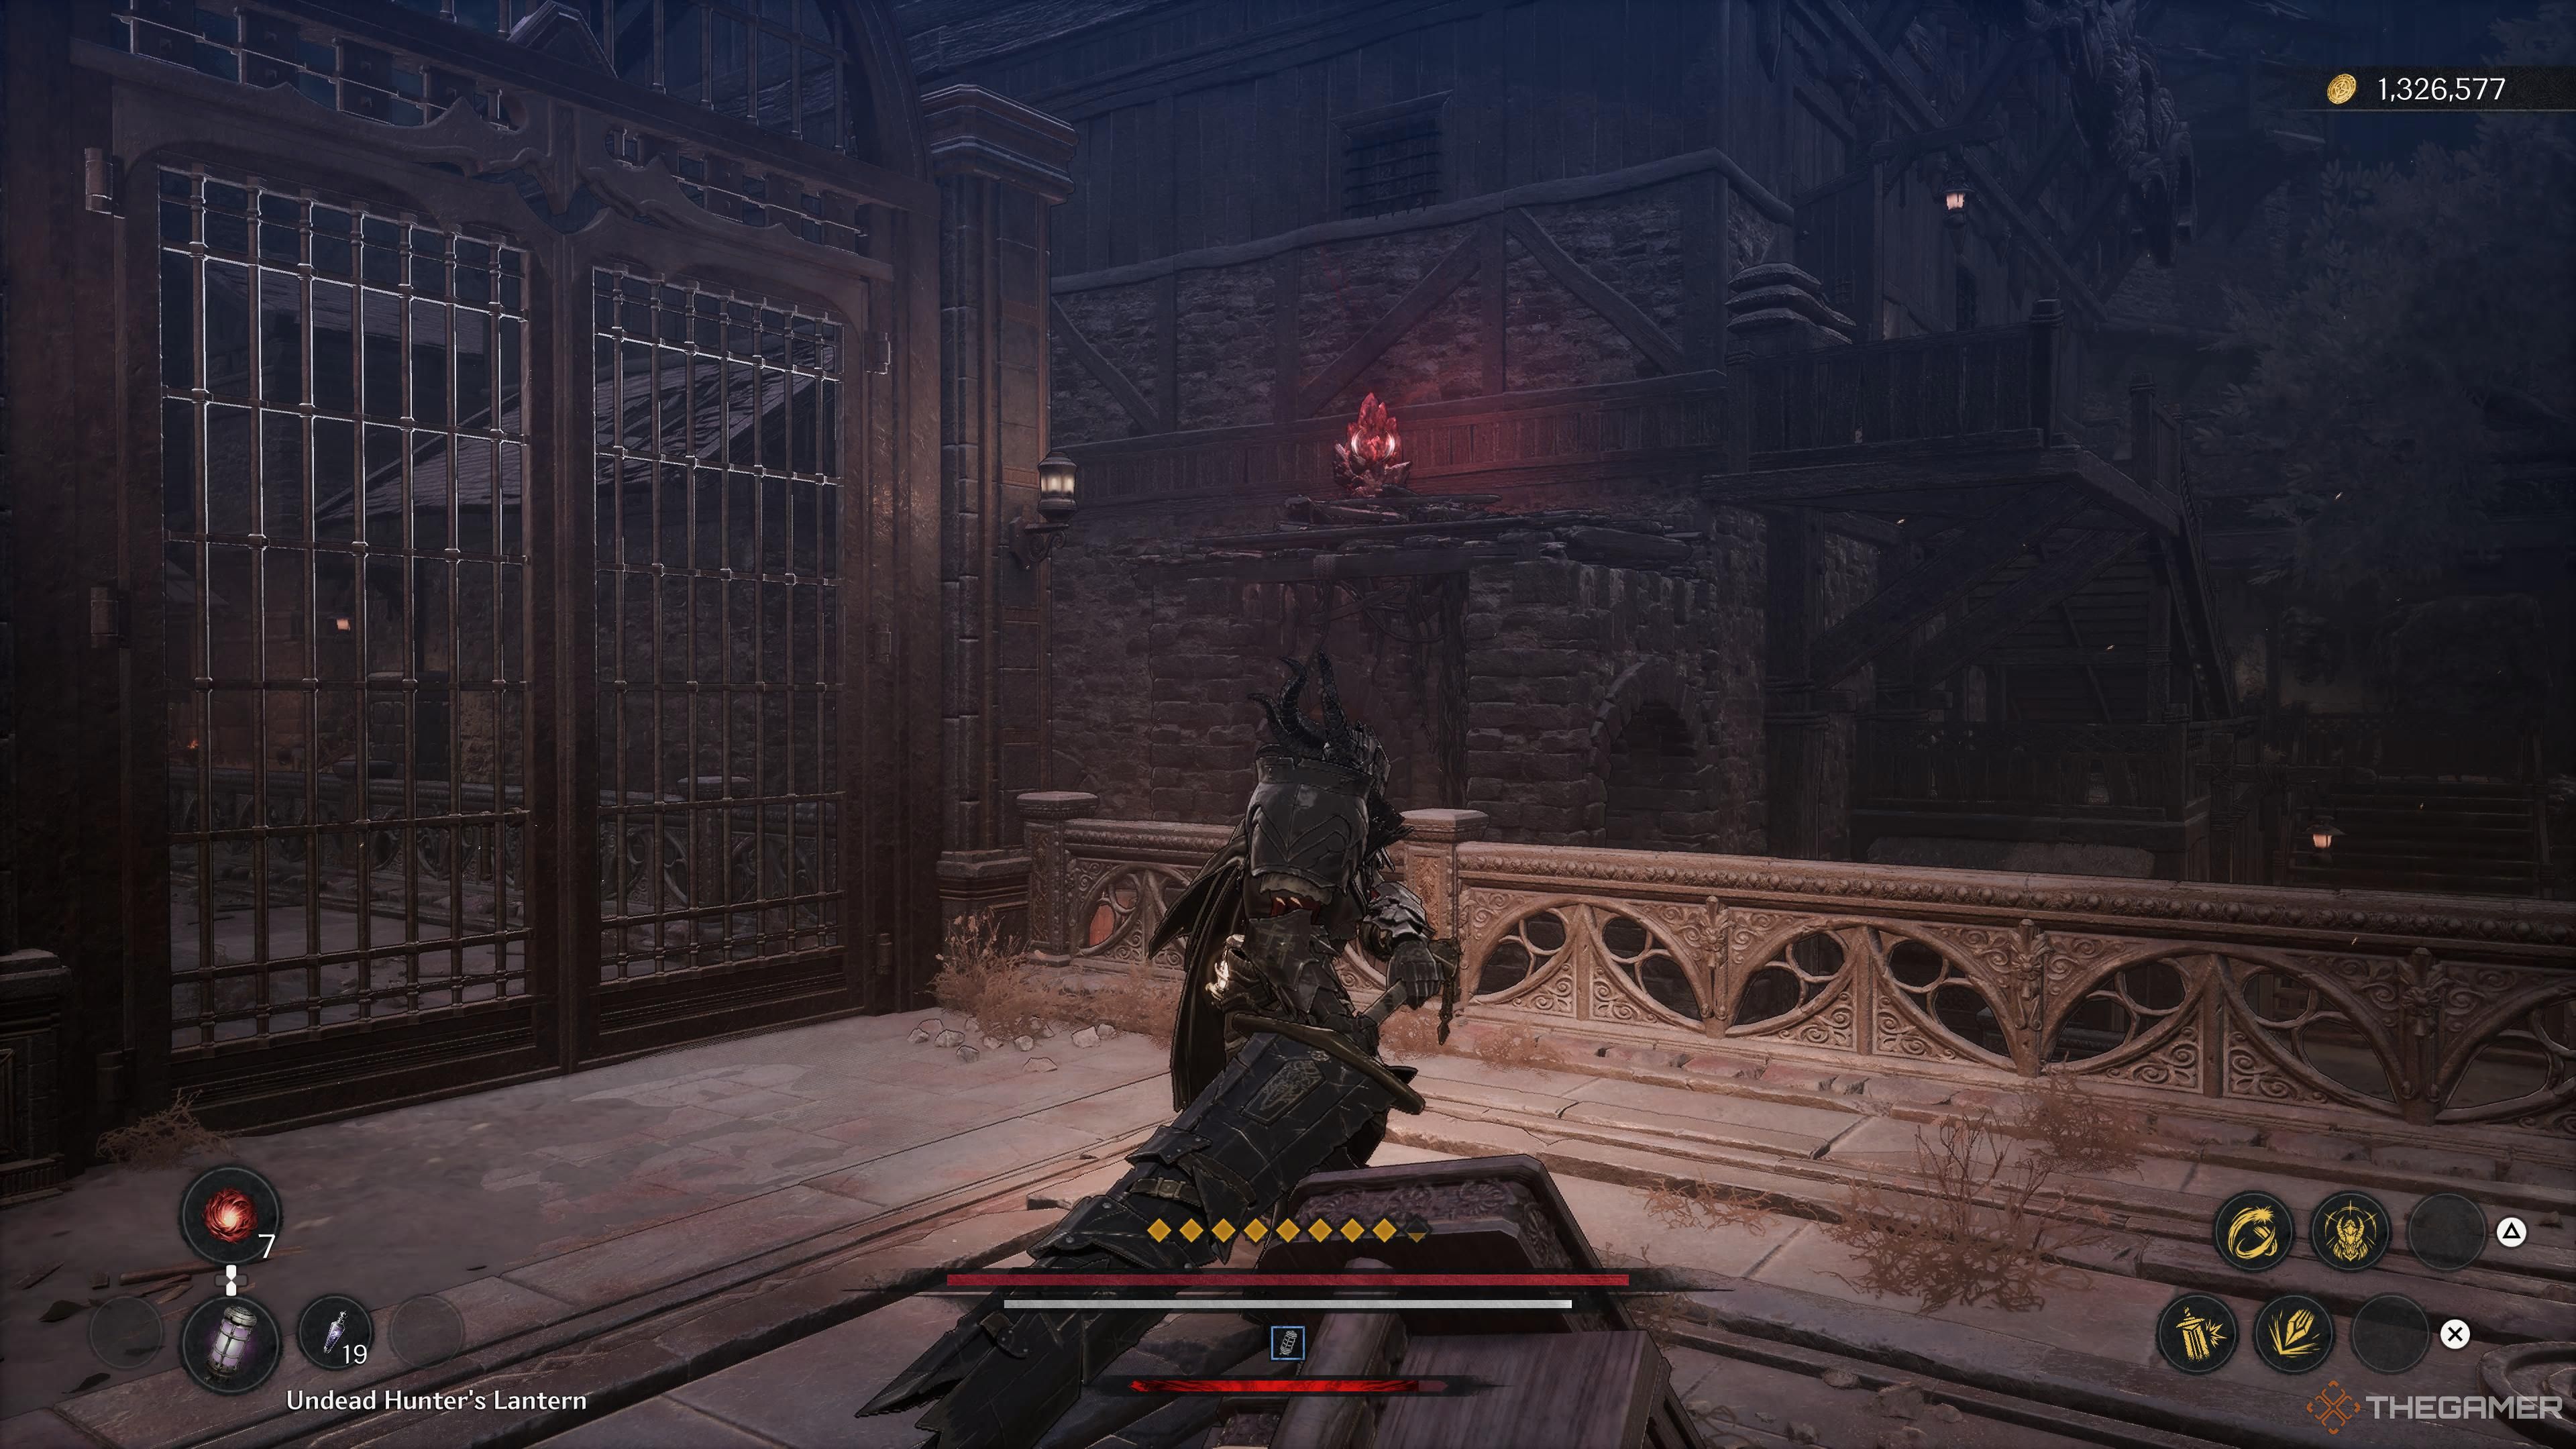
- Soulstone #2 – From the Old Town Blade Nexus, progress until you’ve opened the second iron gate. Continue forward for a little longer until you see an alley to your right with a few brute enemies. Defeat them and head to the end of the alley and look to your right, where you’ll see a Soulstone sitting in front of what looks like an outhouse.
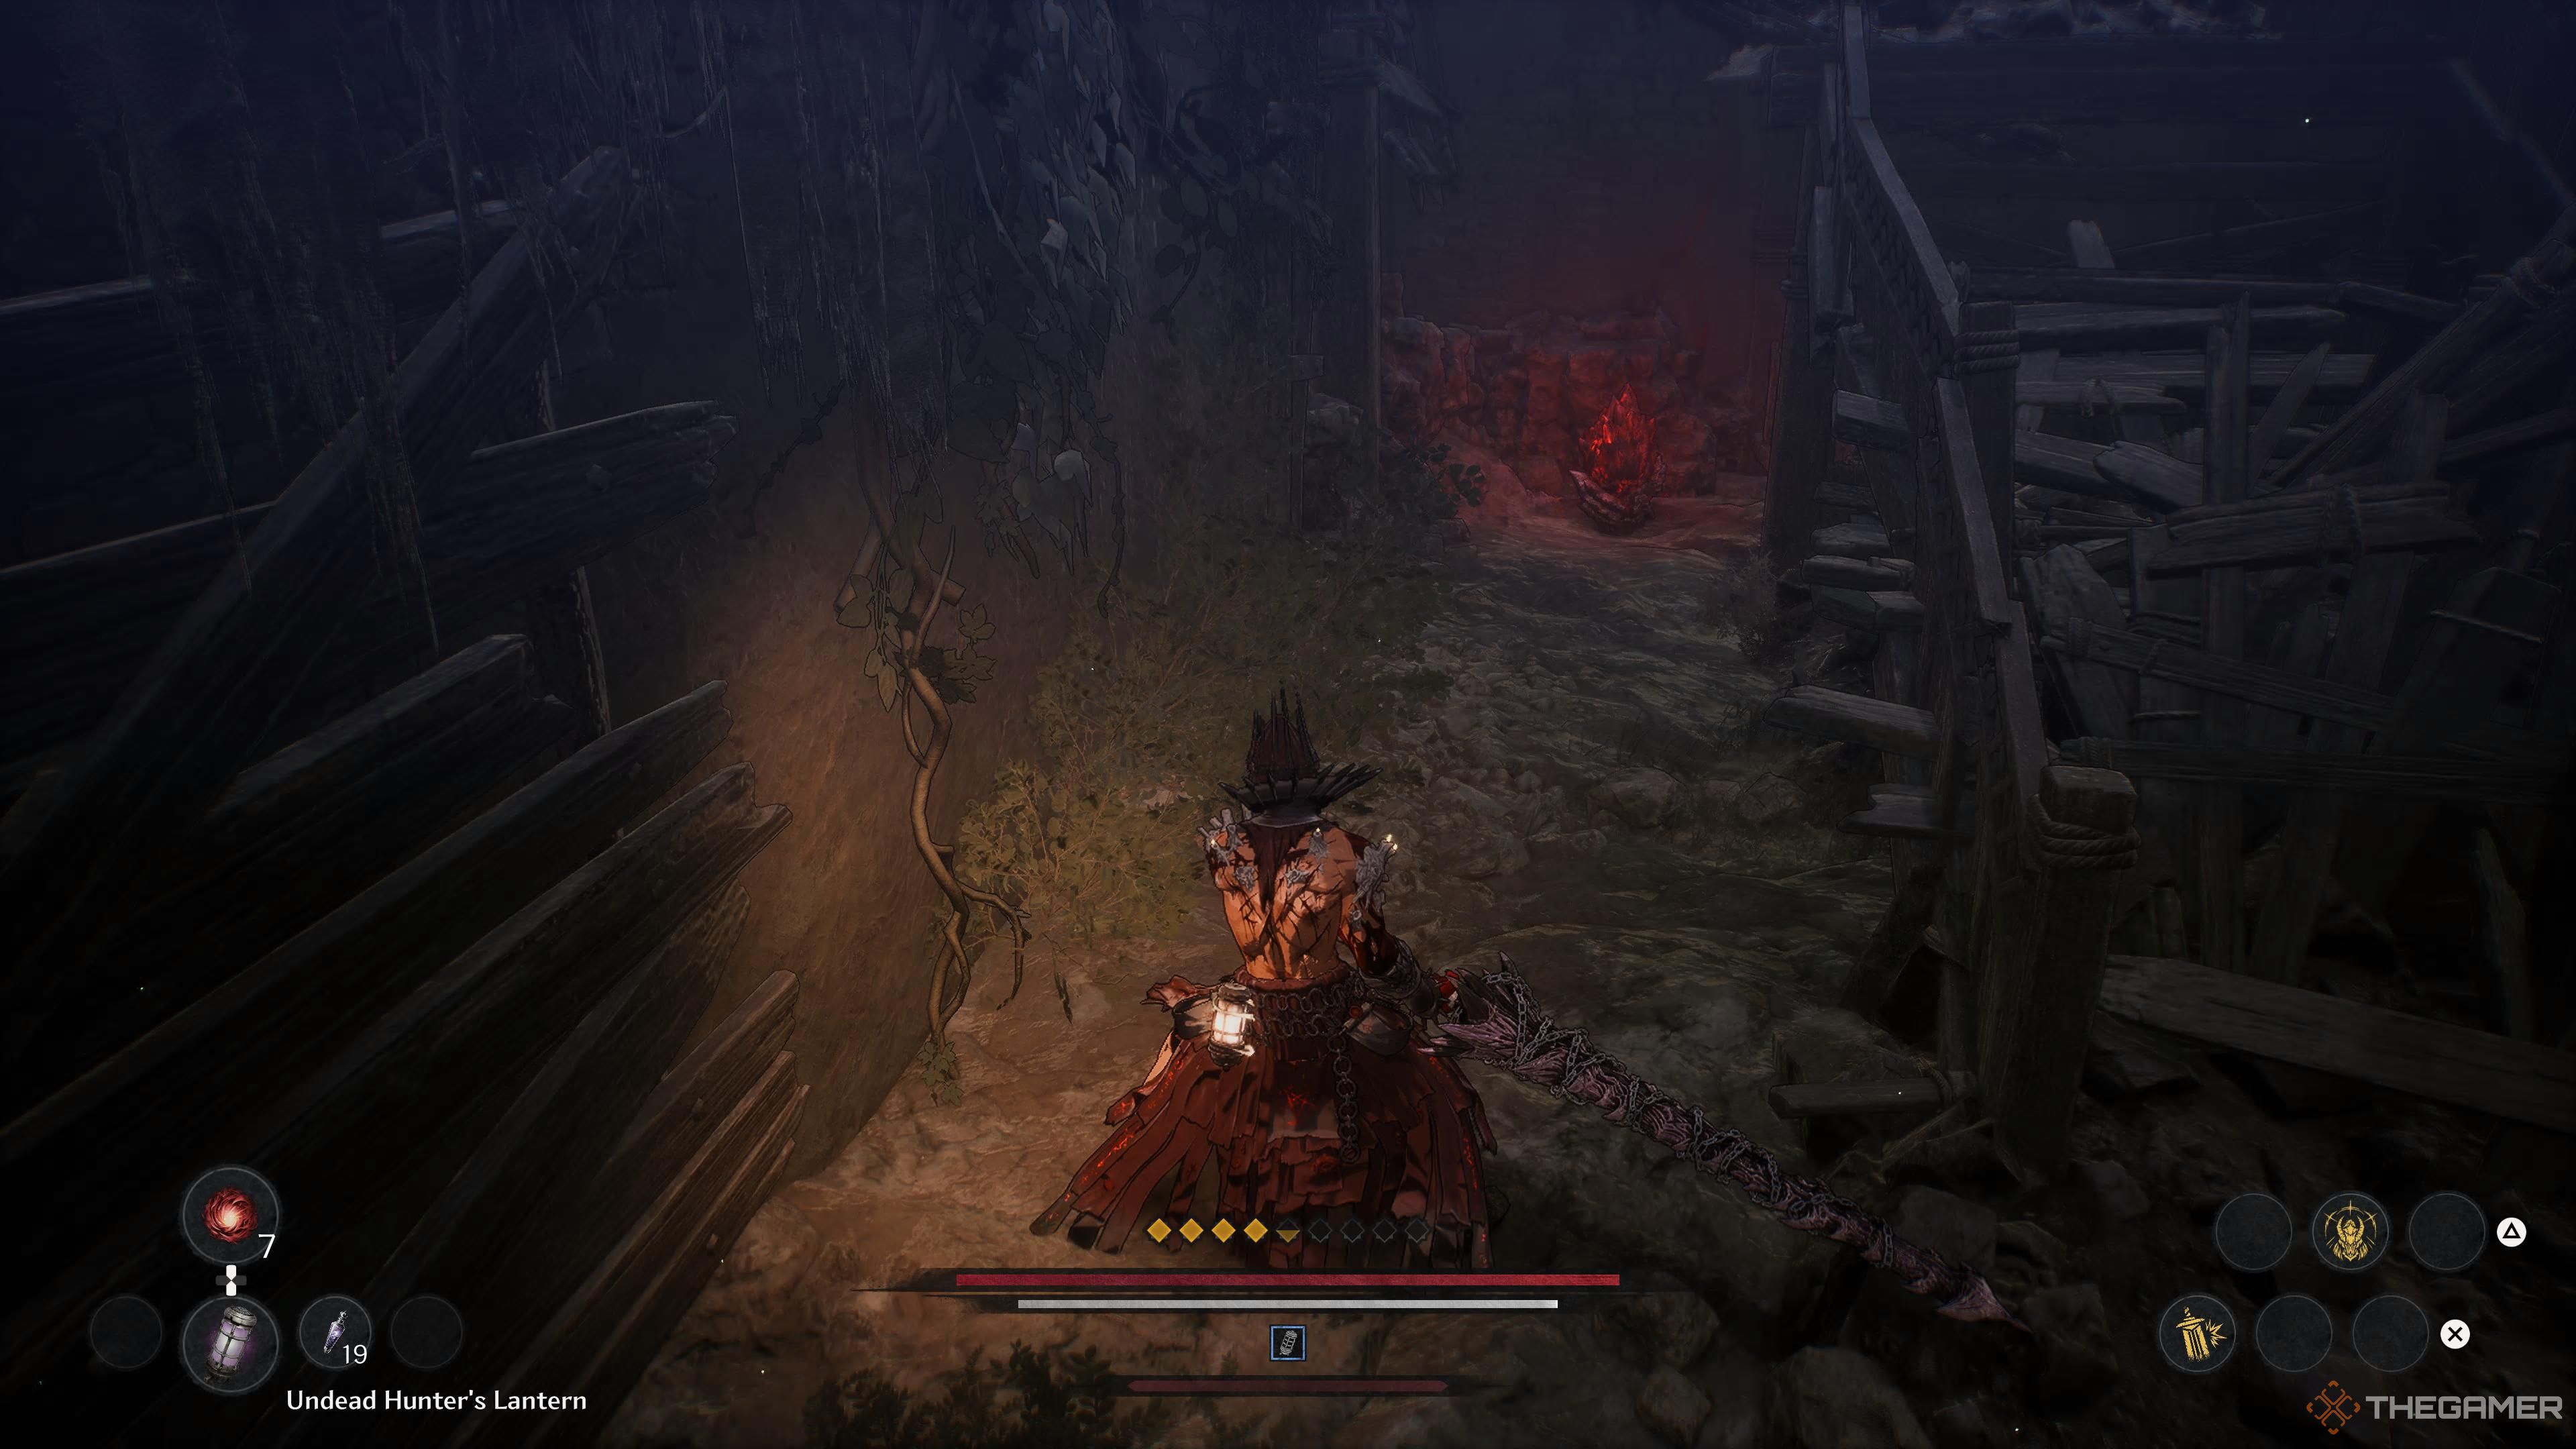
- Soulstone #3 – From the Main Street Blade Nexus, progress until you’ve made it to the open area at the bottom of the sewers. Look around for a waterfall coming down and you should see a red glow from it, which is the third Soulstone of this area.
- Soulstone #4 – From the Church Blade Nexus, head behind the nearby altar and you’ll find the fourth Soulstone sitting just behind the large statue.
- Soulstone #5 – Once you’ve unlocked the shortcut back to the Church Blade Nexus, head back through that shortcut and take a left. Circle around some nearby debris and then you’ll see a staircase ahead of you to the right. Head up this staircase and you’ll find the final Soulstone of this area toward the top on your left.
Main Mission #15 – Bloodied Sanctuary
Just before embarking on the last major story mission of the game called “Bloodied Sanctuary”, there are five additional Soulstones waiting for you to find them first.
- Soulstone #1 – From the Path to the Temple Blade Nexus, open the gate and head straight across the area to the archway at the opposite end of the fountain from the Nexus. Once you’re there, turn right and you’ll see the first Soulstone of this mission.
- Soulstone #2 – From the Path to the Temple Blade Nexus, progress through the area normally until you enter the building containing the Reese 2 information log from Ozma. Head outside this room and take an immediate left, then follow along the wall to find the next Soulstone.
- Soulstone #3 – From the Main Entrance of the Temple Blade Nexus, open the large door and head to the right to enter a hallway. Look to your right from the entrance and you’ll find an illusory wall. Go through it and you’ll find the third Soulstone in a room with a few enemies.
- Soulstone #4 – From the Main Entrance of the Temple Blade Nexus, progress through the area until you see an elevator with a ladder behind it. Climb down the ladder and go around the rooftops until you see the fourth Soulstone tucked away in a corner across some wooden planks.
- Soulstone #5 – From the Main Entrance of the Temple Blade Nexus, progress through the area until you make it to the rafters of the main building. From there, look toward the corner opposite of the ladder you used to climb up to the rafters and you’ll see the final Soulstone of this mission that you can destroy by throwing a javelin at it.
Main Mission #16 – Master Of Chaos
In the concluding major quest of The First Berserker: Khazan, known as “Master of Chaos”, there are an additional four Soulstones scattered that you must gather before confronting Ozma directly.
- Soulstone #1 – From the Cathedral Entrance Blade Nexus, head forward into the room with the Elite Enemy and two brute enemies. Once you’ve defeated them, head up the nearby staircase and pull the lever at the top, revealing a secret passageway on the floor below. Head down the newly revealed staircase and take a left. Follow the path to its end and you’ll find the first Soulstone of this mission.
- Soulstone #2 – From the location of the first Soulstone, progress through the area normally until you reach the first button that shifts the surrounding tower. Step on this button and then stay on the bottom level as the tower turns. Once the tower is done turning, head down the newly revealed path to find the second Soulstone of this mission at the end.
- Soulstone #3 – From the Corrupted Lounge Blade Nexus, progress through the area normally until you take the first set of stairs to the second floor. From there, keep an eye out on your left for a Soulstone perched at the top of a pillar. You can destroy this one with a well-thrown javelin.
- Soulstone #4 – From the Imperial Palace Garden Blade Nexus, progress through the area normally until you walk up a slope covered in debris. At the top, turn to your left and you’ll see an archway that is actually an illusory wall. Go through this illusion and you’ll find the final Soulstone of this mission.
Side Mission – Disobedience
As a passionate enthusiast, diving into the captivating world of Vitalon, I found myself embarking on my initial side quest – Disobedience. This exhilarating adventure presented me with a solitary Soulstone to vanquish.
- Soulstone #1 – From the Crumbled Residence Blade Nexus, move over to the nearby iron gate and look upward to see a Soulstone on a ledge just across the way, which you can destroy by throwing a javelin.
Side Mission – Birth Of Evil
The next side mission, titled Birth of Evil, has two more Soulstones for you to collect.
- Soulstone #1 – From the Destroyed Bridge Blade Nexus, progress through the area normally until you pass by a well-like structure. Just past that on your left you will see a wooden cart that you can destroy. Break through it and head up the stairs and you’ll find the first Soulstone of this side mission on your right.
- Soulstone #2 – From the Noble’s Manor Blade Nexus, head up the stairs and defeat the swarm of enemies on the second floor. Before you head into the next room, check behind the furniture on the end of the room opposite to the stairs to find the second Soulstone of this side mission.
Side Mission – The Vow
In The First Berserker’s side quest, Khazan, titled “The Vow,” you will find the last two Soulstones. Once you gather these remaining ones, you’ll have collected them all.
- Soulstone #1 – From the Forbidden Passage Blade Nexus, progress through the area normally until just after you defeat the Elite Enemy in the middle of a plague-infested swamp area. From there, open the nearby iron door and head straight. Before you turn left to continue down the hallway, turn to your right and attack the wall to reveal an illusory wall that hides the first Soulstone of this mission.
- Soulstone #2 – From the Ruins Bridge Blade Nexus, progress through the area normally until you reach an area filled with water next to several statues and a large Servant of Chaos enemy. Behind one of the statues on the right is the second Soulstone of this mission, and the last Soulstone of this guide.
Read More
- Gold Rate Forecast
- Green County secret bunker location – DayZ
- ‘iOS 18.5 New Emojis’ Trends as iPhone Users Find New Emotes
- How to unlock Shifting Earth events – Elden Ring Nightreign
- [Mastery Moves] ST: Blockade Battlefront (March 2025)
- Love Island USA Season 7 Episode 2 Release Date, Time, Where to Watch
- Green County map – DayZ
- Etheria Restart Codes (May 2025)
- Pixel Heroes Character Tier List (May 2025): All Units, Ranked
- How To Beat Gnoster, Wisdom Of Night In Elden Ring Nightreign
2025-05-06 00:12